
A Dell computer can take a screenshot with Windows + Shift + S, even when its keyboard has no obvious Print Screen key. Press the shortcut, drag around the area you need, then paste it or save the picture from Snipping Tool.
For a full-screen file in one step, use Windows + PrtScr instead. The extra detail on Dell laptops is the keyboard: Print Screen can share another key, need Fn, or sit on a touch-sensitive function row.
Choose an area without hunting for Print Screen
Keep the window you want to capture visible and press Windows + Shift + S. When the screen darkens and the capture toolbar appears, choose the rectangular capture, then drag around the area you need.
Release the mouse button to finish. Press Ctrl + V in an email, document, or chat that accepts images. The clipboard holds the picture for pasting; it isn't the same thing as saving a named file.
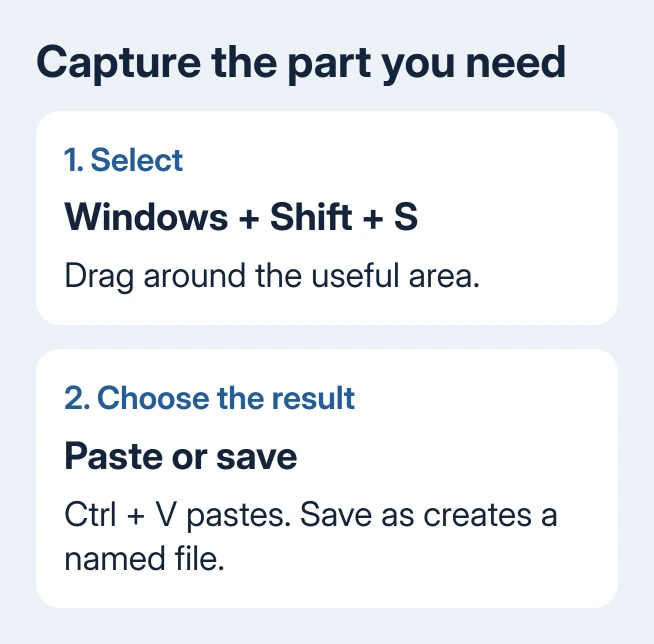
Click the capture notification to open the picture in Snipping Tool. Review the edges, then use Save as to choose a folder and filename. If the notification disappears, open Snipping Tool from Start and check the capture there.
I'd use this method for a support request. A tight crop keeps the error readable and leaves the rest of your desktop out of the picture. Check that passwords, addresses, and account details aren't included before sending it.
Microsoft's Snipping Tool instructions cover both Windows layouts. Newer Windows 11 versions can save captures automatically; check the app's settings for that option.
Find the screenshot key on your Dell keyboard
Look for PrtScr, PrtScn, PrtSc, or a shortened Print Screen label. On a desktop keyboard it is often near the upper-right corner. A laptop can put the label on the function row or share it with another key.
Dell's keyboard guide lists different arrangements. Some laptops use Fn + F10; some use Fn + Insert. Match the printed label rather than treating either as universal.
For example, if Print Screen is the secondary function on Insert, hold Fn while pressing Insert. To save a full-screen file automatically, include the Windows key as well. Use the key with PrtScr printed on it.
Some Dell laptops have an illuminated or capacitive function row. Switch to its function-key layer if Print Screen isn't shown. Check the model manual when the row doesn't match a conventional keyboard.
An external keyboard follows the labels on that keyboard. The laptop's Fn instructions don't automatically apply to it. If the physical shortcut remains unclear, the area shortcut in the first section bypasses Print Screen entirely.
Save the entire desktop with Windows and PrtScr
Press Windows + PrtScr, adding Fn only when your keyboard needs it for Print Screen. Open File Explorer > Pictures > Screenshots afterward and look for the newly created image.
This shortcut saves the file for you. You don't need to open Paint and paste first. The display may briefly dim, but check for the new file to confirm it worked. That brief flash is easy to miss.
Open the saved image before attaching it. With multiple displays, check what was captured and crop anything unrelated. A full desktop picture can make a small error message difficult to read in a support ticket.
If Pictures is backed up or redirected, open Pictures from File Explorer's navigation pane rather than guessing a folder under your user name. The Windows screenshot methods compare where the other capture shortcuts put their results.
Copy one window instead of the whole desktop
Click the app window you need, then press Alt + PrtScr. Add Fn if required by the keyboard. This copies the active window, so the next step is Ctrl + V in Paint or another app that accepts pictures.
To save from Paint, paste the image and use File > Save as, then choose an image format and destination. Check that the window title and error text are present before closing Paint.
This helps when several windows overlap. The active window is the one you selected immediately before the shortcut. If the wrong app appears in the pasted picture, select the intended window and capture it again.
Print Screen by itself can behave differently on Windows 11 because it can open the capture tool. That's a Windows keyboard setting, so an unexpected capture bar doesn't mean the Dell keyboard is broken.
Capture a menu with the app's delay control
Open Start, search for Snipping Tool, and launch it. Choose its capture shape and a delay from the timer control, then select New. Open the menu you need while the timer runs.
When capture begins, select the menu area. A delay is useful for a dropdown that closes when you press a keyboard shortcut. Save the finished image and check that the menu labels remain readable.
Windows 10's older Snipping Tool uses Mode, Delay, and New. Its Save Snip control opens the save dialog. Don't assume a capture has become a file just because it appears in the editing window.
Windows 11's newer app has different controls and automatic-saving options. Open its settings to check the destination rather than relying on an older screenshot of the app. Both versions let you save a copy yourself.
When a shortcut appears to do nothing
Try pasting into Paint first. A clipboard capture can succeed without opening a window or creating a file. If the image appears, the shortcut worked and the remaining job is saving it.
If Windows + Shift + S works but the Dell's Print Screen combination doesn't, check the keyboard label and model manual. Focus on the Print Screen key combination, since the capture app opens with the other shortcut.
If Snipping Tool also fails when launched from Start, use the Snipping Tool repair steps. Repeating Fn combinations won't repair an app that can't start.
For a key that fails in other uses too, ask Dell Support to check the keyboard mapping for your exact model and whether a keyboard repair is needed. Give them the working capture method and the physical combination that failed.
The Short Version
Use Windows + Shift + S for a selected area. Use Windows + PrtScr for a file in Pictures > Screenshots, or Alt + PrtScr and paste for one window. On Dell laptops, follow the printed key label and add Fn only when needed.
Checked November 8, 2026.

Isaac Smith is the founder and editor of PC Glance, a website that covers computers, laptops, and technology. He is a tech enthusiast and a computer geek who loves to share his insights and help his readers make smart choices when buying tech gadgets or laptops. He is always curious and updated about the latest tech trends.