Alright, if you’re trying to install macOS Sequoia and nothing’s working — I get it. I was right there a few days ago, staring at a screen that kept throwing errors, not giving much info, and just plain refusing to install.
At first, I figured it was some quick issue like a bad connection or not enough space. But after restarting multiple times, checking the basics, and still getting nowhere — I realized I needed to dig a little deeper.
So I wrote this guide to help anyone else who’s stuck. Whether the update won’t start, fails mid-way, or shows weird error messages.
I’ll walk through everything I tried, in the exact order. Either way, this should save you time and frustration.
Let’s get into it.
What Happened in My Case (Error Messages from GUI and Terminal)
So here’s exactly what happened when I tried to install macOS Sequoia on my Mac.
When I went through the usual route — System Settings > General > Software Update — the update showed up just fine.
But the moment I hit install, it asked me for my password once (which is expected), then weirdly asked again. After that, it just failed. No clear reason. It didn’t say what went wrong. Just gave me this vague message:
“Failed To Personalize the software update. Please try again.”

Tried again. Same thing. At one point it also threw this:
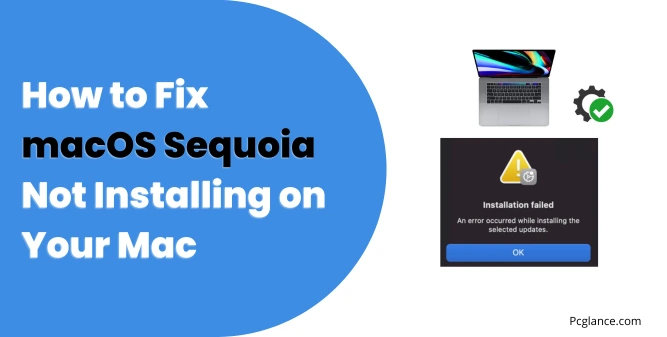
“An error occurred while installing the selected updates.”

Another time it said:
“The macOS installation couldn’t be completed.”
I figured maybe the Terminal route would be more helpful — so I opened up the Terminal and used the softwareupdate command with --fetch-full-installer, and later tried the startosinstall method.
Now this was even more frustrating.
It asked for the admin password like usual… and then just exited. Nothing else. I even tried adding the --verbose flag to get more insight, but it didn’t print any error or logs — it just silently failed.
So between the GUI throwing vague errors and the CLI quietly quitting without doing anything, I was completely stuck.
No explanation, no logs, just confusion. That’s when I decided to troubleshoot this deeper — and everything I learned is laid out in next sections.
1. Check If Your Mac Supports macOS Sequoia
Let’s start with the basics — because this one step can save you a ton of time and frustration.
In my case, I’m using a MacBook Pro 2019, which is officially on the list of supported devices for macOS Sequoia. So I knew the update should work — at least in theory.
If you’re not sure whether your Mac is supported, take a moment to check. Because if your device isn’t on Apple’s compatibility list, the installer may not run at all, or you might end up stuck mid-way with errors that are hard to fix.
✅ Here’s a list of Macs that support macOS Sequoia:
- MacBook Air – 2020 and later
- MacBook Pro – 2018 and later
- iMac – 2019 and later
- Mac mini – 2018 and later
- Mac Studio – All models
- Mac Pro – 2019 and later
- iMac Pro – 2017
To find out your Mac’s model:
- Click the Apple menu () in the top-left corner.
- Select About This Mac.
- You’ll see the model name and year right at the top.
You can also see the official apple website.
What if Sequoia is showing up but your Mac isn’t supported?
Here’s something that might confuse people:
If your Mac is not supported, the Sequoia update usually won’t even show up in the Software Update section.
But if you’re more tech-savvy and ran this Terminal command:
softwareupdate --list
You might still see macOS Sequoia listed — even on an unsupported Mac.
That doesn’t mean you can install it.
In most cases, if you try to install Sequoia this way on an unsupported model, it will either:
- Prompt you for your password, and then silently fail
- Give you a vague or generic error message
- Or just exit with no feedback at all, even when using
--verbose
So, if you ran the command and saw Sequoia but the install didn’t happen — that’s likely why. Apple’s system allows listing the update, but blocks the actual installation on unsupported hardware.
To avoid wasting time chasing a broken installer, always verify your Mac is on the official compatibility list first.
How to check:
- Click the Apple menu > About This Mac.
- Look at the year/model (e.g., MacBook Pro 2019).
Then compare with Apple’s list of supported Macs for Sequoia. You can usually find this on Apple’s site or by Googling:
macOS Sequoia supported Mac models site:apple.com
If your device isn’t on the list, no amount of troubleshooting will fix this — at least not officially.
2. Make Sure You Have Enough Storage Space
Installing macOS Sequoia isn’t just about having enough room for the installer file itself.
The system also needs extra space to create temporary files, unpack everything, and complete the installation smoothly.
If your Mac is running low on free space, the update can fail partway through — often with confusing error messages that don’t really explain what went wrong.
Here’s how to check and free up space:
- Open System Settings and go to General > Storage.
- Give it a moment — your Mac needs a few seconds to calculate what’s taking up space.
- Look through the list for big files you don’t need anymore — old installers (like
.dmgfiles), unused apps, and system junk. - Don’t forget to empty your Trash after deleting things, or the space won’t actually free up.
Pro tip: Aim to clear at least 30 to 40 GB of free space before starting the install.
This gives your Mac enough room to breathe and helps avoid those tricky storage-related errors. Even if the installer says it needs less, give it more room than you think.
3. Fix Internet-Related Issues
Even if your connection seems fine, the installer can be picky.
- Disconnect Wi-Fi, wait 5 seconds, then reconnect.
- Switch to a different network if available (e.g., mobile hotspot).
- Avoid VPNs or proxies while downloading the update.
This wasn’t an issue in my case, but since different types of users will read this post, I’m including it here just in case it helps you troubleshoot your internet connection problems.
4. Check Apple’s Servers (Sometimes It’s Not Your Fault)
Every now and then, Apple’s servers get overloaded — especially right after a new macOS update drops. When that happens, your Mac might have trouble downloading or installing Sequoia.
Here’s how to check:
- Open Safari (or any web browser).
- Head to Apple’s System Status page: https://www.apple.com/support/systemstatus/.
- Look for any issues flagged next to macOS Software Update.

If you see a problem there, unfortunately, you’ll just need to wait it out until Apple sorts it. No amount of fiddling on your end will fix server issues.
5. Reset NVRAM and SMC (For Intel Macs Only)
Sometimes, little system glitches or settings stuck in memory can block macOS updates from installing properly.
Resetting the NVRAM and SMC clears out those glitches and resets some hardware-level settings that control how your Mac starts up and manages power. This often fixes issues that prevent the update from completing.
How to Reset NVRAM:
- Shut down your Mac completely.
- Turn it back on, and as soon as you hear the startup sound (or see the screen light up), press and hold Option + Command + P + R all at the same time.
- Keep holding these keys for about 20 seconds, then release them and let your Mac start normally.

What this does:
NVRAM stores small bits of information like speaker volume, screen resolution, and startup disk selection. If any of these get stuck or corrupted, it can cause problems during the update. Resetting NVRAM wipes this info and lets your Mac start fresh.
How to Reset the SMC:
- Shut down your Mac.
- Press and hold Shift + Control + Option on the left side of your keyboard and the Power button together for 10 seconds.
- Release all keys, then press the Power button to turn your Mac back on.

What this does:
The SMC (System Management Controller) handles power management, battery charging, and other low-level functions. If it’s misbehaving, your Mac might have trouble installing updates or powering hardware correctly. Resetting the SMC can clear these hiccups.
For Apple Silicon Macs (M1, M2, etc.):
You don’t need to manually reset NVRAM or SMC. Just shutting down and restarting your Mac is enough, since these newer chips manage those settings automatically in the background.
This reset step is often a hidden fix for mysterious update problems because it clears out stuck settings that you wouldn’t normally see but can mess with the installation. It’s a simple thing to try before diving into more complicated solutions.
5. Boot in Safe Mode and Try Again
Safe Mode loads the bare essentials and clears some caches. This alone fixed the install for a few people.
To boot a Mac into Safe Mode, follow these steps:
For Apple silicon Macs, you’ll need to press and hold the power button until “Loading startup options” appears, then select your startup drive and press Shift before clicking “Continue in Safe Mode”.
For Intel-based Macs, simply hold the Shift key while turning on the Mac until the login window appears
Once logged in:
- Try installing Sequoia again from System Settings > Software Update.
6. Use Terminal to Force the Update (CLI)
If the GUI keeps failing, Terminal gives you a bit more control — though in some cases, even the CLI isn’t helpful (as you’ve seen).
Try this command:
softwareupdate --fetch-full-installer --full-installer-version 15.0
This downloads the full Sequoia installer manually.
Then run:
sudo /Applications/Install\ macOS\ Sequoia.app/Contents/Resources/startosinstall
This starts the installer directly.
If it exits immediately with no error — try running with verbose:
sudo /Applications/Install\ macOS\ Sequoia.app/Contents/Resources/startosinstall --verbose
Still exits? Might be a permissions issue, or a corrupt installer file. Which brings us to…
7. Create a Bootable USB Installer (Recommended When Everything Else Fails)
If nothing else is working — not the GUI, not Terminal — then install Sequoia from a USB drive.
What you need:
- A working Mac
- A USB drive with at least 16GB
- The Sequoia installer
Steps:
- Download Sequoia using:
softwareupdate --fetch-full-installer --full-installer-version 15.0or (any other version in future)
- Plug in your USB and rename it to
SequoiaUSB(or anything simple). - In Terminal:
sudo /Applications/Install\ macOS\ Sequoia.app/Contents/Resources/createinstallmedia --volume /Volumes/SequoiaUSB
- Once it’s done, restart your Mac and hold Option while it boots.
- Pick the USB installer from the list and install from there.
This bypasses all the annoying GUI and software update errors.
Bonus: Check Disk Health (Optional But Smart)
If your startup disk is damaged, Sequoia may refuse to install.
Run Disk Utility:
- Open it from Spotlight.
- Select your drive.
- Click First Aid and let it scan.
If it finds problems and can’t repair them, you may need to format your drive and do a clean install (after backing up your data, of course).
Another Bonus Section
While researching on this issue I also found a method that worked surprisingly well for some users — and it might work for you too if the usual methods aren’t getting you anywhere.
Here’s what they did:
- Run this Terminal command:
sudo softwareupdate --fetch-full-installer -a --launch-installer -RThis command downloads the full macOS Sequoia installer into your /Applications folder.
- Start the installer from the Applications folder — it will appear as
Install macOS Sequoia.app. - Select your disk and proceed to the install process until the progress bar and estimated time show up. Let it run for a short while — then cancel the install.
- According to the user, at this point, some cleanup or preparation happens in the background.
- Go back to System Settings > Software Update and check for the Sequoia update again. This time, you should see the prompt to accept the Terms and Conditions.
- Click Agree — and the update should start downloading as usual.
A bit unorthodox, but multiple people have reported success with this approach when nothing else worked.
Final Thoughts
Look, I know updates can be a pain. But trust me, once you get it right, the new macOS Sequoia will feel like a fresh, powerful machine. Just take your time, follow the steps carefully, and back up your data before anything big.
If you’re still stuck after trying all this, Apple Support or an Apple Store Genius Bar can definitely help — don’t hesitate to reach out.
Good luck! And if you want, I’m here for any follow-up questions.

Isaac Smith is the founder and editor of PC Glance, a website that covers computers, laptops, and technology. He is a tech enthusiast and a computer geek who loves to share his insights and help his readers make smart choices when buying tech gadgets or laptops. He is always curious and updated about the latest tech trends.