
Start by restarting the Nintendo Switch and joining your Wi-Fi again near the router. If the network is missing, grayed out or rejects the password, that detail tells you which setting to check next.
The original Switch, Switch Lite and Switch OLED can use both 2.4GHz and 5GHz Wi-Fi. They support different security settings from Switch 2, so changing your router can leave an older console unable to connect.
1. Restart the console and search again nearby
Save your game, then hold the console's POWER button for three seconds. Select Power Options, then Restart. A quick tap that puts the Switch to sleep doesn't perform this restart.
Nintendo says to restart if your wireless network doesn't appear. Take the console out of its dock and try it close to your router, with a clear path between the two.
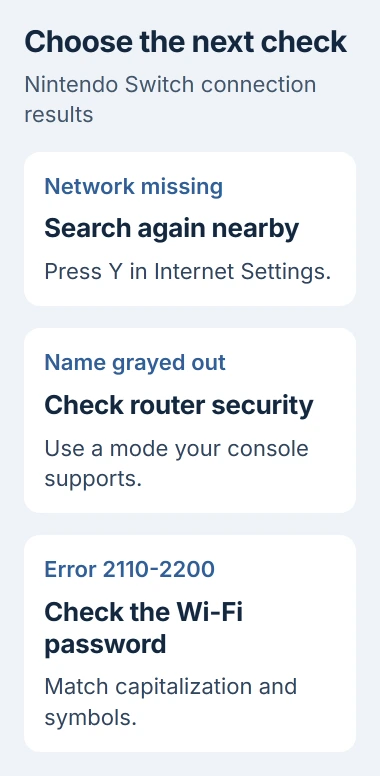
Status: checked November 3, 2026. These steps cover Switch, Lite and OLED. Nintendo lists WPA3 support for Switch 2, while the original Switch family supports WPA2-PSK with AES.
From the HOME Menu, open System Settings > Internet > Internet Settings. Wait for the network search. If your Wi-Fi name isn't listed, press Y to search again.
Nintendo's setup instructions recommend starting within 10 feet of the router. If your Switch finds the network and connects there, try its original location again before changing the password or router settings.
Move nearby metal objects and electronics away from your console and router if you can. If distance is what changes the result, use the weak Wi-Fi signal checks to choose a better spot.
2. Enter the actual Wi-Fi password
Select your wireless network and enter its password carefully. This is the router's Wi-Fi password, not your Nintendo Account password or the password used to manage the router.
Nintendo states that an incorrect wireless password can trigger 2110-2200. Its error-code instructions recommend correcting that password first.
Check capital letters, numbers and symbols. Use the onscreen keyboard's Show control to inspect the entry while keeping it private from people nearby. A password saved before the router was replaced may be out of date.
If a Windows laptop already connects, the saved Windows Wi-Fi password can help you confirm the network details. Make sure it's the same network name you're choosing on the Switch.
If the saved details are wrong, set up a new connection through Internet Settings. Enter the correct password, let the connection test finish, and read its result before changing anything else.
If the password works but the test fails later, write down the new error code. You've moved past the password check; the next problem may be reaching the internet through your router.
3. Match router security to the Switch model
A grayed-out network name can mean its security mode isn't supported. Nintendo documents that behavior in its wireless setup guide.
For an original Switch, WPA2-Personal with AES, also called WPA2-PSK (AES), is a compatible security setting. Ask the router owner which setting it's using, or check it with help from the router's manual.
A network set to WPA3-only won't work with an original Switch, Lite or OLED. Switch 2 adds WPA3-SAE support, so check which console the advice covers before changing your router.
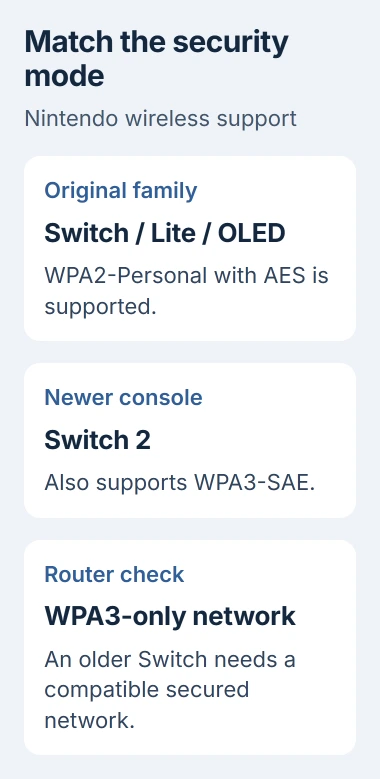
Keep Wi-Fi protected with a password. A separate WPA2 network for older devices, if your router offers one, may let the Switch connect without changing the network your other devices use.
Changing router security can disconnect devices already using it. Get the network owner's agreement first, and keep the router instructions handy so you can reconnect afterward.
Try the Switch connection again when the router has finished applying the new settings. Leave its IP address and DNS on automatic unless your network administrator has supplied specific values.
4. Check the band or add a hidden network
An original Switch works with either band. If your router lists separate 2.4GHz and 5GHz networks, try the other one with its correct password. You don't need to limit every Switch to a 2.4GHz-only network.
A router can hide its network name, also called the SSID. The Switch's search then won't show the name, even though the network is there. Ask the network owner whether they've hidden it.
For a hidden network, open Internet Settings, scroll to Manual Setup, and enter the real SSID. The Network Name field is a nickname for the saved connection; it doesn't replace the SSID field.
Select the correct security type and password. Set Connect to a Hidden Network to On, then save and choose Connect to this Network to test it.
For the manual setup documented by Nintendo, keep IP Address Settings and DNS Settings on Automatic. Leave Proxy Settings off unless the network owner has told you otherwise.
If the router normally broadcasts its name but the Switch still can't see it, avoid guessing an address or DNS server. Continue with a router restart and a test on another network.
5. Restart the network and compare another connection
Try loading a webpage on a phone or laptop using the same Wi-Fi. If those fail too, follow the router and modem makers' instructions to turn them off and back on. Wait for the internet connection to return.
A restart briefly interrupts other people using that network. Don't press the router's factory-reset button: that can erase its connection settings and create a separate setup problem.
Run the Switch test after the network is back. Nintendo recommends testing after changes so you can tell whether each change helped. If other devices recover but the Switch doesn't, try another trusted Wi-Fi network.
Try a friend or family member's broadband Wi-Fi, or a compatible phone hotspot if your plan allows it. With a limited cellular plan, run the connection test rather than using your data to download a game.
If the Switch connects elsewhere, you know it can join Wi-Fi. Focus on your original router and tell its maker the security mode, network band, console model and error code.
I'd try a second network before resetting the console. It helps you tell whether the problem is with your home network or follows the Switch wherever you take it, without erasing anything.
When to contact Nintendo
If your Switch can't find any wireless networks in several locations, Nintendo recommends having it inspected. Tell support which other devices could see the networks your console missed.
If Wi-Fi connects but the internet test fails, search Nintendo Support for the exact error code. Your Switch can be connected to Wi-Fi while an online service or a particular game is unavailable.
Tell support your console model, where the connection fails, and which checks changed the result. Keep your router password private; support can start with the error code and settings.
The Short Version
Match the fix to the result: search for missing networks, correct rejected passwords, and check security for grayed-out names. Test a second network before asking Nintendo to inspect the console.

Isaac Smith is the founder and editor of PC Glance, a website that covers computers, laptops, and technology. He is a tech enthusiast and a computer geek who loves to share his insights and help his readers make smart choices when buying tech gadgets or laptops. He is always curious and updated about the latest tech trends.