
A laptop flex cable problem can make the built-in screen flicker, lose colors or cut out when the lid moves. Compare the internal picture with an external display before buying a cable, because a damaged panel or connector can look similar.
Leave the laptop assembled for these first checks. For later work inside the lid, follow the service instructions for your model.
1. Describe which cable problem you're seeing
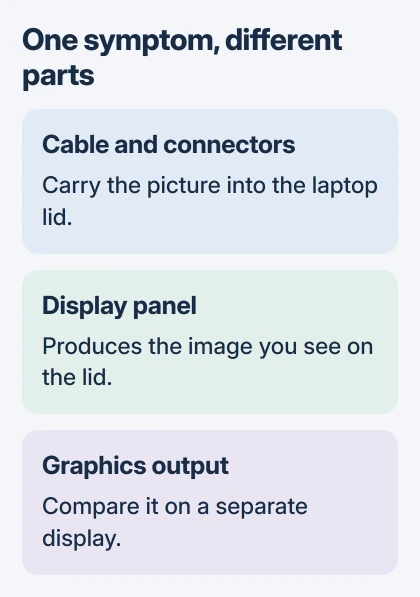
The cable carrying the picture between the motherboard and lid is the display cable. Listings may call it an LCD, eDP or LVDS cable, depending on the laptop. Other flexible cables serve the keyboard, touchpad or separate boards.
Match the symptom to the component before ordering anything. A working screen with dead keyboard keys doesn't point to its display cable. A screen that changes color or loses the picture needs the display checks here.
Tell the repairer about any drop, hinge damage or recent screen work. That history helps them decide where to look. The brand alone won't identify the correct replacement cable.
If the casing pulls apart or the hinge feels unusually stiff, stop moving the lid and arrange service. Repeated opening isn't a repair for a cable being trapped by damaged hinges.
2. Compare the picture on an external display
Connect a working monitor directly to a video output your laptop supports. On Windows, press Windows + P and choose Duplicate to compare the same picture on both screens.
If the laptop panel is unusable, the external-screen access procedure can help you reach your files first. Check that the separate display uses the correct input before judging its picture.
If the external picture stays stable while the built-in screen fails, have the panel, cable and connectors checked. Any of those parts could be responsible; this comparison doesn't tell you which one needs replacing.
If both displays show the same broken picture, have the graphics software or hardware checked too. A fault in the internal cable wouldn't explain why the external picture is wrong too.
HP's service troubleshooting guide uses an external-monitor comparison before checking the internal display connections. Tell the technician whether one screen or both showed the fault.
3. Notice lid movement without stressing the assembly
Set the laptop on a stable desk and note whether normal opening changes the fault. A picture that returns at one angle and vanishes at another makes a connection check useful. Stop once you've seen how the lid position affects it.
Don't twist the display, press its edges or repeatedly work the hinge to keep the image alive. Those actions can damage an already weakened assembly. Use an external display while arranging a repair if the machine otherwise works.
If changing the lid's angle affects the picture, it could be the cable, panel connection, hinge damage or sensor that detects an open lid. Tell the repairer whether your laptop goes to sleep or just loses its picture.
Use another device to record the change, including the lid position and external display when possible. A screenshot may miss a fault that happens after the computer has created the image.
4. Check whether Windows is involved
Watch the manufacturer's startup logo or run a supported display test before Windows starts. If the same stripe or cutoff appears before Windows loads, an app's settings aren't the first repair to try.
On a Dell laptop, the D-key LCD test checks the panel without using Windows. Follow its preparation and model limits. Other manufacturers use their own diagnostics; D plus Power isn't a universal laptop shortcut.
A normal result doesn't rule out a cable fault that comes and goes. Note whether the problem was happening during the test. A screen that works at one lid position can pass a brief check.
For flickering that happens only in Windows, compare Task Manager with the desktop. Microsoft says this Task Manager comparison helps distinguish a display-driver problem from an incompatible app.
Try those software checks if the startup picture stays normal and the symptom fits. If it also happens outside Windows or changes with the lid's position, arrange a hardware repair.
5. Have both connections and the cable checked
Have the connections checked before choosing a replacement. A loose connection may need reseating: disconnecting and correctly reconnecting it. Replace a damaged cable with the matching part; a broken socket or panel needs different work.
Ask the technician to check for a trapped or damaged display cable and loose connections at either end. Trying a cable they know works helps them check whether the original is faulty.
That comparison is more useful than replacing several parts blindly. Before accepting a price for a whole display, ask whether the shop checked the motherboard and panel connections, plus the cable's route through the hinge area.
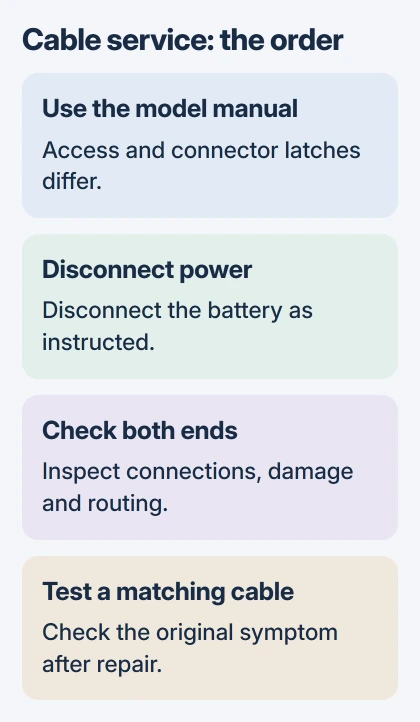
Follow the model's power and battery-disconnection procedure before internal work. Switching off doesn't disconnect an internal battery. Use a technician if you can't confidently follow the service instructions.
6. Match the replacement to the actual assembly
Get your laptop's full model and the existing cable's part number from the repairer or service manual. Check which display version is installed too. Similar laptop names don't mean their cables connect or fit the same way.
The Inspiron 7348 service manual, for example, has you remove several parts before reaching the display cable. It also shows separate touchscreen and camera connections in the display assembly.
That manual shows why access differs between models. Before agreeing to the repair, ask whether the technician can replace your model's cable separately or needs to replace a larger display assembly.
After the repair, check for the original problem at normal lid positions and compare the external picture. If a replacement cable known to work leaves the fault unchanged, ask for further panel and connector checks.
The Short Version
Compare both screens, note the effect of lid movement and check the picture before Windows starts. Have the cable and connectors checked before choosing a matching replacement. A normal external picture alone can't identify the failed part.
Checked November 5, 2026.

Isaac Smith is the founder and editor of PC Glance, a website that covers computers, laptops, and technology. He is a tech enthusiast and a computer geek who loves to share his insights and help his readers make smart choices when buying tech gadgets or laptops. He is always curious and updated about the latest tech trends.