
UVA Wi-Fi setup starts by joining UVA WiFi Setup, then running the university's Network Setup Tool to connect to eduroam. Finish the tool's setup on a personal Windows laptop or Mac so the secure campus network can connect automatically.
These instructions are for the University of Virginia. Use the setup network to get your laptop ready, then check that it's connected to eduroam when the tool finishes.
Start on the setup network with the right account
Have your UVA Computing ID and password ready. UVA's eduroam setup instructions use a personal digital certificate, a digital ID the tool installs on your laptop. It takes the place of a shared home-router password.
On Windows 11, click the taskbar's network, sound or battery area. Open the available Wi-Fi networks, select UVA WiFi Setup, then choose Connect. On a Mac, select that network from the Wi-Fi menu.
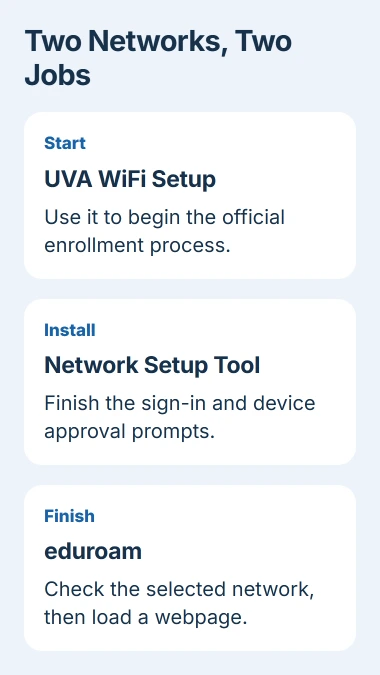
If the setup window appears, select Connect Now. Otherwise, open connect.virginia.edu in your browser. Use the Faculty/Staff & Students option and choose Continue to start setup.
Keep your laptop with you while setup runs. Downloading the tool is only the first step; you still need to open it and finish installing it. A file sitting in Downloads hasn't set up your eduroam connection yet.
If the university manages your computer, follow your department's instructions or contact its IT team. The personal-device installer won't let you skip a request for administrator approval.
Complete the Windows setup tool
Use Microsoft Edge as your default browser during Windows setup. In Settings > Apps > Default apps, open Microsoft Edge and choose Set default. These default-app controls choose which browser opens links.
Download the Network Setup Tool from the official university page, open the downloaded program and follow its prompts. You can switch back to your preferred default browser after setup.
When NetBadge opens, sign in with your UVA Computing ID and password, then complete any requested verification. Return to the setup tool after signing in so it can finish setting up Wi-Fi.
When prompted, select eduroam and continue until the tool reports Joined. Then select Done. Check which network Windows is using; finishing the download alone doesn't mean setup is complete.
Use the Windows Wi-Fi controls to see which network you're connected to. Within campus coverage, it should now show eduroam.
If you're unsure which downloaded file is the setup tool, go back to the official setup page. Don't run a similarly named installer from an unrelated search result or an old email attachment.
Approve the Mac configuration in System Settings
Use Safari as your default browser for Mac setup. Under System Settings > Desktop & Dock, set Default web browser to Safari. You can change this browser preference back after setup.
Open the downloaded UVA setup disk image, run its setup app and follow the NetBadge sign-in prompts. Approve the requested Mac changes with your Mac account password.
The UVA login identifies your university account. The Mac password approves changes on the laptop itself. Both can appear during setup, so check which one the prompt is asking for.
When the configuration profile downloads, open System Settings > General > Device Management. Open and review the profile in Downloaded, choose the installation option shown, then enter the requested Mac account details.
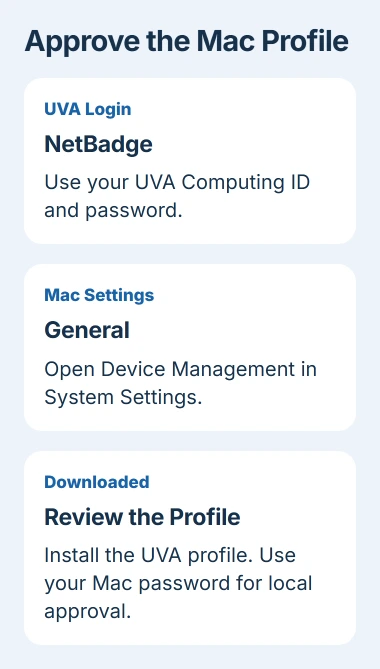
Apple's profile guide shows this route. A profile is a bundle of settings for your Mac. Downloading it doesn't install those settings; you need to approve the installation too.
Older macOS versions can show Profiles in System Preferences instead. Follow the controls that match your Mac, then return to the university's tool and wait for its completion message.
Leave other work or school profiles installed. Removing one can also remove its email, VPN or network settings, creating more connection problems while you're trying to set up eduroam.
Verify the connection before removing the setup network
Open the Wi-Fi menu and check which network is selected, then load a new webpage. I'd check both before closing everything, while you can still see the setup tool and any error message.
If eduroam is connected and the webpage loads, your laptop is connected to both the wireless network and the internet. The Wi-Fi versus internet guide explains why those are separate checks.
Once setup succeeds, stop your laptop from automatically rejoining UVA WiFi Setup. On Windows, open Settings > Network & internet > Wi-Fi > Manage known networks, find the setup network and choose Forget.
On a Mac, forget the saved setup network through its Wi-Fi options. Wait until eduroam works so you still have the setup connection available if you need it before then.
If eduroam fails, check whether the tool finished and, on a Mac, whether you installed the profile. Repeatedly guessing a password won't fix an unfinished setup.
Match a failed setup to the help it needs
If no wireless networks appear anywhere, check whether Wi-Fi is enabled and Airplane mode is off. A missing wireless adapter needs the Windows Wi-Fi adapter checks before a campus installer can help.
If home Wi-Fi works but UVA sign-in fails, write down the exact login error. Support can then check your account or setup, knowing your laptop can already connect to another Wi-Fi network.
If the Mac downloaded a profile but never connected, check Device Management for that profile. Tell support whether you approved it, whether the tool reported Joined, and what network name appears now.
If you're still stuck, contact the UVA Help Desk at 434-924-4357 or your Local Support Partner. Include your laptop's operating system, campus location and where setup stopped. Keep passwords out of support screenshots.
The Short Version
Join UVA WiFi Setup, run the official enrollment tool and finish the Windows or Mac approvals. Check that eduroam is selected and a webpage loads. Forget the temporary setup network after the secure connection works.
Checked November 5, 2026.

Isaac Smith is the founder and editor of PC Glance, a website that covers computers, laptops, and technology. He is a tech enthusiast and a computer geek who loves to share his insights and help his readers make smart choices when buying tech gadgets or laptops. He is always curious and updated about the latest tech trends.