

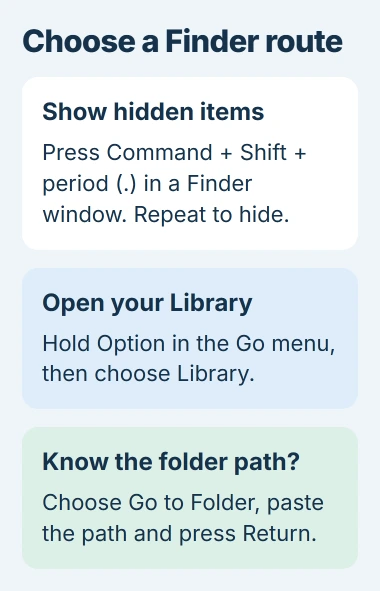
To see hidden files on a Mac, open a Finder window and press Command + Shift + period (.). Press the same keys again to hide them. This changes Finder's view without renaming or moving the files.
For the hidden Library folder in your own account, Finder's Go menu offers a direct route: hold Option, then choose Library. Use that route when an app's instructions specifically name your user Library.
1. Reveal hidden items in the folder being viewed
Open Finder from the Dock, then navigate to the folder being inspected. Hold Command and Shift, then press the period key once. Look for additional, dimmed items, often with names starting with a dot.
Owners report that this shortcut reveals hidden items without relaunching Finder. The saved discussion dates its Finder support to macOS Sierra; later replies also confirm it working.
Status: Apple's current folder-navigation guide and saved Finder shortcut outcomes checked November 2, 2026. The owner reports include older macOS versions. No Mac was operated here.
Use the shortcut while Finder has focus. Typing it into a browser or a document does not change Finder's folder display. If that folder has no hidden items, the lack of a visible change does not prove the shortcut failed.
Press the combination again when finished. Hidden status is separate from deletion: making an item visible does not recover a file that was removed.
2. Open your user Library through the Go menu
In Finder, open Go in the menu bar while holding Option. Select Library when it appears. Apple documents this shortcut in its folder-navigation guide.
This opens the Library belonging to the signed-in account. It is the location written as ~/Library, with the tilde representing your home folder.
Do not substitute /Library for ~/Library when following an app's repair instructions. Apple says a leading slash starts at the computer's top-level folder structure; the tilde starts at your home folder.
Only change a file when the app's instructions identify it and explain the effect. Visibility is not permission to remove an unfamiliar preference, database or support folder. Copy an important original before an instructed edit.
3. Jump to a known hidden folder by its path
Choose Go > Go to Folder in Finder. Paste the exact folder path, such as ~/Library, then press Return. The folder can be opened directly without browsing through every parent folder first.
Use the path supplied by the software's support instructions rather than guessing between similarly named folders.
If Finder reports that the folder cannot be found, recheck the spelling and account. A path from another person's Mac can contain their username or an app folder that has never been created on this one.
For files that exist but are hard to locate by name, the Mac Spotlight checks address search behavior. Folder visibility and Spotlight indexing are separate functions.
When the shortcut seems to stop working
Close that Finder window, open another and retry the same folder. One owner on Catalina accepted a refresh-by-reopening workaround and later reported improvement, although it did not happen immediately for them.
That older outcome is a limited workaround, not a claim of a current macOS-wide defect. The direct Go to Folder route remains useful when the destination is already known.
A desktop that is blank while its files remain listed in Finder needs the desktop icon visibility checks. The shortcut does not repair every desktop display problem.
If a known path is inaccessible, record the exact message. Ask Apple Support or the software developer to confirm the required folder and permissions. Avoid recursive unhide or permission commands for a simple viewing task.
The Short Version
Use Command + Shift + period to toggle hidden items in Finder. Hold Option in the Go menu for your Library, or enter a known path through Go to Folder. Leave unfamiliar hidden files intact.

Isaac Smith is the founder and editor of PC Glance, a website that covers computers, laptops, and technology. He is a tech enthusiast and a computer geek who loves to share his insights and help his readers make smart choices when buying tech gadgets or laptops. He is always curious and updated about the latest tech trends.