

PowerPoint's SmartArt gallery builds a timeline without making you align every milestone. In desktop PowerPoint for Windows, choose Insert > SmartArt > Process, pick a timeline, and enter your dates and events.
Use it for a short sequence of milestones that needs to fit on a slide. The dates are labels you enter, so check their order yourself; typing a date doesn't turn the graphic into a scheduling tool.
Plan the milestones before opening the gallery
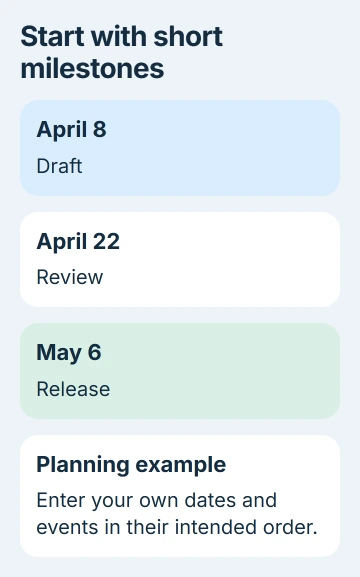
Write a short list with a date and event for each milestone. For a practice slide, use April 8: Draft, April 22: Review, and May 6: Release. These are sample dates, rather than a real project schedule.
Keep the label short enough to read in a presentation. A milestone should tell the audience what happens at that point. Put the detailed explanation in your spoken notes or a separate slide instead of squeezing it into the marker.
Decide what the slide needs to show. A sequence tells the audience what comes first and next. A calendar-based chart needs accurate gaps between dates, which may call for a different tool than a SmartArt layout chosen for its looks.
I'd start with the few dates the audience must remember. If the draft already feels crowded as a short list, adding it to a timeline won't make all that detail easier to read.
Start on a slide with enough room for the graphic and its title. If the deck is new, the PowerPoint starting guide covers choosing a layout and keeping the title in its intended placeholder.
Insert the timeline and fill its text
Open the slide you want to use in desktop PowerPoint for Windows. Select Insert > SmartArt. In Choose a SmartArt Graphic, open Process, then choose a timeline layout and confirm your choice.
Microsoft says its timeline gallery includes Basic Timeline and Circle Accent Timeline. Choose the one that gives your labels enough room, rather than just the one that looks best.
Select a [Text] placeholder and replace it with the first date and event. Fill in the rest of the milestones the same way. You can also use the Text Pane to edit the entries as a list.
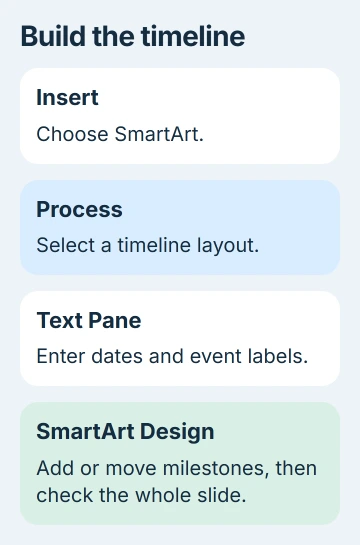
If the Text Pane isn't visible, select the graphic, open SmartArt Design, and choose Text Pane. Some older desktop versions label that ribbon area SmartArt Tools > Design instead.
Check that each date matches the right event. If the graphic has separate date and description boxes, read the whole milestone after replacing the sample text. Clicking a nearby box can put the text beside the wrong event.
The SmartArt layout guidance recommends Process layouts for ordered stages and milestones. A cycle or organization chart shows a different relationship, even if you like the shapes.
Add a milestone in the correct position
Select an existing shape near the place where the new milestone belongs. Open SmartArt Design > Add Shape. Choose Add Shape Before for an earlier item or Add Shape After for a later one.
Type the new date and description into the added item. In the practice schedule, put a check between Draft and Review by adding it after Draft or before Review. Adding it after Release would put it in the wrong place.
Look at the whole graphic after adding the item. SmartArt rearranges the layout to fit everything in, so existing labels can become smaller or wrap differently even when you haven't changed their wording.
If the slide has become crowded, remove a less important milestone or divide the schedule into phases on separate slides. Shrinking every label until it fits can leave a complete timeline that's hard to read.
A text box works well for a short explanation outside the graphic. Use the PowerPoint text-box controls to add that caption without covering a milestone's existing label with another box.
Put the dates in order and check what the spacing means
To change an item's sequence, select its date or shape, then use SmartArt Design > Move Up or Move Down. Move Up brings it earlier in the sequence; Move Down moves it later.
When a date changes, edit its label and check the surrounding dates. Changing April 22 to April 5 also changes where that milestone belongs in the sequence. Move it to the right position too.
Don't assume the distance between markers represents the number of days between events. SmartArt arranges shapes to fit its chosen layout. The labels carry the dates unless you've designed a separate, accurate time scale.
If your timeline only shows order, say so in a short caption. To show how long tasks take, where they overlap or which depend on others, use a chart or project schedule with those details. Equal gaps between markers won't tell that story.
Check the first and last milestones as well as the one you just edited. The middle date can be right while the dates at either end still belong to an earlier version of your project.
Adjust the style while keeping the words readable
Select the timeline and open SmartArt Design. Use Change Colors to pick a color combination, or choose a SmartArt style. Check how it looks against your slide background before keeping the change.
You can change the layout from the same ribbon area. Pick another timeline or process layout if the original leaves too little room for descriptions. Check every label after the change because its wrapping and placement can shift.
Use color to help distinguish items, while keeping each date and event readable without relying on color alone. Avoid extra labels that compete with the milestones for attention.
Resize the overall graphic with its corner handles when needed, leaving space for the title and slide margins. Compare the result in Slide Show view, where the timeline is seen at presentation size rather than while zoomed in for editing.
Save a clear version and handle an unavailable command
Save the presentation, then reopen the timeline slide and check its dates, sequence and text size. If sharing a PDF, review the exported slide too so the audience sees the labels you intended.
If you can't edit the SmartArt, check whether the presentation itself allows editing. A picture of a timeline won't have SmartArt controls. You'll need the original editable graphic or a new one you create yourself.
PowerPoint for the web has a different Smart Art gallery, and its timeline choices can appear under List. The desktop Windows steps won't match that browser interface exactly.
If the command also fails in a new editable desktop presentation, tell Microsoft Support your PowerPoint version and what happens when you select Insert > SmartArt. Keep your working presentation while support checks the app.
The Short Version
Choose a timeline from Insert > SmartArt > Process, enter short date-and-event labels, and add or reorder shapes through SmartArt Design. Check the sequence yourself and review the slide at presentation size before sharing it.
Checked November 5, 2026.

Isaac Smith is the founder and editor of PC Glance, a website that covers computers, laptops, and technology. He is a tech enthusiast and a computer geek who loves to share his insights and help his readers make smart choices when buying tech gadgets or laptops. He is always curious and updated about the latest tech trends.