

Excel's Insert > Header & Footer command adds a heading to the printed page without putting it in a worksheet cell. Choose the left, center or right header area, type the text, then check it in Print Preview.
This is useful for a report title, filename or page number that belongs on the paper. Column names that must repeat with the data use a different setting called Print Titles.
Start with the worksheet that needs the header
Select the worksheet tab that needs the header in your Windows desktop workbook. Choose Insert > Header & Footer. Excel changes to Page Layout view so you can work with the printed page.
Click in the page's top header area. It has three positions: left, center and right. Each can hold different text, so a report name can sit in the center while its date sits on the right.
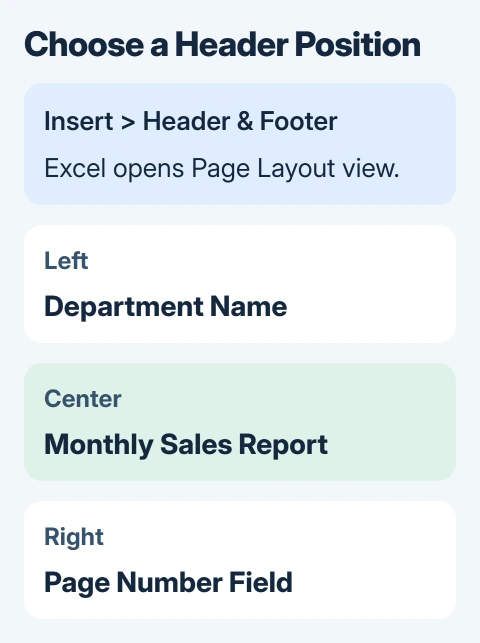
Type a short title, such as Monthly Sales Report, in the center position. Click a worksheet cell when you're finished. The text stays in the page header instead of becoming a value in the grid.
These steps apply to the current Windows desktop editions, including Microsoft 365, Excel 2024 and Excel 2021. Microsoft's worksheet header reference describes the Page Layout and Page Setup routes.
If the command isn't available in the Excel edition you're using, open the workbook in the desktop app. Don't type the title into row 1 unless it also belongs in the worksheet data.
Add page numbers, a date or the filename
Click inside the header again to show its tools on the ribbon. Depending on your Excel version, look for Header & Footer or a Design tab under Header & Footer Tools.
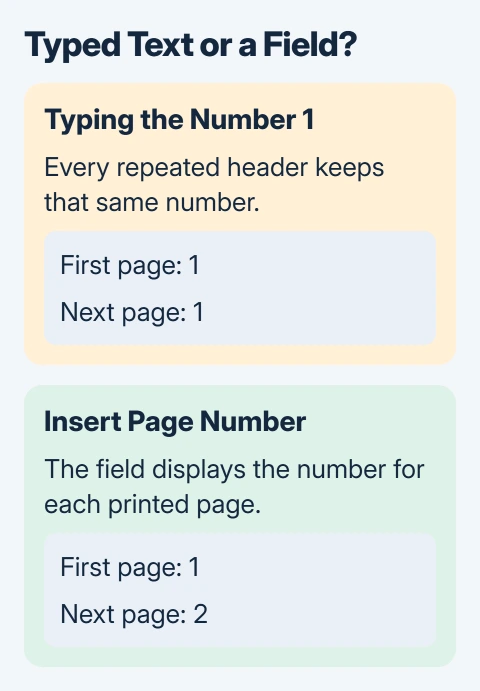
Choose an item such as Page Number, Current Date or File Name from the header elements. Excel fills these fields in for you, so you don't have to update them by hand as you would with typed text.
For example, put the report title in the center and insert Page Number on the right. After you leave the header, that field displays the page's number. Check the next printed page to confirm that its number changes.
A typed number stays the same wherever the header repeats. I'd use the page-number field for any report longer than one page; it saves you from sending several pages all labeled 1.
Type the date when the heading needs to keep a particular reporting date. Use Current Date for Excel's date field. The two choices can look the same today but serve different purposes.
To combine words with a field, type the words in the same header area and insert the field where it belongs. Keep enough space between elements that the finished heading remains easy to read.
Use Page Setup for a custom header or several sheets
To edit the header in a smaller dialog, choose Page Layout and click the Page Setup group's dialog launcher. In the dialog, select Header/Footer, then Custom Header.
The Left section, Center section and Right section boxes match the three positions on the page. Type in the box you want, or use its element buttons to insert page information. Confirm your changes when you're finished.
Chart sheets also use this route. Use Page Setup for those instead of the worksheet's header editing area. If the screen looks different, check whether you've selected a chart sheet.
To give several worksheets the same header on Windows, hold Ctrl while selecting their tabs, then use Page Setup. Excel shows Group in the title bar while those sheets are selected together.
Afterward, select a tab outside the group. Alternatively, right-click one of the grouped tabs and use Ungroup Sheets. While sheets are grouped, changes you make can affect all of them.
Format the text and control its printed size
In Page Layout view, select the header text, then use Home > Font to change its font, size or style. Highlight the words you want to format so the change applies to that part of the heading.
Microsoft's header formatting instructions also explain Scale with Document. With that option selected, worksheet scaling affects the header and footer too.
If a wide worksheet is reduced to fit a page and the heading becomes too small, clear Scale with Document in the header tools. Check the print result again before increasing the font several times.
Use Align with Page Margins when the header should follow the worksheet's left and right page margins. It helps the heading and printed table share the same alignment.
If your heading is too long, shorten it or press Enter inside the header to split it into two lines. Stretching a title across all three positions makes it harder to keep the separate fields apart.
Check the first page and any alternating headers
Use Different First Page when the cover or opening page needs a different header. It gives the first page its own header, so check that page separately instead of checking only page 2.
Use Different Odd & Even Pages only when the two page types need different headings. If the header is blank on every other page, check this option and both sets of header text.
For an ordinary report with one heading throughout, leave those options off. You won't need separate first-page or alternating headers, which reduces the chance of an unexpected blank one.
The header doesn't add cell outlines. If the table needs visible boxes on paper, choose printed gridlines or cell borders separately.
Preview the report, then return to normal editing
Open File > Print and inspect the preview. Check the heading, page number, margins and the last printed page. A header that looks right on one page can still crowd a wider table on another.
If the table splits at an awkward point, set the worksheet's page breaks without moving the title into the cells. You can change where pages end without changing the header text.
Return to View > Normal for everyday worksheet editing. Headers appear in Page Layout, Print Preview and on paper. You won't see them in Normal view.
To remove a header, reopen it and clear the text in each position you've used. Check any separate first-page or odd/even version too. Save the workbook after confirming the finished preview.
If you still have trouble with the header, send a small sample workbook to its author or Microsoft Support. Say which page is affected and whether Print Preview shows the same problem.
The Short Version
Choose Insert > Header & Footer and enter text in a header position. Use fields for changing page information, check Print Preview and return to Normal view. Repeated worksheet rows use Print Titles.
Checked November 5, 2026.

Isaac Smith is the founder and editor of PC Glance, a website that covers computers, laptops, and technology. He is a tech enthusiast and a computer geek who loves to share his insights and help his readers make smart choices when buying tech gadgets or laptops. He is always curious and updated about the latest tech trends.