

Rounded tops with stair steps need thinner layers near the curve. Select your model in Bambu Studio, open Variable Layer Height, move toward detail and click Adaptive. Use Smooth to blend the layer-height changes.
Ironing handles a different surface problem: lines across a flat top. It won't remove the steps around a dome, so choose the layer-height tool for a rounded upper surface first.
Check that the roughness comes from printed layers
Look at the model in Prepare, then compare it with the sliced Preview. If the model looks smooth but the printed dome has horizontal terraces, variable layer height can help reduce those steps.
Those terraces happen because the printer builds horizontal layers through a curved shape. Near a shallow rounded top, each layer can leave a wide ledge before the next one starts. Thinner layers reduce the size of those steps.
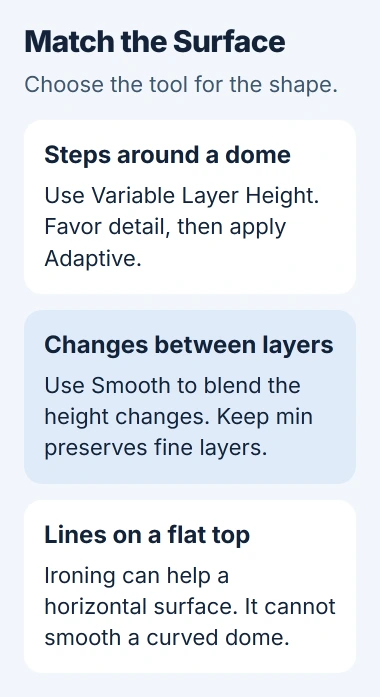
Bambu Lab says its variable layer-height feature suits shapes such as spherical tops and slopes. It can use finer layers there and larger layers elsewhere.
If the digital model itself has obvious flat patches, check the source file too. Changing how the printer divides it into layers won't give a blocky model a more detailed shape.
For gaps, blobs or missing material rather than regular steps, keep a photo of the defect. You may need to check the material or how the printer pushes out plastic instead of making every layer thinner.
Select the model and open Variable Layer Height
Start with the correct printer, nozzle and filament presets in Bambu Studio. Open your model and select the object on the plate. Use the toolbar's Variable Layer Height control to open its settings panel.
If you're still choosing between the mobile and desktop apps, use the Bambu Studio setup guide. Use desktop Studio for this layer-height work; Handy doesn't have the same controls.
Keep your model at the same angle for the first comparison. Then you can see what the layer-height adjustment did without also changing the dome's angle or how it sits on the build plate.
Keep the layer heights within the nozzle profile's allowed range. Don't lower the printer preset's limits just to match a smaller number in someone else's screenshot.
The model-to-print explanation covers the distinction between the model and sliced instructions. Here, you're changing the printed layers rather than editing the object's intended shape.
Apply Adaptive with more detail at the curved top
Find the detail/speed control in the variable-height panel. Move it toward detail when the rounded surface needs finer layers, then click Adaptive to calculate the layer-height changes.
Check the layer-height display to see where the layers changed. Adaptive follows your model's shape and detail/speed choice. Pay close attention to the shallow curve near the top.
Moving toward speed favors larger layers. That can suit less demanding parts of the model, but start toward detail when the problem you're seeing is large steps near the dome's top.
Keep the other print settings unchanged for now. Changing the temperature, speed and material at the same time would make it harder to tell what the layer-height adjustment did.
For a model with straight walls under a rounded cap, check both areas. Aim for finer layers around the curve and larger layers where the rest of the shape doesn't need that extra detail.
Smooth the height changes without losing the fine area
Click Smooth after applying Adaptive and check where fine layers meet thicker ones. This blends the changes in layer height; it doesn't polish the printed model or change its digital shape.
The Radius setting controls how widely that change is spread. A larger radius makes the change in layer height more gradual. Check the resulting curve after each adjustment instead of clicking repeatedly without looking.
Use Keep min to keep your thinnest layers when smoothing. Check that setting near the top, where you need fine layers to make the steps less visible.
Check the top again after smoothing. If you've lost the fine layers you wanted there, review Keep min and the amount of smoothing before accepting the result.
The controls for editing layers by hand can differ between Studio versions. Follow the hints in your version when adjusting one height range. You can use Adaptive and Smooth without copying mouse gestures from an older version.
Slice again and inspect the rounded region
Run Slice again after changing the layer heights. Open Preview and move through the upper layers. Check that the curve is still present and that nothing else in the print setup has changed unexpectedly.
Compare the estimated time with the original slice. Finer layers need more passes through the same height, so extra time can be the expected cost of making the top steps smaller.
If the plate has several objects and colors, check the prime tower used for color changes. The objects need matching layer heights for that tower to work with variable layer height.
The feature also doesn't support organic tree supports. If slicing reports that conflict, choose a support type that works with this feature and your model instead of ignoring the message.
For a first comparison, use a small model with a similar curve and a simple plate. Inspect the sliced result before sending it to the printer so you don't waste a full print on an unsupported setup.
Reserve ironing for a flat top
The ironing instructions describe another pass over a flat top at the same height, using a small flow of plastic. That can blend the lines across that horizontal surface.
A dome is made from many layers at different heights. Ironing its final top region won't remove the terraces around the rest of the curved surface. Changing the ironing pattern doesn't turn it into a curved-surface finishing tool.
If the model also has a flat ledge, judge that area separately. It may benefit from ironing even though the dome needs variable layer height. Change and compare one of those features at a time.
Ironing adds printing time and needs settings that suit the material and surface. I'd leave it disabled for the first rounded-top comparison unless a separate flat surface is the actual problem.
Save the project and compare the printed result
Save the adjusted project under a different name so you can reopen its settings. Keep the original project for comparison instead of overwriting your only copy while trying several detail settings.
On Windows, show file name extensions through View > Show > File name extensions in File Explorer. Check that you're reopening the intended project file.
Send the print the way you normally would, using your printer's supported method. Compare the rounded area with the earlier part. Keep the material, model angle and other settings the same so you can judge the layer-height change.
If the steps are too visible, check the fine-layer area and supported limits again. If the slice looks right but the print is poor, send support the Studio version, project, printer/nozzle preset, material and a close photo of the top.
The Short Version
Use Variable Layer Height, favor detail and apply Adaptive. Blend transitions with Smooth and inspect a fresh slice. Ironing suits flat tops; compare the rounded print before changing other settings.
Checked November 5, 2026.

Isaac Smith is the founder and editor of PC Glance, a website that covers computers, laptops, and technology. He is a tech enthusiast and a computer geek who loves to share his insights and help his readers make smart choices when buying tech gadgets or laptops. He is always curious and updated about the latest tech trends.