

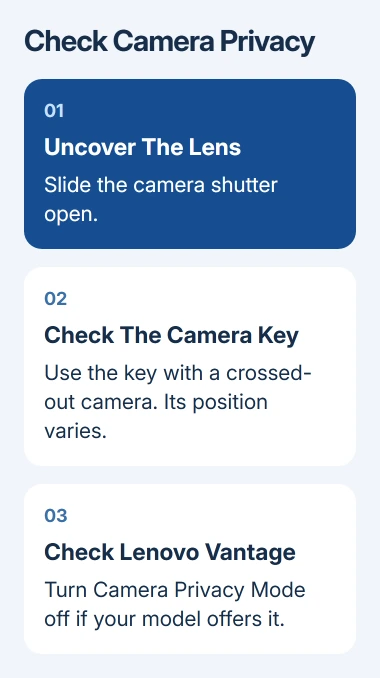
A Lenovo laptop camera showing a lock or crossed-out camera often has privacy enabled. Uncover the lens and turn off Camera Privacy Mode in Lenovo Vantage if available.
If only your meeting app fails, check its camera permission and selected camera.
1. Open the shutter and check the camera key
Look at the screen's upper edge for a small slider covering the lens. Move it to uncover the camera. A physical shutter can block the picture even when the app recognizes the webcam and its activity light comes on.
Check the keyboard for a crossed-out camera symbol. On supported Lenovo models, the privacy shortcut is often F8. Press the marked key, using Fn with it if your keyboard requires that for the pictured function.
ThinkPad, IdeaPad, Yoga and Legion models can use different keys, so follow the icon on your keyboard. Check the sides of the case too; some laptops have a separate camera switch.
Open Start, search for Camera, and open it. A live preview means Windows can receive video from the camera. If it works there, move to step 4; a lock image or missing-camera message needs the privacy and permission checks first.
2. Turn off Lenovo Vantage camera privacy
Open Lenovo Vantage from Start and look for its camera or privacy settings. Turn Camera Privacy Mode off if it appears, then reopen Camera. Microsoft's Lenovo camera instructions describe the gray lock image this setting can cause.
Vantage layouts differ, and some versions or devices don't offer that control. Don't install an older Vantage package just to recover a missing camera section. Check the physical privacy control and Windows permissions instead.
I'd check these privacy controls before removing drivers. A privacy lock can block video from a working camera.
If the preview returns, close Camera before reopening your meeting app. Another app using the camera may keep your meeting app from using it.
3. Allow camera access in Windows
In Windows 11, open Settings > Privacy & security > Camera. Enable Camera access. Switch Let apps access your camera on too, then allow the affected app if it has an individual control.
In Windows 10, open Settings > Privacy > Camera. Under device camera access, select Change if needed and enable access. Turn on Allow apps to access your camera and the relevant app's permission.
Desktop programs and browsers also need the separate Let desktop apps access your camera setting in Windows 11, or Allow desktop apps to access your camera in Windows 10. They don't all have individual switches in this list.
If a switch is gray or the page says your organization manages it, ask your work or school administrator to allow the app. Meeting settings can't override that restriction.
Try Camera again. If it now shows a preview, permissions were blocking access. If it still reports no camera, continue to Device Manager after checking the app selection.
4. Select the built-in camera in the affected app
Open your meeting app's video settings or pre-join preview. Select the built-in webcam rather than a disconnected webcam or software-generated video source. Turn video off and back on after changing it.
For a browser meeting, check camera permission beside the website address. Allow access, select the correct device and reload the meeting. A site's permission is separate from Windows permission.
When the app's preview appears but the meeting stays black, try the app's desktop version or another supported browser. Report the app name and whether Windows Camera works to that app's support team.
Once the preview works, take a photo with Windows Camera to check the saved result before returning to your meeting.
5. Check detection and a recent driver change
Right-click Start > Device Manager. Expand Cameras, Imaging devices, or Sound, video and game controllers and look for the webcam. Open its Properties to read any device-status message.
If the camera is absent, choose Action > Scan for hardware changes. Restart Windows and check again. If it reappears, open Camera and check for a preview.
For a failure that started with a driver update, try Properties > Driver > Roll Back Driver on the webcam, then restart. If rollback isn't available, use a driver matching your exact Lenovo model and Windows version.
Microsoft's Windows camera troubleshooting covers detection and rollback. Avoid generic driver-download utilities. A driver intended for another Lenovo model can create another problem.
If the camera is still missing after turning privacy controls off, ask Lenovo support for a check of the built-in camera and its connection. Give them the laptop model, Windows version, device-status message and Camera app result.
For a numbered camera error or a different failure message, use the webcam checks by symptom to find the steps for that message.
The Short Version
Uncover the lens, release the camera privacy control and check Vantage. Test Windows Camera, allow the required app, then check device detection or a recent driver update. If the camera stays missing, ask Lenovo to check it.
Checked November 7, 2026.

Isaac Smith is the founder and editor of PC Glance, a website that covers computers, laptops, and technology. He is a tech enthusiast and a computer geek who loves to share his insights and help his readers make smart choices when buying tech gadgets or laptops. He is always curious and updated about the latest tech trends.