
A PowerPoint poster needs one slide sized to the printer's requested dimensions before you add content. Use Design > Slide Size > Custom Slide Size on Windows, or Design > Slide Size > Page Setup on Mac.
The usual widescreen slide shape doesn't tell you what size the printed poster will be. Ask for the finished dimensions, orientation and accepted file format first, so you aren't rebuilding a completed poster to fit a different sheet.
Choose the finished poster size before designing
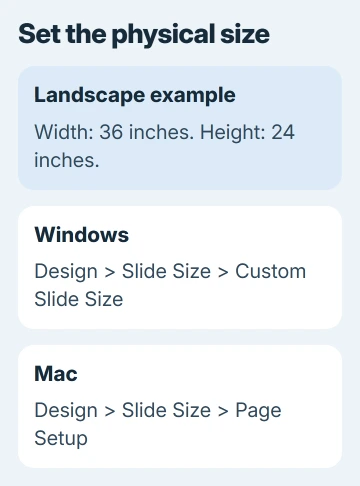
Get the required width and height from the event organizer or printer. A landscape poster is wider than it is tall; portrait is taller than it is wide. Write the measurements with their units so the two dimensions can't be confused.
For example, a 36 by 24 inch landscape poster needs a width of 36 in and a height of 24 in. That's an example size, not a universal poster standard. Use the dimensions requested for your job.
Microsoft lists custom dimensions in its slide-size instructions, ranging from 1 to 56 inches for each side. If the requested poster exceeds that limit, agree on a scaled file with the printer before working.
For example, a 72 by 48 inch poster could be designed at 36 by 24 inches and enlarged to 200 percent when printed, if the printer accepts that arrangement. Tell them the file's dimensions and the intended final dimensions together.
I'd settle the measurements before choosing a template. A beautiful layout is extra work to repair when it starts at the wrong proportions.
Set up one poster slide on Windows or Mac
Start a new presentation and keep one slide for the poster. Choose a blank layout if you don't want title and subtitle placeholders. Save the editable presentation so you can correct text later without rebuilding it from an exported file.
On Windows, select Design > Slide Size > Custom Slide Size. Enter Width and Height, confirm the slide orientation, then select OK. Review the numbers after entering them, especially if you typed a different measurement unit.
On Mac, choose Design > Slide Size > Page Setup. Enter the custom width and height, choose the intended orientation, and confirm. In some Mac editions, you'll also find Page Setup in the File menu.
For the general controls and existing-deck resizing choices, use the PowerPoint slide-size guide. Your poster should be one page with the dimensions you agreed on.
PowerPoint uses one size and orientation throughout a presentation. One slide can't have a larger poster size while the rest remain ordinary slides. Keep the poster in a separate file when it needs different dimensions.
Handle an existing template without clipping its content
Make a copy before resizing a filled template. Windows may offer Ensure Fit or Maximize. Ensure Fit keeps the content inside the new page by reducing it; Maximize can enlarge content beyond the page edges.
On Mac, the choices can be Scale and Don't Scale. Scale adjusts content to the new dimensions, while Don't Scale keeps its size. Whichever you choose, inspect the text and pictures after the page changes.
Look at the title, each text panel, captions and logos. An item still visible on the slide can be too small to read when printed. For a very different shape, rebuild the panels instead of cramming content into the old positions.
A poster's title should identify its subject quickly. Group related text and figures together and leave space between sections. Keep the reading order clear so a person standing in front of it knows where to start and what to read next.
Check pictures and text at the intended size
Use the original picture files when possible. A tiny image stretched across a large poster can look soft even though it seemed acceptable in the slide's thumbnail. Zoom in on detailed diagrams and check their smallest labels.
For a scaled design, remember that everything grows at print time. In the half-size example, a 20-point label becomes 40 points at 200 percent. Use that arithmetic to check the intended result, rather than the editing-window preview.
Keep text boxes away from the outside edge. PowerPoint doesn't offer Word-style page margins, and the printer can leave an unprinted edge. Ask the printer for its safe area and trimming requirements before placing text near the edge.
Check names, dates, units and figure captions while the source file is still open. If a chart needs a correction, fix the chart or text in PowerPoint and export again. Editing a flattened image of the poster makes later corrections harder.
Export a single poster page for the printer
Ask whether the printer wants the editable presentation or a PDF. A PDF lets you check and share the page layout, while you keep the presentation for editing. Keep both with filenames that distinguish the latest version.
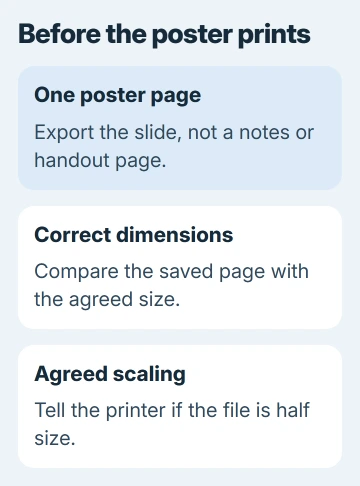
On Windows, open File > Export > Create PDF/XPS Document > Create PDF/XPS. Choose Standard for print quality. In Options, check that the output is the poster slide, rather than notes or a page of handouts, then publish.
On Mac, use File > Save As and choose PDF in File Format, or use File > Export > PDF. Inspect the exported poster before handing it over. The PowerPoint PDF guide covers the platform-specific output choices.
If you're working in PowerPoint for the web, custom sizing is under Design > Slide Size > Custom Slide Size. Export through File > Export > Download as PDF. Online editing requires sign-in. Check the finished file after exporting it.
Confirm the page size before paying for the print
Open the exported file and check its page dimensions in the viewer's document properties. Compare them with the PowerPoint slide size. The poster should appear as one page, rather than several slides or small handout panels.
Tell the printer whether the file is full size or intentionally scaled. Ask them to confirm the final width, height and enlargement before printing. Fitting to another sheet can change the result even when the exported file is correct.
If PowerPoint rejects dimensions within its supported range, give Microsoft Support your edition, width, height and units. If print preview changes a correct file's size, ask the printer to check paper and scaling settings.
The Short Version
Agree on the dimensions, set one custom-sized slide, and inspect text and images at print size. Export one poster page, verify its dimensions, and tell the printer any scaling. Keep the editable presentation for corrections.
Checked November 9, 2026.

Isaac Smith is the founder and editor of PC Glance, a website that covers computers, laptops, and technology. He is a tech enthusiast and a computer geek who loves to share his insights and help his readers make smart choices when buying tech gadgets or laptops. He is always curious and updated about the latest tech trends.