
Zoom on iPad Pro uses the Zoom Workplace app. Get it through App Store, open the invitation, and approve the camera and microphone prompts you need. A guest can usually join without an account, unless the host requires you to sign in.
For a silent meeting, check the audio connection before changing volume. For a camera that follows you around, check Center Stage. Those controls do different jobs from sharing the iPad's screen, which starts a separate broadcast.
Install the meeting app and open the invitation
Open App Store, search for Zoom Workplace, and check the publisher before installing it.
Use the ordinary meeting app for an invitation to a class or call. Zoom Rooms is a different product used with dedicated meeting-room setups.
Open the installed app. The first screen lets you sign in, sign up or join a meeting. Tap Join meeting to enter an ID without signing in, then enter the ID and passcode supplied by the host when requested.
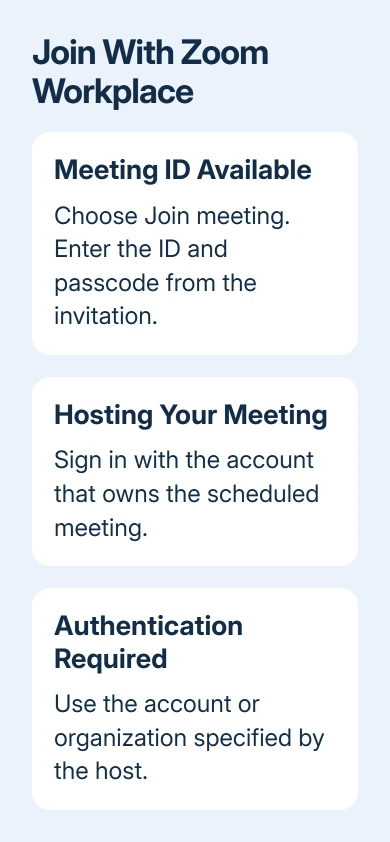
A meeting link can carry some joining details for you. Use the invitation from the organizer rather than typing a guessed meeting address. If the link opens a web page first, follow its option to open the installed app.
Some meetings require you to sign in, sometimes with a school or work account. If the joining screen asks for that sign-in, use the account named by the organizer.
Creating a separate free account won't get you into a meeting restricted to a school or employer.
When already signed in, the current mobile layout has Home > Join for entering meeting details. A scheduled meeting may also have its own Join button. Tabs can differ with app version and the products available to your account.
I'd join a test meeting before an important call, particularly after switching headphones. Open the test meeting page in Safari and launch the app when prompted. Complete its audio check, then tap Done.
Connect meeting audio before troubleshooting the microphone
Tap the meeting window to show its controls if the toolbar is hidden. Look for Join Audio when the iPad hasn't connected to meeting sound. Choose Wifi or Cellular Data to use the iPad's internet connection for the call.
Then check Mute/Unmute. A muted microphone prevents others from hearing you, while Join Audio means you haven't connected to the meeting's sound yet. Raising the speaker volume doesn't fix either of those input controls.
If microphone access was refused, open Settings > Privacy & Security > Microphone and allow Zoom. Check Camera in the same privacy area for video access. Reopen the call. Try the microphone or select Start video again.
On older iPadOS versions where the menu says Privacy, use its Microphone and Camera lists.
The app permission controls show which apps have requested access to each feature.
Disconnect a headset temporarily and compare the built-in microphone and speaker. If the iPad works on its own, check the headset's connection and selected audio route.
For the wider problem across devices, use the Zoom microphone checks.
Keep the camera steady or turn Center Stage on
On a supported iPad Pro, Center Stage adjusts the camera framing as people move. It can be useful when you're presenting, but a moving frame can be distracting if you'd prefer a fixed camera view.
With the camera active, swipe from the upper-right edge toward the middle to open Control Center. On current iPadOS, tap the app's controls at the top, then turn Center Stage on or off. Return to the meeting and compare the framing.
On iPadOS 17 or earlier, open Video Effects in Control Center instead, then select Center Stage. Apple says to use that older menu in its Center Stage instructions.
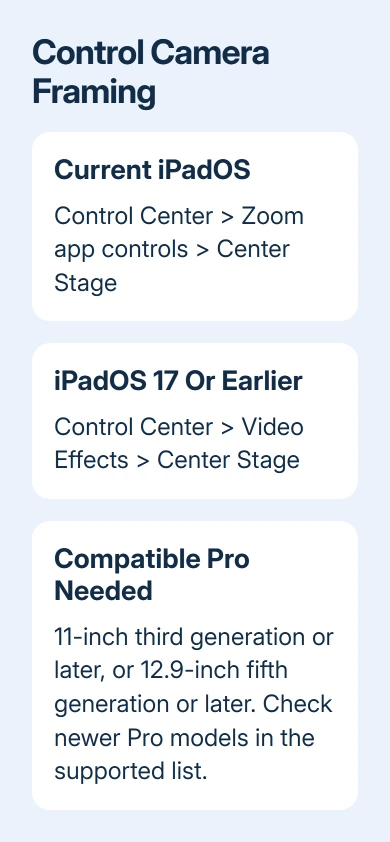
The feature needs compatible hardware as well as a supported app. For iPad Pro, the supported list starts with 11-inch third generation and 12.9-inch fifth generation, with later supported Pro models included.
An older Pro won't gain the feature from an app update.
A missing Center Stage button therefore needs a model check before a reinstall. A magnified display is a separate problem. Accessibility settings enlarge what's on your screen; Center Stage changes what the camera shows.
Share the iPad screen with the meeting
In the meeting toolbar, tap Share Content > Screen. The next panel lets you start broadcasting your screen. Before starting, enable Do Not Disturb to keep personal notifications out of the presentation.
Tap Start Broadcast and wait for the three-second countdown. Swipe up to leave the broadcast controls and open the app or material you want to present. On an older model with a Home button, pressing it also leaves the panel.
The mobile screen-sharing steps describe this as sharing the entire iOS device screen.
You can't annotate through Zoom while sharing that entire screen, so plan the presentation around the app you're showing.
To include device audio after leaving the broadcast controls, return to Zoom and tap Share Device Audio. Other participants may hear a brief delay.
Speaking into the meeting microphone and sharing an app's sound are separate parts of the presentation.
When finished, reopen Zoom and tap Stop Share. Confirm that the meeting returns to its normal view before opening private material. Closing a document isn't the same as ending the screen broadcast.
If Screen is missing, ask the host to review sharing permissions and the account's screen-sharing restrictions. The mobile instructions also list a setting in the web portal that can hide this option.
Ask the host or account administrator to sign in and check that setting.
Check the model and app when a control is missing
Open the app's page in App Store and install an offered update. Compare its compatibility requirements with your iPadOS version.
An older iPad can support screen broadcasting but still be too old to install the current Zoom app. Use the app listing's requirements to check that combination.
For a Pro using a keyboard, mouse or a floating meeting window, return to the full meeting view when checking a missing toolbar. Tap inside the meeting to reveal controls before assuming the option was removed.
For an iPad used in classes, a practical study setup can help arrange the apps and accessories around the call.
If you're stopped by a waiting room or a sign-in requirement, ask the organizer about the meeting's joining rules.
Ask the host or app support about the exact failure
For a rejected invitation, ask the host to confirm the meeting ID, passcode and required account. For missing sharing controls, give them the option that's absent. These are settings the host can check without changing your iPad.
For an app failure, send Zoom Support the iPad model, iPadOS version, Zoom version and the action that fails. Mention whether built-in audio works without the headset and whether the camera permission is enabled.
Those details help support repeat the problem and choose the next check.
The Short Version
Use Zoom Workplace to join the meeting, then connect audio and check microphone permission. Center Stage controls camera framing on compatible iPads.
Share Content starts a separate screen broadcast; use Stop Share to end it, and ask the host about restricted options.
Checked November 10, 2026.

Isaac Smith is the founder and editor of PC Glance, a website that covers computers, laptops, and technology. He is a tech enthusiast and a computer geek who loves to share his insights and help his readers make smart choices when buying tech gadgets or laptops. He is always curious and updated about the latest tech trends.