
In CapCut Desktop, add a keyframe with the diamond beside Scale, Position or Opacity. On the selected clip, save a starting value, then move to a later time and change that setting to create movement.
Start with a simple zoom on one clip. Two different scale values at two different times make the movement much easier to understand than changing several controls together.
1. Select the clip and find its diamond controls
Start with your saved CapCut Desktop project and put a video or image on the timeline. Click the timeline clip to show its controls in the panel on the right. Clicking the file in the media library won't select that timeline clip.
Open the editing section you need, such as Video, Transform or Adjust, and look beside the setting you want to animate. Each diamond belongs to its own setting, so choose Scale for a zoom rather than an unrelated effect.
CapCut says a missing keyframe diamond can come from the clip selection, unsupported elements or hidden panels. Start by checking the selected clip and expanded panel.
To zoom without changing the picture's proportions, leave Uniform scale enabled if it's present. The separate width and height controls stretch the picture, changing the shape of faces and other objects.
The playhead is the vertical marker showing the current time in the project. Move it to choose when the next keyframe applies. Moving the video clip itself changes when the whole clip starts, which is a different edit.
2. Set the starting value before moving to the end
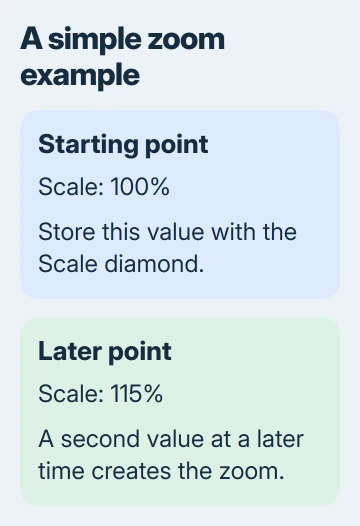
Place the playhead inside the selected clip at the point where the zoom should begin. Set Scale to its starting size, then click the diamond beside Scale to store that value at that time.
Try 100% as a practice starting value. Your project can use a different starting size if that frames the recording better.
Move the playhead farther into the same clip. Increase Scale a little, for example to 115%. Check that a second keyframe appears for that property at the later time.
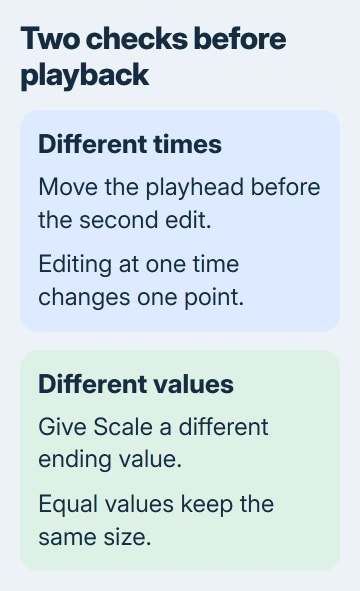
Changing an animated setting at a new time can add the next keyframe automatically. If no marker appears, click that setting's diamond at the new position. Look for the marker before playing the animation.
For movement, the two keyframes need different times and values. Editing the same keyframe twice replaces its value. Two keyframes with the same scale keep the picture at that size between them.
I'd animate only Scale for this first attempt. Once the zoom works, add position changes to keep a subject centered. With one control changing, it's easier to see which edit caused an unexpected movement.
3. Play across both points and adjust the timing
Move the playhead to a moment before the starting keyframe, then play through the ending point. The preview should change size between the two stored values, rather than jumping straight to the finished view.
Drag the playhead between the keyframes to check individual frames. Look at the beginning, middle and end: a subject centered at the start can be cropped by the time the zoom finishes.
Move the two keyframes farther apart in time to slow the movement, or closer together to speed it up. Changing the ending scale changes how far the zoom travels, rather than how long it takes.
Select a keyframe marker and drag it along the timeline to change its time. Keep the start and end in the order you want. Play the preview afterward to check that the new timing fits the scene.
Some versions offer Ease In and Ease Out controls for changing how movement starts or finishes. Use them after the basic animation works. They change the pacing between points rather than creating a different camera view.
4. Animate another property when the shot needs it
Position moves the image within the frame. Rotation turns it. Opacity changes how much of the layer you can see, making it useful for a fade. Set a starting and ending value for each property you animate.
For a moving title, select the text clip before changing Position. A video clip and its separate text layer are different timeline items, so animating the video doesn't automatically move the title with it.
If the title appears several times, duplicate the text clip when you need another copy. Then check each copy's timing and animation, rather than assuming its placement fits another part of the recording.
Make one change and preview it before adding another. A zoom and a position change can work together, but several large changes can send the subject outside the frame or make a caption hard to read.
Press Ctrl+Z, the Windows undo shortcut, to undo an unwanted edit. Do it promptly, then check the preview before continuing.
5. Handle a missing diamond and check the export
If the diamond never appears, select a standard video or image clip and expand the right-hand editing panel. Some template elements, grouped clips or special assets don't support the same animation controls.
Compare that ordinary clip with the item you were trying to animate. If only one has a diamond, check what controls the other item supports. Repeating the click on an item that can't be animated won't help.
Check for updates in CapCut's settings, then restart it if the controls remain absent. For a supported clip that still lacks them, give support your app version and a picture of the clip selection and editing panel.
When the preview looks right, choose Export, set the required resolution and format, and save the movie. Play that saved file across the animated section. Keep the editable project so you can change the keyframes again later.
The Short Version
Select the clip and click the diamond beside the setting you want to animate. Save a starting value, move to a later time in the clip and set a different ending value. Preview the movement, adjust the timing, and check the exported movie.
Checked November 6, 2026.

Isaac Smith is the founder and editor of PC Glance, a website that covers computers, laptops, and technology. He is a tech enthusiast and a computer geek who loves to share his insights and help his readers make smart choices when buying tech gadgets or laptops. He is always curious and updated about the latest tech trends.