

To stretch video in CapCut on PC, select its timeline clip, open Video > Basic > Transform, and turn off Uniform scale. Change width or height separately, then check the preview for distorted faces and cropped edges.
To make the picture bigger without changing its shape, leave Uniform scale on and change Scale instead. The project's aspect ratio controls the frame's shape; stretching changes the shape of the clip inside it.
Select the video clip and open Transform
Open your project in CapCut Desktop. Import the video if needed and drag it onto the timeline. Click the video clip itself, rather than an audio track, text layer or empty space on the timeline.
Look in the right-hand editing panel for Video, then Basic. Find Transform and its scale controls. If the panel shows text formatting or audio controls, click the video clip again.
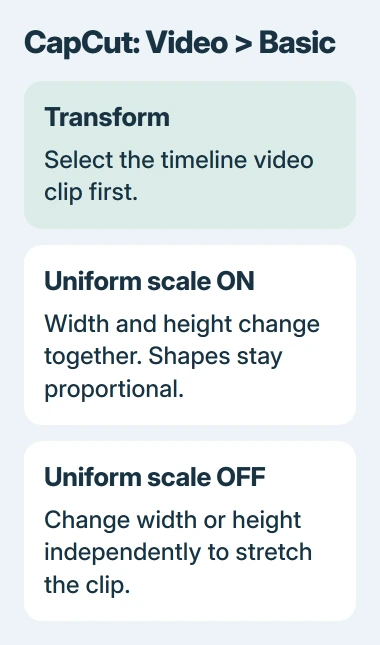
CapCut's desktop resizing instructions describe selecting the timeline clip, opening Basic and using Transform. The panel's layout can change after updates, so look for those labels.
Play the video or drag through it until you see a face, a round object or another familiar shape. These make stretching easier to judge than a plain sky or blank background.
I'd check a frame with a face before changing the width. A stretched landscape can look fine while a person at the edge looks noticeably wider. A familiar shape makes that easier to catch.
Turn off Uniform scale and change one direction
Turn off Uniform scale so you can change width and height separately. Increase the horizontal value to make the clip wider without making it taller. Increase the vertical value to make it taller without widening it.
Some versions show width and height values; others label them horizontal and vertical scale. With Uniform scale off, changing one direction no longer changes the other.
Make a small change and check the preview. Stop when you get the effect you want. A horizontal stretch makes circles wider; a vertical stretch makes them taller. Stretching changes shapes without showing more of the original recording.
The resizing control reference also explains how to turn off Uniform scale to adjust each dimension. Use its desktop instructions here; the online editor may put controls in different places.
Check the whole frame after making the change. The clip can extend past the frame's edges, hiding its outer parts even when the stretch worked. Move it back into position if the subject you need has gone out of view.
If you only meant to make the picture bigger, undo the change and turn Uniform scale back on. Use stretching when you want to change shapes; an empty edge around the video doesn't always call for that.
Choose between filling the frame and changing its ratio
A portrait clip in a landscape project leaves space at the sides unless you change how it fits. You can keep the whole picture with empty space, enlarge it and crop the edges, or stretch it and change its shape.
For a closer view that keeps the same proportions, leave Uniform scale on and increase Scale until the picture fills the frame. Check each edge, since making the clip bigger can push part of the scene out of view.
If the final video should be portrait rather than landscape, use the project's Ratio control and choose the intended frame shape, such as 9:16. Then resize and position the clip within that new frame.
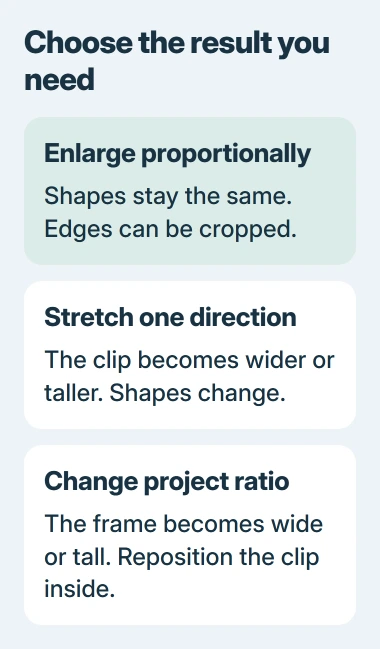
A ratio of 16:9 is a wide frame; 9:16 is a tall one. Those numbers describe the relationship between width and height. They don't tell the editor to stretch a person or object to match.
If black bars are already part of the recording, you may need to enlarge or crop the picture to remove them. Changing the project ratio alone won't remove bars saved in the video itself.
Choose based on what matters in your scene. Keep faces in proportion and text readable, and check that cropping hasn't hidden something the viewer needs to see. Leaving some empty space may work better than losing that detail.
Check motion and other layers after resizing
Play through the entire edited clip. A subject that fits in the frame at the start may move out later. Pause at its widest movement and check whether the stretched or enlarged picture still contains it.
If the framing changes during playback, check the clip's existing keyframes. A keyframe saves a setting at a particular moment, so the editor can change that setting as the video plays.
An existing scale or position animation can make your change look right at one moment and wrong later. Review those keyframes before making more changes. Use Undo if you changed the wrong part of the animation.
On Windows, press Ctrl+Z to undo an edit. It's listed in the Windows keyboard shortcut reference. Check that the preview returns to the earlier framing.
Check titles and captions separately. Resizing one video clip doesn't resize every text layer with it. A title that used to fit can crowd a face after you've moved the picture behind it.
For repeated titles, follow the CapCut text-copy workflow to duplicate and position the text clips. Check each title with the new framing rather than the old background.
Export a sample and inspect the saved video
Choose Export, check the video settings and save location, then export a copy with a name you'll recognize. Open the saved video outside the editor and check its proportions and edges.
Watch a scene with movement as well as the still frame you used while editing. Check that faces have the shape you want, captions are visible and important action stays in view. The saved file needs this check too.
Keep your original recording and editable project while checking the export. The exported movie doesn't keep every separate timeline control. You'll need the project if you decide to change the framing again.
If you're sending it to a phone, use the CapCut PC-to-phone transfer steps after checking the video on your PC. Play the phone copy too so you can judge its size and framing there.
If you can't scale width and height separately, send support your CapCut desktop version, the clip type and a screenshot of the Basic panel. They can check whether the control is missing or you've selected the wrong timeline item.
The Short Version
Select the video, open Basic and Transform, and disable Uniform scale to stretch width or height independently. Keep it enabled to enlarge proportionally. Set the project ratio separately, then check motion, text and the exported movie.
Checked November 5, 2026.

Isaac Smith is the founder and editor of PC Glance, a website that covers computers, laptops, and technology. He is a tech enthusiast and a computer geek who loves to share his insights and help his readers make smart choices when buying tech gadgets or laptops. He is always curious and updated about the latest tech trends.