
A wrong address, failed name lookup or refused connection can cause This site can't be reached on a Chromebook. Reload the correct address and try another website first; the small error code tells you what to check next.
A connected Wi-Fi icon only tells you the Chromebook joined the wireless network. It doesn't tell you that the network has internet access or can find the particular website you're opening.
1. Check the address and how much browsing still works
Return to the original address or bookmark, check its spelling and reload once. Then open an unrelated familiar website. Keep the exact code shown under the error, such as ERR_NAME_NOT_RESOLVED or ERR_CONNECTION_TIMED_OUT.
If only one address fails, open it on a second device connected to that same Wi-Fi. If that site fails on both devices while other sites work, ask the site's operator about it before resetting your Chromebook.

Google explains these codes in its connection-error reference. A name-lookup problem calls for different checks than a refused or interrupted connection.
For ERR_INTERNET_DISCONNECTED, restore the connection first. When the Chromebook can't join Wi-Fi at all, use the Chromebook Wi-Fi connection checks instead of changing website settings.
If the message mentions a private connection or a certificate, keep that wording. Follow the matching clock, certificate or administrator checks for that warning; it needs a different repair from an ordinary unreachable page.
2. Compare the current Wi-Fi with another connection
Save unfinished work, restart the Chromebook and retry that address. If all websites still fail, check whether another device has working internet on the original Wi-Fi.
Try a second trusted network if you can. Your phone's hotspot can work if your plan lets you share its connection. Open the same website so you're comparing networks, with everything else kept the same.
If the Chromebook works there, tell the original network's owner. A router, network filter or internet-service problem can leave Wi-Fi connected while browsing fails. Erasing the Chromebook would leave that network problem untouched.
On a hotel or library network, follow its sign-in notification. If the access page doesn't appear, the connection troubleshooting instructions describe opening an address beginning with http:// to bring it up.
That address is only for reaching the network's sign-in screen. Use the provider's expected sign-in page, then retry your original website. If that page fails on several devices, ask the network operator for help.
3. Save the network result before changing DNS
Open Settings > About ChromeOS > Diagnostics. You can also search for Diagnostics from the Launcher. Its connection tests start automatically for the Chromebook's default connection.
Read the Connectivity result and use Save test details to keep the report. The Diagnostics instructions explain how to tell DNS errors from other connection problems.
DNS looks up the network address for a website's name. If that test fails, try the next step. A failed connection or trouble getting a network address needs a different fix, even if the page shows the same large error message.
If the connection reports DHCP Lookup Failed, follow the Chromebook address-assignment guide. A name-server change doesn't repair a Chromebook that hasn't received a usable network address.
I'd save this report before changing settings on a school network. The administrator gets the failed test, and you can leave required settings alone instead of guessing.
4. Try another name server for a DNS failure
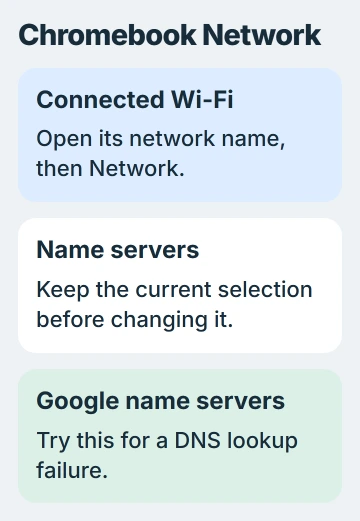
On a personal Chromebook with a DNS error, select the bottom-right time, then the Wi-Fi network. Select your connected network's name and open Network. Find the Name servers section.
Record its current choice before changing it. Select Google name servers, then retry the original website. This uses a different service to look up website addresses on that connection.
The Chromebook DNS repair procedure shows that setting. If access returns, the original lookup service or your connection to it was involved. Nothing needed changing on the website.
If the change doesn't help, restore the previous selection. On a managed Chromebook or a work network, ask IT about unavailable controls or required internal name servers before changing them.
For an outdated saved lookup affecting one site, the webpage troubleshooting page also lists chrome://net-internals/#dns. Open it and choose Clear host cache if the button is there, then reload the site.
That clears remembered name lookups. It doesn't clear the site's photos, cookies or saved sign-in session. If the page or button isn't available in your build, continue with the remaining checks rather than hunting for experimental flags.
5. Check a proxy or a browser-only problem
For ERR_PROXY_CONNECTION_FAILED, open Settings > Network, select the active network, select its name again and open Proxy. Compare its settings with the network owner's instructions.
A proxy is a service that handles web connections for your computer. Whether it's from an old home setup or required for work, it needs the right details. Keep required work settings and send the error to IT if you don't know them.
If the site opens in an Incognito window but fails normally, review extensions and the affected site's stored data. Ctrl + Shift + N opens Incognito when your administrator permits it; some extensions can be allowed there too.
To check for old saved page files, open Chrome's menu and choose Delete browsing data. Select Cached images and files and uncheck the other categories, then choose Delete data. Removing cookies separately can sign you out.
If it still fails, send the site operator or Chromebook support the exact address, code, ChromeOS version and saved connection report. Include whether another network worked. That's more useful than repeating a full reset (Powerwash).
The Short Version
Compare one website with other sites and one connection with another. Save Diagnostics results, then change name servers only for a DNS failure. Check a proxy error separately and give support the error code you still see.
Checked November 5, 2026.

Isaac Smith is the founder and editor of PC Glance, a website that covers computers, laptops, and technology. He is a tech enthusiast and a computer geek who loves to share his insights and help his readers make smart choices when buying tech gadgets or laptops. He is always curious and updated about the latest tech trends.