
3D printing builds an object one layer at a time from a digital model. A program called a slicer turns that model into instructions for your printer, which then lays down or hardens material in the shape of each layer.
For your first print, start with a model file and the right printer and material settings. Check the sliced preview before sending the job to see what the machine will try to make. That matters as much as choosing the shape.
Follow the file from your computer to the printer
A model file describes the object, such as a replacement knob, a small organizer or a decorative figure. Your printer still needs instructions for making that shape with its own hardware and material.
The slicer divides the shape into horizontal layers and works out how to print each one. For a filament printer, that includes where the nozzle moves, how much material comes out and the printing temperatures.
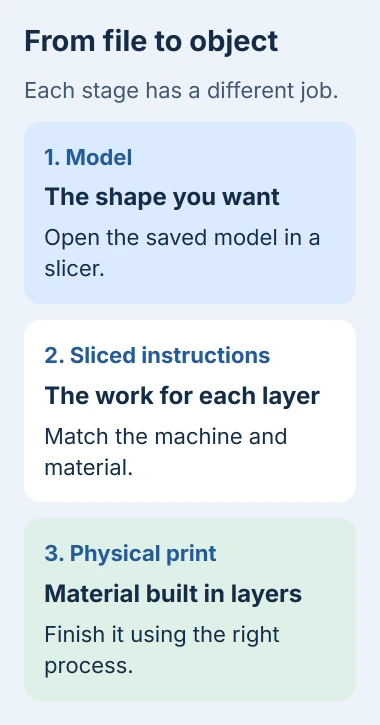
Each stage does a different job. Editing the model changes its shape; changing slicer settings changes how your printer makes it. Starting the print sends the instructions you've prepared to the machine.
A file that looks right in a model viewer can still need work before printing. The object might face the wrong way, be too large for the printer or have an overhanging section with nothing underneath it.
You can prepare the file on a computer you already have, as long as it supports the slicer. Use the slicer's supported Windows, Mac or Linux release. On Windows, follow the installation route for trusted desktop software.
Match the process to filament or resin
A filament printer feeds plastic from a spool into a heated nozzle. The nozzle lays down thin paths on the build surface to form the walls and inside of the object. It adds new layers as the object gets taller.
This process is called FFF or FDM. Both mean printing with melted filament. The printer may move its bed, its print head or both to put the material in place.
If that movement continues without plastic, check the spool and extruder grip before changing the model.
Resin printing works differently: light hardens selected areas of liquid resin one layer at a time. A laser, a light source with a mask controlling where it shines, or a projector forms the layer instead of a nozzle laying down plastic.
Prusa's comparison of printing technologies explains how each type works. Follow preparation and cleanup instructions for your printer type; the materials aren't interchangeable.
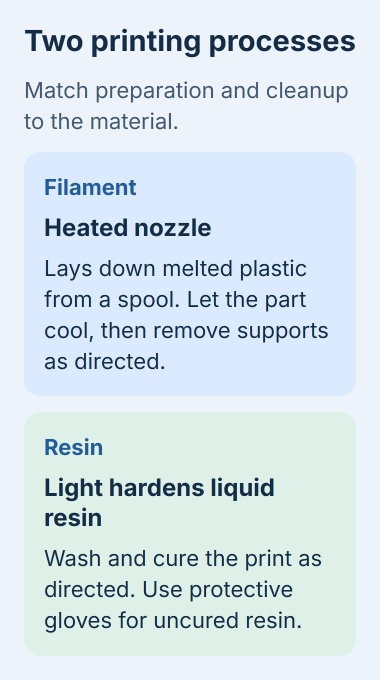
These steps use PrusaSlicer with a filament printer. Resin printers also use sliced layers, but they need supports, light-exposure settings and exported files made for that resin system.
Load a model and select the actual machine
In PrusaSlicer, drag your saved model into the window, use Add, or choose File > Import. Supported model formats include STL, STEP, 3MF, OBJ and AMF. Use a file supplied for the project you intend to print.
Select the correct printer and nozzle size. A preset is a saved group of settings for that hardware. Instructions made for another machine can use the wrong movements, temperatures or printing area.
Choose the material preset that matches the filament loaded in the printer. Different plastics need different temperatures, speeds and cooling. A matching preset gives you a starting point for that combination.
Rotate the model if needed, or use Place on Face to put a chosen surface against the bed shown on screen. Check its dimensions too. The preview shows how much space your selected printer has.
If the model has holes or broken surfaces, return to its design program or use the available repair tools. Looking right on the outside isn't enough; the file needs to describe a solid the printer can make.
Choose layers, supports and the inside of the part
Layer height affects surface detail and printing time. Thinner layers can follow curves more closely, but your printer has to finish more layers to make an object of the same height.
In Bambu Studio, use finer layers around a rounded top while keeping other regions at larger heights.
The first-print instructions suggest 0.15 or 0.2 mm layers as starting examples. Choose a settings profile for your printer and nozzle rather than copying those values into every machine.
Supports are temporary structures that hold up parts which would otherwise start in empty space. They use extra material that you'll remove later. Leaving out a needed support can make that part of the print fail.
Infill is the pattern inside the outer walls. A part can look solid without being solid all the way through. Infill supports top surfaces and affects how much material the part uses and how it holds up under force.
A brim adds material around the edge of the first layer to help it stay attached to the bed. It's useful when only a small part of the shape touches the bed. It isn't part of the finished shape.
I'd use a small, simple model and the supplied presets for the first attempt. That makes it easier to learn the file-to-print process before adding tall overhangs, several materials or complicated moving parts.
Inspect the sliced preview before exporting
Click Slice now. PrusaSlicer then shows a preview of the print. Move the layer slider and check how the part begins, where supports appear and whether the upper sections have something supporting them.
Compare the preview with the model you want to make. If a feature is missing, a section starts in midair or the size is wrong, correct the setup before using up material on the print.
For supported filament printers, export the G-code or binary G-code in a format your machine accepts. These are the files that tell the printer what to do; the original STL or other model file describes the shape.
Use the printer's supported transfer method, such as removable storage or its network software. For another slicer, the OrcaSlicer connection guide covers the separate task of reaching the printer.
Finish the part using the right process
Follow your printer's preparation and first-layer instructions before starting. Each layer needs to stick to the build surface or the layer before it for the object to keep the right shape.
Let a filament print cool as directed before removing it from the build surface. Remove its temporary supports or brim using the method suitable for that material and part.
Wash and cure resin parts as your system's instructions direct. Wear the recommended protective gloves when handling uncured resin. The sticky residue isn't safe to handle just because printing has finished.
Include finishing supplies in your full printer setup budget. Getting a usable object takes the machine, material, software preparation and cleanup.
If prints keep failing despite a correct preview, send the printer maker your model, material, preset and a photo of the failed layer. That gives support the details to suggest a fix without changing every slicer setting at once.
The Short Version
The model supplies the shape; the slicer prepares each layer for the printer. Match the hardware and material presets, inspect the sliced preview, and finish the part using the process for filament or resin.
Checked November 5, 2026.

Isaac Smith is the founder and editor of PC Glance, a website that covers computers, laptops, and technology. He is a tech enthusiast and a computer geek who loves to share his insights and help his readers make smart choices when buying tech gadgets or laptops. He is always curious and updated about the latest tech trends.