
Spinning extruder gears can't feed filament unless they grip it and the path from spool to nozzle is clear. Stop the print and check the spool and gear contact before changing tension or temperature.
These checks are for filament-based 3D printers. The drive gear grips the plastic; the hotend heats and melts it before it leaves the nozzle. A motor can turn even when one of those parts isn't doing its job.
1. Stop the print and check the spool path
Cancel the failed print so the gear doesn't keep scraping the same piece of filament. Check whether the spool can unwind and whether a loop is trapped under another strand or caught on the spool holder.
Follow the strand from the spool to the extruder entrance. Look for a tight bend, a snag or a damaged guide tube. On a Bowden printer, that tube carries filament from a separate feeder toward the print head.
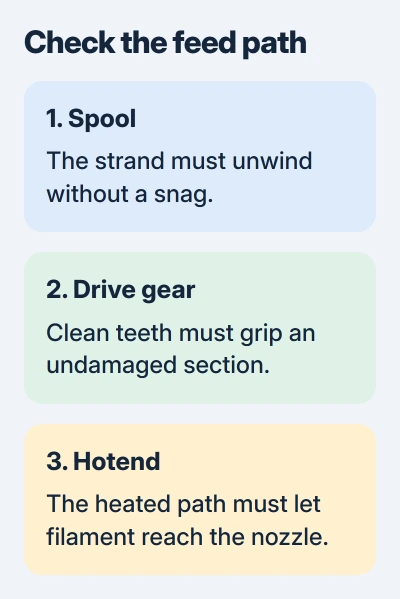
Free any spool snag you can reach before adjusting the extruder. Hold the loose filament end so it doesn't slip beneath another winding. Follow your printer's normal loading procedure to see whether it feeds again.
If the spool turns freely and the strand reaches the feeder, check the grip next. If loading works after you free a snag, you've restored feeding without changing motor settings.
The filament-printing explanation shows how extrusion differs from moving the print head. A printer can continue moving through its planned path while no plastic comes out.
2. Remove the section the gear has ground away
Unload the filament using the printer's supported procedure. The hotend may need to be heated for unloading, so follow the model's instructions and avoid contact with the heated nozzle and heater block.
Check the section that sat between the drive gear and pressure roller. A deep notch, flattened patch or coating of plastic dust means the teeth have been scraping one spot without moving the filament forward.
Cut off the damaged end and reload an undamaged section, preparing its tip as the manual directs. Don't keep commanding extrusion against the same worn notch; the gear needs material it can bite.
Prusa lists dirty teeth, misalignment, a loose gear screw and incorrect pressure in its filament-loading checks.
Stop the machine and prepare it for maintenance as the manual directs. Then remove visible plastic debris from the gear grooves using the model's instructions.
Reload and watch the filament. If the gear spins but the strand stays still, check pressure and alignment. If it moves briefly and stalls again, check for resistance farther along the path.
3. Restore the model's intended idler pressure
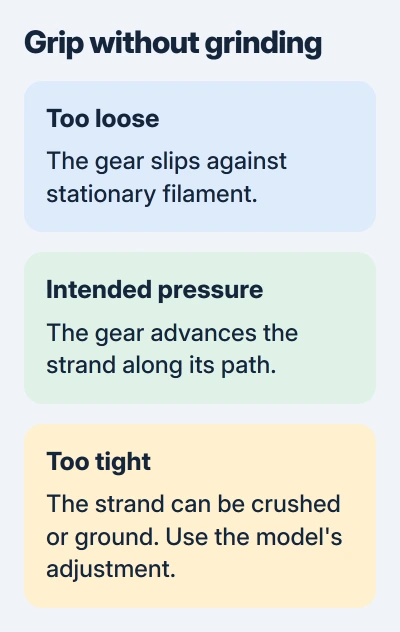
The idler is the roller or gear that holds the filament against the drive gear. It needs enough spring pressure to grip the strand without crushing it or making the motor struggle.
Set the tension to the position specified for your extruder. Tightening a screw as far as it goes won't give you that setting. Too little pressure lets the teeth slip; too much can grind the filament and overload the mechanism.
For a Prusa MK3S+, the idler-pressure reference describes the screw head about flush with, or protruding slightly from, the plastic when filament isn't loaded.
On a MINI+, you'll find the adjustment underneath the extruder. A MK4/S has a different two-screw arrangement. Follow the reference for your exact model; another print head's screw position may not apply.
Put the mechanism back in its operating position and run a normal loading check. If the filament still slips with clean teeth and the specified pressure, check that the groove lines up with the filament entrance.
4. Check whether the gear moves with the motor shaft
Some extruders have a small set screw holding the drive gear to the motor shaft. If the gear slips, the shaft can turn without driving it. Check this only if your model's maintenance instructions let you reach it safely.
Stop the printer before checking the gear's position. On the older Prusa design in the loading guide, its groove must line up with the filament path. The set screw rests against the motor shaft's flat side.
Use your model's instructions to position and secure the gear. An angled filament path adds friction even with clean teeth. Finish the adjustment before trying to load again.
Don't use this direct-drive adjustment on a sealed gearbox or a newer extruder with a different mechanism. If you can't tell which part is slipping, describe it to the manufacturer before taking more apart.
If the gear and filament now move together but nothing comes out of the nozzle, check for a blockage or trouble melting the plastic next. Raising motor current won't clear a physical obstruction.
5. Check temperature, nozzle clearance and a blockage
Choose the correct material profile and heat the nozzle to the temperature specified for your filament and printer. Follow the printer's loading controls, with the nozzle clear of the print surface.
If material flows in that position but not during the first layer, check the model's first-layer calibration. A nozzle pressed too close to the bed can leave the melted plastic nowhere to exit.
If filament still won't flow during loading, follow the manufacturer's clogged-hotend procedure. A cold pull uses filament to pull debris out, but the temperatures and pulling method depend on your printer and material.
For the older models it names, the clogged-hotend guide separates a nozzle clog from material stuck farther up the assembly. Use the matching guide before attempting that repair.
If feeding starts normally and stops later, check the hotend cooling fan and look for blocked ventilation. Heat creep is heat traveling too far up the filament path, softening plastic before it reaches the part meant to melt it.
Stop if the cooling fan isn't working as it should. Give support the printer model, material, temperature and point where feeding stops so they can help with the correct fan or hotend repair.
Finish by checking the next small print
Once loading produces a continuous strand, try a short print with the intended material profile. Watch the first layers. If it fails again, note whether the gear slips, clicks or stops, and check for a new ground notch.
If a Windows computer sends the print directly over USB, keep it awake through its power and sleep settings. Do this after filament feeds properly.
If the printer is missing from your slicer, use the OrcaSlicer connection checks. A slicer connection issue needs different checks from a gear spinning against stationary filament during the printer's own loading command.
The Short Version
Free the spool path, replace damaged filament and clean the teeth. Set the model's intended pressure and check alignment. If gripping works but plastic won't exit, check the material profile, first-layer clearance and hotend blockage.
Checked November 5, 2026.

Isaac Smith is the founder and editor of PC Glance, a website that covers computers, laptops, and technology. He is a tech enthusiast and a computer geek who loves to share his insights and help his readers make smart choices when buying tech gadgets or laptops. He is always curious and updated about the latest tech trends.