
The message Windows 11 installation has failed doesn't identify what stopped setup. After Windows returns to your old desktop, save the full error code, restart the PC, and check space and connected devices before trying the upgrade again.
These checks are for an upgrade you started while Windows was working. A brand-new PC crashing from a USB installer, or an error when choosing a disk for a clean install, needs different checks.
1. Save the error and check what Windows was installing
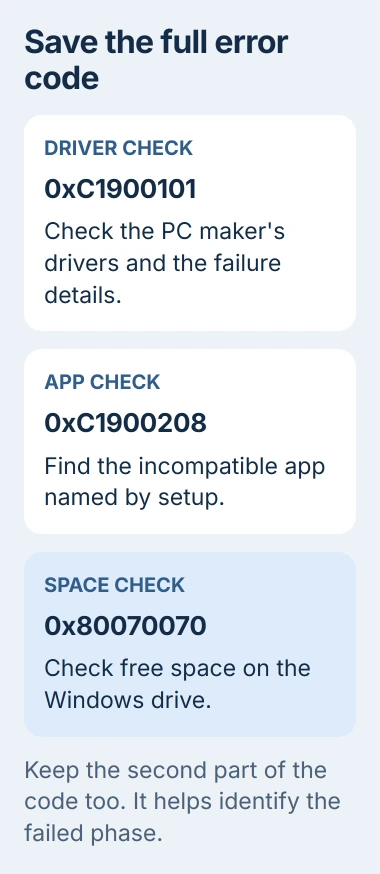
Write down the entire message, including both parts of a code such as 0xC1900101 - 0x20017. The second part tells you when setup stopped. That's useful when two failures have the same first code but need different fixes.
If the failed upgrade came through Windows Update, open Settings > Windows Update > Update history in Windows 11. On Windows 10, use Settings > Update & Security > Windows Update > View update history.
Microsoft's upgrade error guide lists different fixes for drivers, incompatible apps and low storage. Check your code before trying again so you don't repeat the whole installation with the wrong fix.
Check whether you were installing a feature upgrade or a monthly update with a KB number. A failed monthly patch needs different checks from an upgrade to another Windows release.
If your machine is new and crashes before Windows has ever started, use the new-PC installation checks. The desktop and upgrade-log steps here need a copy of Windows that already runs.
Before trying again, back up your important files somewhere you can open them without this PC. An upgrade is meant to keep your files, but protect them first when setup is already failing.
2. Clear a pending restart and check available storage
Choose Start > Power > Restart, then let Windows finish any pending work. 0xC1900107 can mean cleanup from an earlier installation hasn't finished, so a restart can be the required next step.
Once back at the desktop, open File Explorer > This PC and check free space on the Windows drive. 0x80070070 points toward insufficient space; use storage cleanup before repeating the download.
Don't use Windows 11's advertised storage requirement as the free space needed for an upgrade. Setup needs room to work and may also need space for files that let it return to your old installation.
Move personal files you can safely store elsewhere and remove unwanted temporary files through Windows storage controls. Save the failed setup logs for step 5 before clearing setup files or the old Windows copy.
Check Windows Update for current updates and complete their restarts. If setup names an incompatible app or says the PC doesn't meet requirements, address that message instead of clearing folders at random.
If setup blocks the hardware, use the PC maker's instructions to check its processor, TPM security feature and Secure Boot support. Trying a different installer won't add hardware support the PC lacks.
3. Remove accessories and address a named driver or app
Disconnect external drives, printers, docks and other nonessential equipment. Leave the keyboard, mouse and display connected, and keep a laptop on its proper charger throughout the next attempt.
For 0xC1900101, start with the computer maker's current drivers for the exact model. A driver problem can cause this code when setup rolls back, or returns to your earlier Windows installation.
Update any driver named in the error or the results from step 5. If Device Manager shows a device warning, save its status code too. You don't need a third-party driver updater to do this.
For 0xC1900208 - 0x4000C, check which incompatible app setup identifies. Update or uninstall that app through its normal settings, restart, and try again. Save any license or sign-in information needed to restore it later.
If an old VPN, security package or disk utility is named, use its maker's removal instructions. On a managed work PC, ask IT to handle the change rather than removing company protection yourself.
If the upgrade works with accessories disconnected, reconnect them afterward and check any software they need. If it rolls back again, save the new code and try the next check.
4. Try a clean boot when background software interferes
Errors such as 0x8007042B - 0x4000D can mean another program interrupted setup. With a clean boot, fewer programs run in the background. That lets you check whether one is interrupting setup.
Search Start for msconfig and open System Configuration. On Services, select Hide all Microsoft services first, then disable the remaining third-party services and apply the change.
On Startup, choose Open Task Manager. Note which startup apps are enabled, disable them for this test, then close Task Manager. Restart from System Configuration when prompted.
Leave the Boot tab and advanced boot settings alone. The clean-boot instructions use service and startup controls, not changes to how the PC boots.
Try setup once, then follow the normal-startup instructions to restore the services and startup apps you changed. If it works, background software may have been getting in the way. If it fails again, check the logs next.
5. Read SetupDiag before another round of guesses
Windows Setup includes SetupDiag, a tool that reads upgrade logs and checks for known problems. After a failed upgrade, look for the result it saved automatically before downloading another tool.
Open Run with Windows+R and enter this file location:
%windir%\Logs\SetupDiag\SetupDiagResults.xmlOpen the file in a text editor if Windows asks. Look for the failure description, any named driver or component, and the last phase or operation. Check that the file's date and time match your latest failed attempt.
The SetupDiag documentation explains that when several failures appear, the last one is usually what stopped the upgrade. Check that result before treating the first error-looking line as the cause.
If that result file is missing, follow that page's instructions for the latest tool or give the setup logs to support. Look for the original logs in these folders on your Windows drive:
C:\$Windows.~BT\Sources\Panther
C:\$Windows.~BT\Sources\Rollback
Save the whole folders if support asks for them. A single error line may leave out the details needed to work out what happened.
6. Retry from fresh media or get help with the specific failure
If the code points toward damaged installation files, get current media from the Windows 11 download page. Choose the tool for your PC's processor and installation task.
To keep your existing installation, start its matching setup.exe from inside Windows and review what setup will keep. Booting the PC from a USB installer starts a different path and can lead to a clean installation.
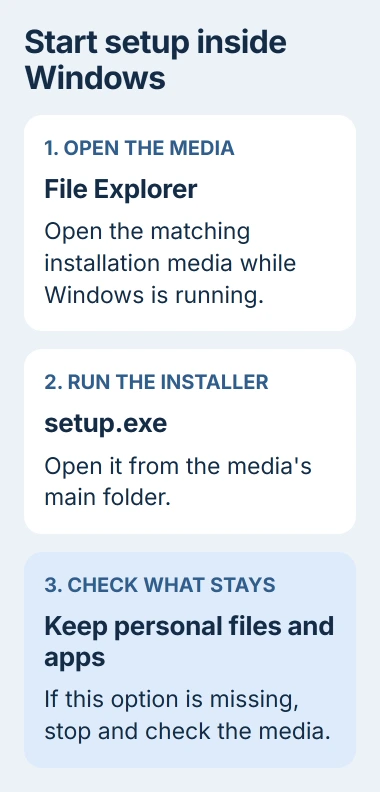
The Windows repair-install guide explains the keep-apps route. If that choice isn't available when you expect it, stop and check the media's language, edition and compatibility before continuing.
If setup still rolls back, give support the full code, PC model, current Windows version, release you're installing and SetupDiag result. Those details help them choose a fix before you run the same installer again.
The Short Version
Save the complete error, restart, check space, and remove nonessential accessories. Follow the named driver or app block, try a clean boot when appropriate, then read SetupDiag before choosing another repair or installation attempt.
Checked November 5, 2026.

Isaac Smith is the founder and editor of PC Glance, a website that covers computers, laptops, and technology. He is a tech enthusiast and a computer geek who loves to share his insights and help his readers make smart choices when buying tech gadgets or laptops. He is always curious and updated about the latest tech trends.