
To print a photo on a Canon printer, set the app's paper size and type to match your photo paper before cropping. In Easy-PhotoPrint Editor on Windows, choose Photos, select your picture, then set the printer, paper and copy count.
Print one photo first. That lets you check which way the paper feeds, whether the crop looks right and how your paper setting affects the result before printing a whole collection.
Prepare the paper and a supported photo app
Check that your Canon model accepts the photo-paper size and type you want to use. Trays and supported sizes vary between printers, so a sheet labeled photo paper won't necessarily fit your tray.
Follow your printer's diagram for which tray to use and which way the printable side faces. Match the printer's paper-size and media prompts too. The glossy side doesn't face the same direction on every model.
These steps use the installed Easy-PhotoPrint Editor desktop app with a supported Canon printer. If your model uses another printing utility, follow that app's photo-printing steps instead.
On Windows, use the Add device procedure if your printer isn't installed yet. For a wireless Canon that hasn't connected to your router, finish its model-specific Wi-Fi setup first.
Select Photos and start with one picture
Turn on the printer, open Easy-PhotoPrint Editor and select Photos on its New screen. The app opens Photo Locations, where you choose the picture you want to print.
Canon describes this sequence in its desktop photo-print procedure. The next screen is Print Settings. Set the photo's copy count to 1 for the first attempt.
Use the original image rather than a small screenshot of it. Enlarge the preview to check the detail. If faces or lettering already look blocky in that image, changing the paper setting won't bring the missing detail back.
Double-check which photo you picked, especially if edited copies have similar thumbnails. A version cropped for a portrait phone screen may give you less room for a landscape print than the original.
I'd leave filters off for the first print. That makes it easier to judge the paper and crop before deciding whether you want to change the image's look.
Set the Windows printer and paper controls
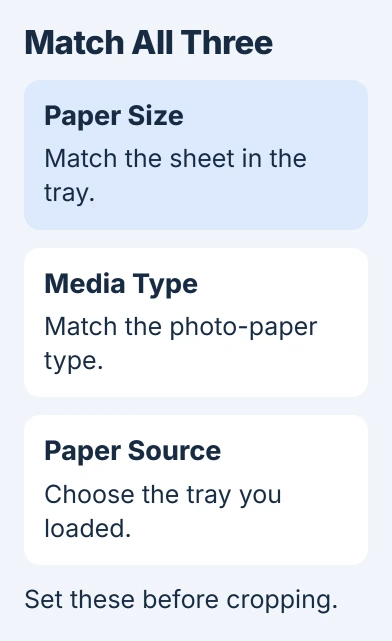
In Print Settings, choose your Printer. Set Paper Size, Media Type and Paper Source to match the sheet and tray you're using.
For example, choose 4-by-6-inch paper only if that's what you loaded. Choose the supported glossy or other photo-paper type that matches your packet. Plain Paper is a separate media setting.
The Windows settings reference explains that Auto for Media Type uses the printer's saved media setting. Check that setting; Auto doesn't recognize whatever paper you put in.
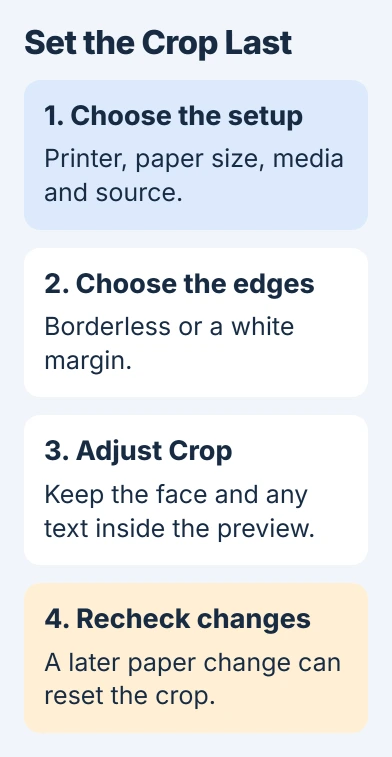
Choose a Print Quality option for your photo from the choices offered. These vary with your model and print job. Set these controls before cropping, since changing the printer or paper afterward can reset the crop.
If you've selected several pictures, check their copy counts too. Same No. of each photo gives them all the same count. With individual counts, you could print two copies of one picture and only one of another.
Choose margins before adjusting the crop
Use Borderless printing if your model, paper and current job offer it. It's meant to fill the sheet without a white margin. Look closely at the preview if a face or caption sits near an edge.
Keep a margin if showing the whole scene matters more than filling the sheet. Your photo and paper can have different proportions, so filling the paper may cut off part of the image.
Choose whether to use borderless printing before you crop. The photo-cropping instructions say changing Printer, Paper Size or Borderless printing on Windows removes your crop.
Changing Media Type or Paper Source can also cancel cropping with some settings. If you change either, reopen the preview and inspect the edges again before pressing Print.
Crop the selected picture and inspect its edges
Select the photo in Print Settings, then click Crop. Adjust the image's size and position within the cropping frame. Use Frame Orientation when the frame should change between portrait and landscape.
The crop window also has rotation, a 90-degree rotation control and Undo. Use Undo if you've cut off too much. Once the preview shows the area you want, click OK to return to Print Settings.
Check the corners as well as the center. Look for a cut-off head, missing text or an important object near an edge. A sharp picture can still have part of its subject cropped out.
If you're printing several pictures, check each preview. Photos with different proportions can need different crops on the same paper. One picture looking right doesn't mean the rest will too.
Follow the extra print dialog on a Mac
The Mac version has a different final step. After choosing your photo and copy count, review the image corrections and crop, load the paper, then click Next.
That opens the macOS Print dialog. Choose your printer, paper and other settings there, then click Print. On Windows you click Print in the app; on a Mac, Next takes you to this extra dialog first.
Set the Mac app's paper size before cropping too. Changing it afterward removes your crop. Recheck the final layout whenever you change the paper choice.
Judge the first sheet before printing more
Click Print once and wait for the result. The app may take time to start printing a large group of high-resolution photos. Sending the job again while you wait can give you duplicate prints.
Let the photo dry before touching its printed surface or putting it in an album. Follow the drying and storage instructions on your paper packet.
If colors are missing or there are repeated streaks, use the nozzle-check and cleaning guidance. A bad crop and missing ink need different corrections, so don't run cleaning cycles to repair the layout.
If the problem continues, give support your Canon model, app version, paper packet details and a picture of the failed print. Include whether an ordinary document prints correctly and which settings you used.
The Short Version
Match the paper and printer settings first, then choose margins and crop. Inspect every preview and print one photo before sending more. On a Mac, Next opens a separate Print dialog before the final print.
Checked November 5, 2026.

Isaac Smith is the founder and editor of PC Glance, a website that covers computers, laptops, and technology. He is a tech enthusiast and a computer geek who loves to share his insights and help his readers make smart choices when buying tech gadgets or laptops. He is always curious and updated about the latest tech trends.