
For a FaceTime screenshot on a Face ID iPhone, quickly press and release Side + Volume Up together. On a Mac, press Shift+Command+4, then Space, and click the FaceTime window.
These are your device's normal screenshot controls, and they save a still image of the call on screen. FaceTime's own photo button takes a Live Photo instead, which can include movement and audio.
Capture the call on an iPhone
Bring the FaceTime video call into view and choose the moment you want to keep. Ask the other people on the call before taking or sharing their picture, especially if the call includes personal information.
Use the buttons that match your iPhone:
| iPhone design | Press together and release quickly |
|---|---|
| Face ID, without a Home button | Side and Volume Up |
| Home button with a side button | Home and Side |
| Older Home-button model with a top button | Home and Top |
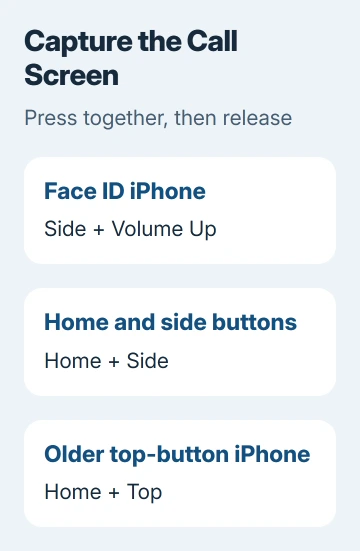
Apple lists these buttons in its iPhone screenshot instructions. Press and release them quickly instead of holding them down, then look for the screenshot preview.
The screenshot includes whatever is visible on your screen, including call controls and other details. Arrange the call view first so the person or information you want to capture is in view.
If someone is moving quickly, try again when their picture is clearer. You can crop the image afterward, but cropping can't add detail that wasn't visible in the call.
If the call is in a small floating window, return to FaceTime to fill the screenshot with the call. Otherwise, your screenshot includes the app behind that floating window too.
Save the preview and find it in Photos
Current iOS can open a full-screen screenshot preview with tools to edit, share and save. Use the save control to choose where it goes, or swipe up to save the full-screen capture to your photo library.
With the small-thumbnail layout, the image saves automatically; tap the thumbnail to edit it. Older iOS versions show this preview in the lower-left corner instead of opening the newer full-screen editor.
The current screenshot guide explains both layouts. If the editor covers your call, check its preview before taking another picture. Your first capture may already be there.
Open Photos > Collections, scroll to Media Types, then choose Screenshots. The preview helps you see the capture, but open the newest saved image to check the copy you'll send.
If you chose a folder in Files when saving, look there instead. A screenshot missing from Photos may have been saved elsewhere; it doesn't necessarily mean FaceTime blocked it.
Crop the still image before sharing it
Open the screenshot's editor and drag the crop handles to keep the part you need. Before sharing, check whether the image includes someone else's name, a phone number or an unrelated notification.
A screenshot keeps a still image without the call's sound or movement. Frame the moment or instruction you want to show; the picture won't explain what happened before it.
If the words in a demonstration are what you need, copy text from an iPhone screenshot. Check the copied words before pasting them elsewhere.
To show someone how to do a task during the call, try FaceTime screen sharing. Use a screenshot when they need a picture to keep and look at again later.
Capture just the FaceTime window on a Mac
Bring the call window to the front. Press and release Shift+Command+4, then press and release Space. When the pointer becomes a camera, click the FaceTime window to capture it.
Hold Option while clicking to leave the window's shadow out of the picture. If it's the wrong window or moment, press Esc before clicking to cancel.
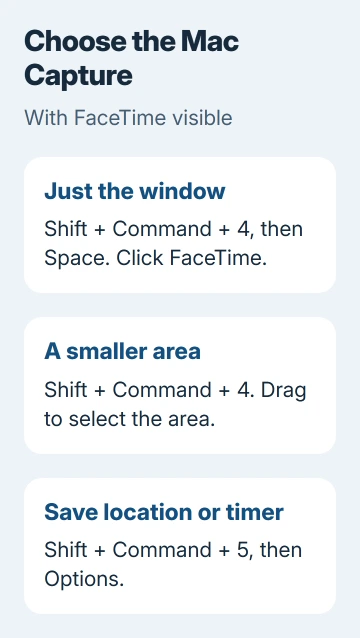
To capture a smaller area, use Shift+Command+4 without Space. Drag over the part you want and release your mouse or trackpad button. Use Shift+Command+3 to capture the entire screen.
The Mac screenshot instructions cover these options. I'd capture the window or a small area for a call; the full desktop may include work you didn't mean to share.
Screenshots save to the desktop by default. Press Shift+Command+5 and open Options to check or change the save location. You can also set a timer there to give yourself time to arrange the call.
Adding Control to the screenshot shortcut copies the image to the clipboard instead of saving a desktop file. Paste it into the app you want, or take another screenshot without Control to save a file.
Choose Live Photo only when that's the result you want
FaceTime's photo button takes a Live Photo, which records a short moment around the capture, including audio. That's different from a normal screenshot, which freezes what's on your screen.
A FaceTime Live Photo capture notifies each person on the call. For a normal screenshot, use your device's screenshot controls instead of the Live Photo button.
If a Live Photo is missing, use the FaceTime photo-saving checks. Changing Live Photos permissions won't help you locate a normal screenshot in Photos or on the Mac's desktop.
If screenshots fail outside FaceTime too, tell Apple Support your device, software version and which screenshot method you tried. Say whether a preview appeared or you couldn't find the saved file; those need different checks.
The Short Version
Use the iPhone's screenshot buttons or capture the FaceTime window on Mac. Save and inspect the image, then crop before sharing. A normal screenshot is a still picture; FaceTime Live Photos add movement and audio and notify participants.
Checked November 5, 2026.

Isaac Smith is the founder and editor of PC Glance, a website that covers computers, laptops, and technology. He is a tech enthusiast and a computer geek who loves to share his insights and help his readers make smart choices when buying tech gadgets or laptops. He is always curious and updated about the latest tech trends.