
MSI laptops that show Secure Boot Mode let you change it from Standard to Custom under Security > Secure Boot. Custom opens controls for managing trusted startup keys; it doesn't turn Secure Boot on by itself.
That matters when a game needs Secure Boot enabled or a Linux installer asks for a different key setup. Check which change your task needs before changing anything else.
1. Prepare Windows before entering the BIOS
Save your work and find your BitLocker recovery key if drive encryption is enabled. Startup security changes can trigger a recovery screen. Have the key ready on a phone, paper or another device.
The recovery-key instructions explain the personal-account, work-account and saved-copy options. The recovery key has 48 digits. Your Windows PIN won't unlock that screen.
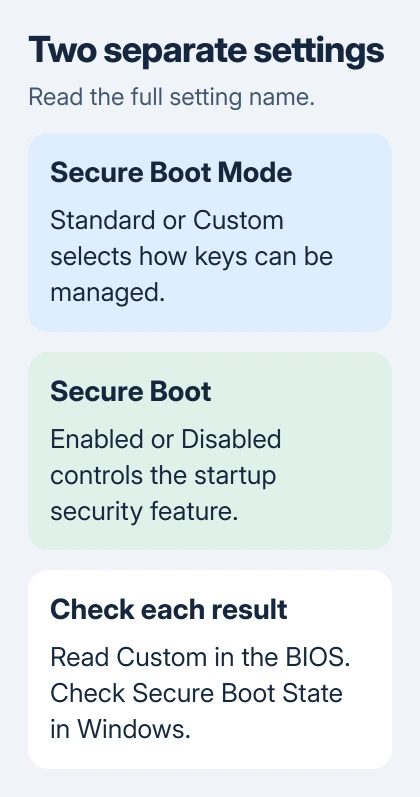
Press Windows key + R, type msinfo32, and press Enter. In System Summary, note System Model and BIOS Version/Date, then record the Secure Boot State and BIOS Mode values. Keep these details to compare after the change.
UEFI with Secure Boot On means Windows already reports it as enabled. If a game still rejects that setup, choosing Custom alone won't tell you what other requirement the game is checking.
If BIOS Mode reads Legacy, use the Windows Secure Boot preparation guide first. Changing how Windows starts takes more than opening the key controls.
2. Open the laptop's Secure Boot menu
Restart the laptop and tap Delete as the MSI logo appears. This opens the BIOS, the firmware settings screen that runs before Windows. If Windows loads instead, restart and begin tapping earlier.
Find Security, then Secure Boot. Look for a separate entry named Secure Boot Mode. It may currently show Standard. Another entry controls whether Secure Boot itself is enabled.
Read the labels carefully. System Mode uses User or Setup to show the state of the installed keys. It isn't the Standard/Custom choice you're trying to change.
BIOS menus vary by laptop model and version. A screen with Settings > Security may arrange the same controls differently. Follow the names on your laptop rather than copying a menu's position in a video.
If you can't find Secure Boot Mode, go to the missing-option section. Changing unrelated Boot settings won't help: a graphics switch or a TPM switch won't make Custom appear.
3. Select Custom and save that change
Highlight Secure Boot Mode, press Enter, and select Custom when that choice is offered. Check that the mode value now reads Custom before leaving the page.
An MSI laptop setup report describes this Security-menu route and the differences from motherboard layouts. Its later steps clear keys for a Linux setup; you don't need them just to change the mode.
Change only the mode selector. Reset to Setup Mode, Delete All Secure Boot Variables and key-deletion commands do more than select Custom. Leave them alone even if changing the mode makes them available.
Press F10, read the save confirmation, and accept it if the listed change is the one you intended. Let the laptop restart normally. Use the screen's own save command if its key legend gives a different one.
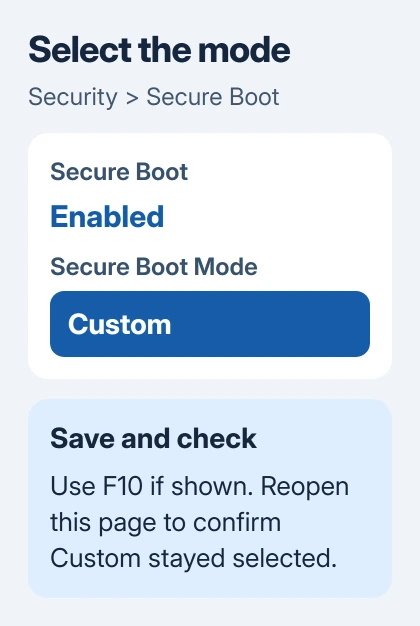
Open the BIOS again and check that Secure Boot Mode still shows Custom. That's how you know the setting saved. A key-management menu may also appear, but check the mode value itself.
If it changed back, record the model, BIOS version and exact save message before trying again. Changing more settings now could hide the reason the mode didn't save.
4. Verify the result your task needs
After Windows starts, run msinfo32 again and compare Secure Boot State with the value you recorded. This shows whether Secure Boot is active, but it won't show the BIOS Standard/Custom choice.
For a regular Windows installation, you may not need Custom at all. I'd leave Standard selected unless the instructions for your task call for access to custom key controls.
Custom also isn't a certificate update. For an older Secure Boot configuration warning, follow the warning's specific instructions. Saving Custom doesn't clear that warning by itself.
For a Linux installation using its own signing key, return to its instructions for adding that key. Changing the mode only gives you access to the controls for doing that.
If you only need Secure Boot enabled for Windows, check the separate enabled setting and the requirements for your model. Stop when Windows shows the expected result. Custom isn't an extra security level.
When the option is missing, locked or followed by an error
For a grayed-out control, get the instructions for your exact laptop and BIOS version. Some MSI laptop owners report extra advanced menus, but another model's shortcut isn't a reason to change hidden BIOS settings.
Ask MSI Support whether your model offers Custom and how to unlock it. Send the System Model and BIOS Version/Date values, plus a picture of the Security page. For a laptop managed by your workplace, contact its IT team.
If Windows asks for the recovery key after the change, match the recovery-key ID on screen with your saved key. For a startup error instead, write down its exact wording and the one setting you changed.
If support asks you to undo the change, put Standard/Custom back to its original value. Avoid loading all BIOS defaults: that can change storage, boot and other settings unrelated to the problem.
If startup still fails, give MSI the error and original settings before restoring keys or updating the BIOS. Those repairs need steps for your model; they aren't part of selecting Custom.
The Short Version
Enter the MSI BIOS with Delete, open Security > Secure Boot, and choose Custom under Secure Boot Mode if the laptop offers it. Save, check that Custom remains selected, and verify Secure Boot State separately in Windows.
Checked November 6, 2026.

Isaac Smith is the founder and editor of PC Glance, a website that covers computers, laptops, and technology. He is a tech enthusiast and a computer geek who loves to share his insights and help his readers make smart choices when buying tech gadgets or laptops. He is always curious and updated about the latest tech trends.