
Lines on a monitor can come from a loose cable, the computer's video output or the screen itself. Unplug and reconnect the cable first, then open the monitor's own menu to see whether the lines run through it too.
The next checks help you decide what needs fixing. Lines in the monitor's built-in test colors point you toward monitor service; lines that appear only after Windows starts need different checks.
1. Reseat the video cable and remove the dock from the test
Shut down the computer and switch the monitor off. Unplug the video cable at each end, then reconnect both plugs firmly. Turn everything back on and check the same area.
Check the plug and cable for damage while they're disconnected. Look for a sharp bend behind the desk or a loose adapter before changing software.
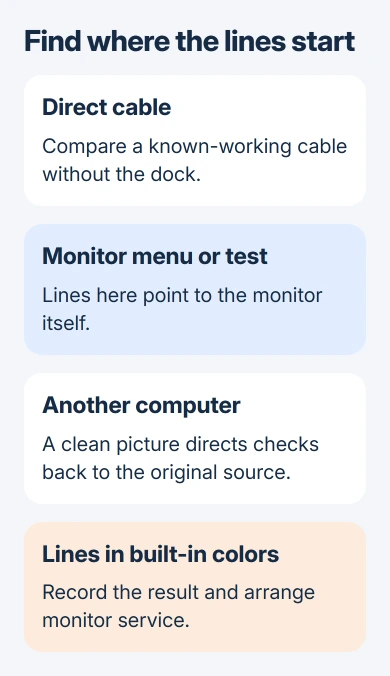
If a dock, hub or adapter sits between your computer and display, try connecting them without it if the ports allow. That checks whether the extra device is involved.
Try a compatible cable that you know works, if you have one. If the lines disappear with that cable and return with the original, replace the original cable. Reinstalling Windows isn't needed for that result.
I'd try a cable that already works before buying a screen. That comparison tells you more than a stripe's direction or color alone.
If a damaged or unusable connector keeps you from getting a good connection, use the HDMI port checks to compare the computer and monitor ends. Otherwise, check the monitor's own picture next.
2. Open the monitor's menu using its physical controls
Press the physical Menu button, or open settings with the monitor's joystick. The monitor creates this menu itself; it doesn't come from Windows or a game.
Check whether the lines run through the menu too. ViewSonic's monitor-line instructions explain how that comparison helps tell a screen fault from a problem with the picture sent by your computer.
If the lines cross the menu and stay after you disconnect the video cable, check the monitor's hardware next. A Windows driver change can't fix a line in a picture the monitor creates itself.
If the menu looks normal, check the connection and try another computer. For lines that come and go, run the monitor's full built-in test too. A brief look at the menu can miss them.
Don't press or twist the screen to make a line disappear. Physical pressure can damage a panel and doesn't provide a lasting repair.
3. Run the model's built-in display diagnostic
Find the manual for your exact monitor model and look for Built-in Diagnostics, BIST or Self-Test. BIST means built-in self-test. The name and buttons you need to press vary by model.
Follow that sequence, including any instruction to disconnect the video cable. Two monitors from the same brand may need different button sequences.
The test may show a series of solid colors. Look for the line on each color and note whether it stays in the same position. You're checking the display without relying on a Windows app or desktop picture.
For supported Dell models, the monitor diagnostic procedure points to the right self-test and manual. Follow your model's controls; the menus aren't all the same.
If the same line appears in those test colors, stop changing computer settings and arrange monitor service. If the colors look normal, reconnect the display and try another computer or video source.
4. Compare another computer or another monitor
Connect the affected monitor to another laptop or desktop with a suitable cable. Open a page or desktop background that makes the lines easy to see.
If the lines stay on that monitor with different computers and cables, tell its manufacturer. The problem isn't limited to the Windows installation on your original computer.
If the monitor works with the second computer, check the original computer's port, adapter and display settings next. That result points you back to the computer and its connection before you pay for screen repair.
If you have another monitor, connect it to the original computer. Lines on both displays from the same output point toward that output or its connection. A normal second screen helps narrow down which parts are involved.
For each comparison, swap just one part. Swapping the computer, cable and adapter together might clear the lines without telling you which part needs replacing.
5. Try the recommended resolution and a lower display rate
In Windows 11, open Settings > System > Display and select the affected monitor. Try its Recommended display resolution first. If you have several displays, check that you're changing the one with the lines.
Open Advanced display and find Choose a refresh rate, which sets how many times the screen updates each second. Try a lower listed rate, such as 60 Hz if offered, and compare it with the higher rate that showed lines.
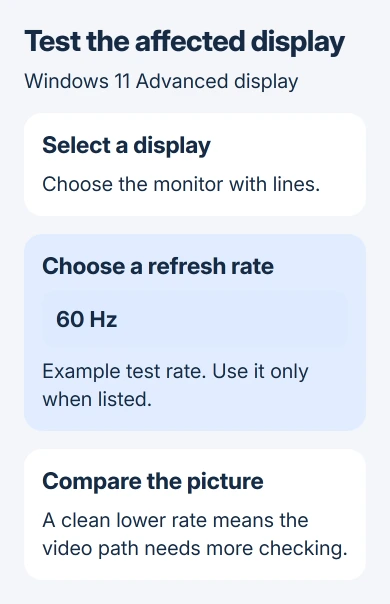
Microsoft's refresh-rate controls list only the choices available for your selected display. An asterisk beside a rate means it also changes the resolution, so check for that when comparing results.
If a lower supported rate clears the lines, keep it while you check what rates your cable, adapter and monitor support. That still leaves you to check whether the cable or screen caused the lines.
The active signal resolution guide helps if Windows' desktop resolution differs from what it sends to the screen. Keep that difference in mind when comparing display modes.
6. Check the driver only after the monitor tests clean
If the lines started just after a graphics-driver update, open Device Manager > Display adapters, then the affected adapter's Properties > Driver. Select Roll Back Driver if it's available to restore the previous driver.
If you can't roll back, use the computer or graphics maker's driver for your hardware. Save your work before installing it, restart when asked and check the same display mode afterward.
Changing the driver makes sense if the monitor looks normal in its own test or with another computer. It won't help when the monitor shows that stripe during a test with no video cable attached.
If the lines persist, tell the display maker your model number, connection type, which cable you tried and what the test showed. Include a clear photo of the lines and ask about warranty service or a repair estimate.
The Short Version
Try another cable, then check the monitor's own menu and test colors. Try another computer before changing Windows display settings or drivers. If lines stay in the monitor's built-in test, arrange monitor service.
Checked November 6, 2026.

Isaac Smith is the founder and editor of PC Glance, a website that covers computers, laptops, and technology. He is a tech enthusiast and a computer geek who loves to share his insights and help his readers make smart choices when buying tech gadgets or laptops. He is always curious and updated about the latest tech trends.