
Digitally sign a Word document in Windows through File > Info > Protect Document > Add a Digital Signature. You'll need a signing certificate. For a document with a signature line, right-click the line and choose Sign instead.
A pasted signature picture only adds an image. Use Word's digital signing tools when the recipient needs to check who signed and whether the document changed.
Get the document and certificate ready
Finish the document's text and formatting before signing. A digitally signed Office document becomes read-only, and changes to signed content can make the signature invalid.
Save a separate working copy if you expect more editing. The Word document copy steps help you keep an editable copy separate from the signed file.
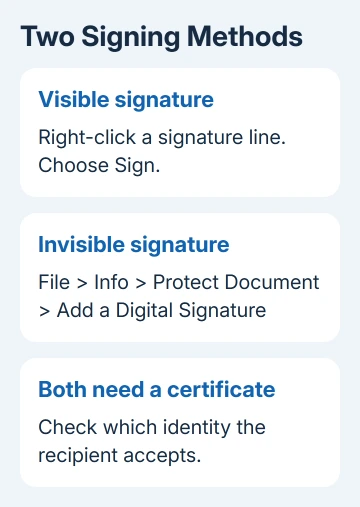
Ask the recipient or your organization's IT team which signing certificate they accept. A certificate is the digital identity used to verify a signature; typing your name into a document doesn't create that identity.
Microsoft documents two certificate routes: a certificate authority (an organization that issues certificates), or creating a certificate yourself.
A self-created certificate requires recipients to decide manually to trust it. I'd check that requirement before signing an important file. A signature that looks finished on your PC can still be untrusted on theirs.
These signing commands are in desktop Word for Windows. If you're using macOS or a browser, switch to the Windows desktop app or ask the recipient for an accepted signing service.
Add a digital signature without a visible line
Use this method when the file needs a verified signature but doesn't need a signature graphic on the page. Open the finished document in desktop Word.
- Select File > Info.
- Open Protect Document and choose Add a Digital Signature.
- Read and accept the Office message if one appears.
- Choose the appropriate Commitment Type.
- Enter the reason in Purpose for signing this document.
- Check the signing identity and select Sign.
The Office digital-signature instructions describe this as an invisible signature. It signs the document without inserting your handwriting into its body.
After signing, look for the Signatures button and the signature information under File > Info. The file should now be read-only.
If Word asks for a digital ID instead of finishing, return to your certificate provider or IT team.
Create a visible signature line when the page needs one
Place the cursor where the signature should sit. Open Insert, then use Add a Signature Line in the Text group. Depending on the ribbon layout, the control can be shown as Signature Line.
In Signature Setup, enter the suggested signer's name. Add their title, email address and signing instructions where needed. These details identify who should sign. The line stays unsigned until they sign it.
Select the options for signer comments or showing the signing date if you need them. Choose OK to place the unsigned line into the document.
For several signers, add all the lines first. Send the file to each person in the agreed signing order, keeping its wording unchanged once signing starts.
Sign the line and inspect its certificate
Right-click the signature line and choose Sign, or double-click it. Type your name beside the X, use inking where supported, or choose Select Image for a picture of your written signature.
Select Sign to finish signing with your certificate. The name or image becomes part of that signature.
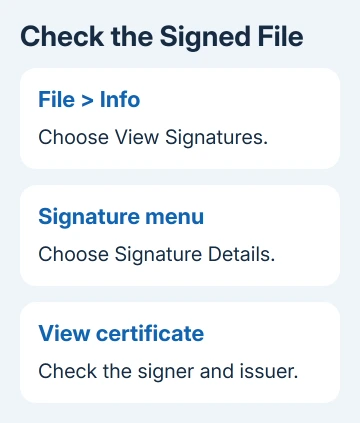
Open File > Info > View Signatures to inspect the result. Open the signature's menu, select Signature Details, then choose View to inspect the certificate.
Check the signer and issuer. The signature-details page explains valid, invalid and recoverable signature states.
A recoverable error can involve an offline check, an expired certificate or an untrusted issuer. Give IT or your certificate provider the error shown in the signature details.
Correct a signed file through a fresh signing cycle
If the text needs changing, keep the original signed version and prepare the corrected working file. For a visible line, right-click it, select Remove Signature and confirm when you're authorized to remove it.
For an invisible signature, open File > Info > View Signatures, use the signature's menu, select Remove Signature and confirm. Make the correction, then arrange signing again.
If the file instead asks for an editing password, follow the Word editing-protection steps. Password protection and a digital signature need different controls.
If signing fails, give your IT team or certificate provider the Word version, exact message and certificate details. Check that the recipient can verify the signature in the finished file.
The Short Version
Use a signing certificate with Add a Digital Signature or the Sign command on a signature line. Inspect the completed signature in File > Info. Keep later edits in a corrected version that goes through signing again.
Checked November 7, 2026.

Isaac Smith is the founder and editor of PC Glance, a website that covers computers, laptops, and technology. He is a tech enthusiast and a computer geek who loves to share his insights and help his readers make smart choices when buying tech gadgets or laptops. He is always curious and updated about the latest tech trends.