

A USB cable and the Photos app can send pictures from an iPhone to a computer without cloud syncing. On Windows, install Apple Devices first, unlock the phone, and approve Trust This Computer.
Pictures stored only in iCloud need a different route: download the originals before importing, or use iCloud for Windows. A Mac can import over USB too, while AirDrop is handy for a few pictures.
Get the iPhone ready for a Windows import
Install Apple Devices from the Microsoft Store app on your PC. Apple says to install it before transferring pictures in its photo-transfer instructions; the actual picture selection happens in Microsoft Photos.
Plug the iPhone straight into the PC using a data-capable USB cable. Charging can work through a cable that lacks file-transfer connections. I'd try another known data cable before changing anything on the phone.
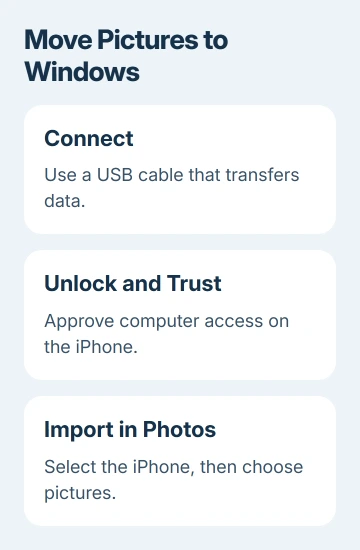
Enter the iPhone's passcode to unlock it. When Trust This Computer? appears, tap Trust and enter the passcode if requested. Keep the phone connected while Windows detects it.
That approval lets this computer access the phone's data. Use your own computer for the transfer. A borrowed charging port isn't a reason to approve computer access.
If the prompt never arrives, check whether Apple Devices detects the iPhone. If it doesn't appear there either, check the cable and trust approval before trying to select pictures.
The missing or repeated Trust This Computer prompt has its own checks. Use those when the phone connects but you can't finish that approval, rather than repeatedly opening Photos.
Import the pictures into Windows Photos
Open Start, type Photos, and launch the Photos app. Select Import, then choose your connected iPhone. Wait for the app to finish looking for available pictures and videos.
Select the items you want, choose where to save them when prompted, and start the import. The device list and wording can differ between Photos releases, but the entry you need is the connected phone, rather than an existing PC folder.
For a large collection, start with a small selection you can recognize. Open those pictures from their saved location on the PC. That checks whether you can both transfer the pictures and open the copies on your computer.
Once that works, import the remaining items you need. Leave the cable attached until the transfer finishes. An interrupted import can leave you with only part of the selection, even though some thumbnails already appear.
Check the destination folder as well as the Photos library. Knowing where the files landed makes it much easier to find them later in an email attachment dialog, a backup program, or another photo editor.
Windows 11 and Windows 10 both use the Photos import route described here. Older app screenshots can show different buttons, so follow Import and the device name instead of searching for a particular thumbnail layout.
Handle pictures that exist only in iCloud
An iPhone can display a picture whose full-resolution original is stored in iCloud. With storage optimization enabled, the phone doesn't necessarily hold every original that a USB import needs.
Open Settings > your name > iCloud > Photos. On iOS 27, tap iPhone Storage, then Download and Keep Originals. On older releases, choose that download option directly on the Photos page.
Make room on the iPhone for these full-size files, then let the download finish before importing over USB. A large video collection can need considerably more space than the optimized versions already on the phone.
Alternatively, open the cloud collection in iCloud for Windows. Use the Apple Account from the phone and enable photo access. This gets cloud-only originals through iCloud instead of the USB connection.
In File Explorer, open iCloud Photos from the navigation pane. Double-click a thumbnail to download and view its full-size version. Seeing a thumbnail in that folder doesn't mean the full-size file has finished downloading.
Treat iCloud Photos as a synced library. Save the pictures you need in a separate location and open those copies before deleting originals. Removing a synced picture can remove it from the other synced devices too.
For USB importing, the useful question is whether the original has reached the phone. For the iCloud route, it's whether the file has downloaded to Windows. Those are two different transfers, even when the picture looks identical on screen.
Import into Photos on a Mac instead
For a Mac import, attach the iPhone, unlock it, and approve any accessory or trust request. Launch Photos, then click the phone's sidebar entry if the import view hasn't appeared.
Choose Import Selected for a selection or Import All New Items for the available new pictures. Wait for the import to finish before disconnecting the phone.
AirDrop can send a few items wirelessly. For files saved straight into a folder rather than a Photos library, use Image Capture. The iPhone-to-Mac transfer guide covers those choices in detail.
AirDrop works with a Mac for this transfer. On Windows, use the Photos import steps. Windows doesn't have an AirDrop receiving setting.
When the phone or imported pictures still won't cooperate
When charging works but detection doesn't, test another data-capable cable, followed by another USB port. Reconnect it while unlocked, then check Apple Devices again. Check detection in that app before asking Photos to import again.
If the iPhone appears but some pictures are missing, check the iCloud-originals issue. If files arrive but won't open, note the file extension and the exact Windows error instead of importing the same selection repeatedly.
For future captures that need broad Windows compatibility, open Settings > Camera > Formats on the iPhone and select Most Compatible. New photos use JPEG and new videos use H.264. This doesn't convert pictures already taken.
If the phone still isn't detected, tell Apple Support your iPhone model, iOS version, and whether it appears in Apple Devices. For failed importing after detection, open Windows Get Help with the Photos error and Windows version.
The Short Version
Prepare Windows with Apple Devices, approve the cable connection, then import through Photos. Cloud-only pictures need downloaded originals or iCloud for Windows. Open the saved files before deleting anything.
Checked November 8, 2026.

Isaac Smith is the founder and editor of PC Glance, a website that covers computers, laptops, and technology. He is a tech enthusiast and a computer geek who loves to share his insights and help his readers make smart choices when buying tech gadgets or laptops. He is always curious and updated about the latest tech trends.