
For a one-time transfer, connect the iPhone to your Mac with a data cable and import the pictures in Photos. Choose Image Capture instead if you want separate files in a Finder folder rather than pictures inside the Photos library.
AirDrop suits a small selection without a cable. If both devices already use iCloud Photos with the same account, the library syncs automatically, so check that before importing another copy.
Choose where the pictures should end up
Decide whether you want a photo library or a folder of files. Photos puts the pictures in its library, where you can browse, edit and organize them. Image Capture lets you choose a normal folder on the Mac.
AirDrop lets you send a handful of pictures without a cable. For a library that stays in sync across your devices, use iCloud Photos instead of transferring each new set of pictures yourself.
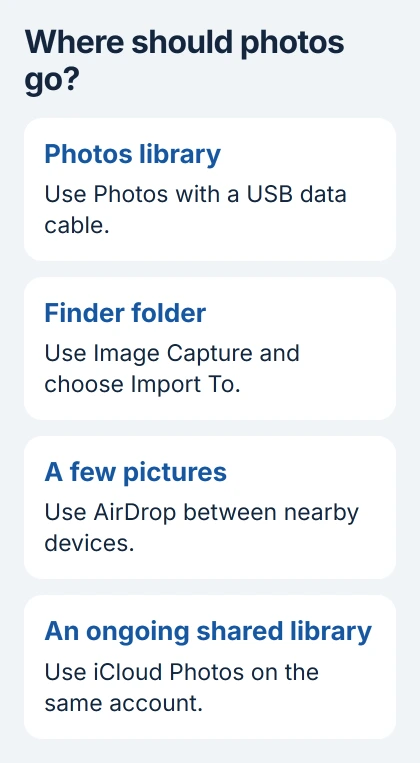
I'd use a cable for a large one-time import and Image Capture if I wanted the files in a folder. Decide that first so you're in the right app before you start selecting hundreds of pictures.
Check that the Mac has enough space for what you're moving. Keep the iPhone copies until you've opened the imported pictures and played the videos on your Mac. Seeing a thumbnail doesn't tell you whether the saved photo or video opens.
1. Connect the iPhone and approve access
Plug the iPhone into the Mac with a cable that supports data. Match the ends to the phone and computer: newer iPhones use USB-C, while older ones use Lightning. An adapter may be needed for the Mac's ports.
Unlock the iPhone with its passcode. If it asks Trust This Computer?, tap Trust and enter your passcode when asked. On a Mac that asks to allow the connected accessory, choose Allow.
Keep an eye on both screens. The Mac's accessory prompt and the iPhone's trust prompt are separate permissions. If you approve only one, Photos or Image Capture may still be unable to see the iPhone.
Apple explains these prompts and the Photos route in its photo-transfer instructions. Charging alone doesn't confirm a working data connection.
If neither Photos nor Image Capture sees the iPhone, try a known data cable and a direct connection to the Mac. The iPhone detection checks explain what to do when the device itself is missing.
2. Import into the Mac's Photos library
Open Photos on the Mac. Select the iPhone under Devices in the sidebar if the import view doesn't open automatically. Wait for its available pictures and videos to appear.
Select the items you want and click Import Selected. To import everything the app marks as new, use Import All New Items, Import All New Photos or the equivalent import button in your version.
Use the Album menu to choose an existing album or make a new one when offered. An album organizes the pictures inside the library; it doesn't create a separate Finder folder containing those files.
After the import finishes, open a few pictures and play a video in Photos. Check recent items as well as older ones, then disconnect the iPhone once the transfer is complete.
The Mac photo-organization guide explains albums and folders inside Photos. If you want files for another editor or a folder outside Photos, use Image Capture next instead.
3. Save pictures directly into a folder with Image Capture
Open Image Capture on the Mac, using Spotlight search if needed. Connect and unlock the iPhone, then select it in the sidebar. Its available photos and videos should appear in the main area.
At the bottom, open Import To. Choose a suggested folder, or choose Other and select where you want the files saved. Make a new folder there if you want to keep this transfer together.
Select the pictures and videos you want, then click Download. Use Download All for all available items. These buttons save files from the iPhone to the folder you've chosen on the Mac.
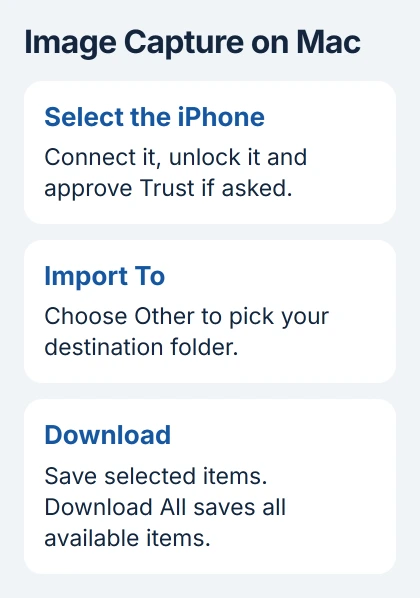
The Image Capture instructions explain the destination choices. A Live Photo downloads as two files: its still picture and its short video. Keep both files for the moving version.
After the transfer, open your chosen folder in Finder and check the files. To keep your phone's originals, leave automatic deletion off while you check the copies.
4. Send a small selection with AirDrop
Turn on Wi-Fi and Bluetooth on both devices and keep them nearby. Open Control Center > AirDrop on the Mac and allow receiving from the people you're sharing with. The transfer won't work while receiving is off.
On the iPhone, open Photos, select the pictures, tap Share, then choose AirDrop. Tap the Mac's name. Accept the transfer on the Mac if it asks; transfers between your own devices on the same account can be accepted automatically.
If your software versions require a code for someone outside Contacts, follow the Get AirDrop Code prompt. Use the code on the receiving device to finish the transfer on the sending device.
Check the prompt on your Mac to see where the items will go. Some go to Downloads; a photo may offer a choice to open in Photos. Look in that location before sending the same selection again.
AirDrop is convenient for a few items. For a large collection, using Photos or Image Capture with a cable makes it easier to choose where the files go and check the finished import in one place.
5. Use iCloud Photos for an ongoing library
To make new pictures appear on the Mac automatically, check the account name on both devices. Both need the same sign-in. On the iPhone, open Settings > your name > iCloud > Photos and enable Sync this iPhone.
On the Mac, open System Settings > your name > iCloud > Photos and turn on Sync this Mac. Check that your collection fits in your iCloud plan, then leave both devices online while the pictures sync.
For full-size local copies on the Mac, open Photos > Settings > iCloud and choose Download Originals to this Mac. On older macOS, the Photos menu uses Preferences instead of Settings.
The iCloud Photos settings explain how to save space or download originals. With optimized storage, your Mac may keep smaller versions while the full originals stay in iCloud.
Deleting a picture in an iCloud Photos library deletes it from the other devices using that library too. If you want to free space on the phone while keeping the photos, save a separate backup first.
When some pictures are missing
If importing fails, use the iPhone-to-Mac import checks. First check whether the app can't see your iPhone at all or can see it but shows only some of your pictures.
On macOS 15.4 and later, a locked Hidden album on the iPhone isn't included in these imports. For those items, open Settings > Apps > Photos on the phone and turn off Use Face ID, Use Touch ID or Use Passcode, as offered.
Import the pictures you want, then turn that protection back on. This setting controls the Photos lock, so keep the phone with you while it's off.
If the same items still won't transfer, give support your macOS and iOS versions, the app you're using and the exact message. Keep the originals while they help you fix the connection or library problem.
The Short Version
Photos imports into its Mac library. Image Capture saves files to a folder, while AirDrop sends a small selection wirelessly. iCloud Photos keeps a library synced across devices. Check the saved items before removing any originals.
Checked November 5, 2026.

Isaac Smith is the founder and editor of PC Glance, a website that covers computers, laptops, and technology. He is a tech enthusiast and a computer geek who loves to share his insights and help his readers make smart choices when buying tech gadgets or laptops. He is always curious and updated about the latest tech trends.