
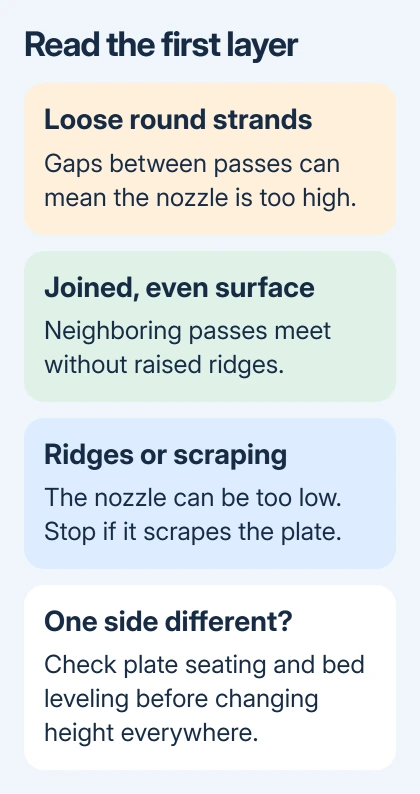
First layer problems usually come from a dirty plate, wrong nozzle height, or the wrong material profile. Clean the surface first. Loose round strands suggest the nozzle is too high; ridges and scraping suggest it's too close to the plate.
Corners that lift need different attention from plastic that never sticks. If no plastic comes out, check the filament feed. These steps cover filament printers, where a nozzle lays melted plastic onto a plate, rather than resin machines.
1. Clean the plate for the surface and material
Stop the failed print before loose plastic gets dragged around the bed. Let the machine cool for safe handling and remove the failed material. Check that the sheet sits correctly, with no scraps trapped underneath.
Identify the surface before choosing a cleaner. Smooth PEI, textured PEI, satin sheets, glass, and specialty plates don't all use the same treatment. A cleaner that works on one plate can damage another coating.
For Prusa's smooth, satin, and textured steel sheets, its first-layer troubleshooting recommends suitable isopropyl alcohol for routine cleaning. Products made for skin or nails can contain oils that work against adhesion.
If adhesion on those sheets has declined despite alcohol cleaning, a few drops of dish soap with warm water can remove residue alcohol leaves behind. Follow the sheet instructions, dry it thoroughly, and handle it by the edges afterward.
Don't use acetone on textured or satin Prusa sheets. For a different maker's plate, follow its own cleaning directions rather than applying a PEI recommendation to an unknown surface.
Try a small first-layer print again. If the strands now stay attached, dirt or residue was part of the problem. If they still look round and separated, check height next rather than adding more cleaner.
2. Adjust nozzle clearance from the printed pattern
Look at the layer while it's being laid down. With the nozzle too far from the plate, strands remain rounded and gaps stay between adjacent passes. The nozzle may pull them loose instead of joining them into one surface.
With too little clearance, the material gets pushed into ridges, the nozzle can scrape through earlier passes, or plastic barely comes out. Aim for strands that join into an even layer, rather than forcing the nozzle as close as possible.
On older Prusa i3 models using this calibration system, open Calibration > First layer calibration and use Live Adjust Z during the test. Follow the model's calibration directions and judge the final patch, not just the first purge line.
A more negative Live Adjust Z value brings the nozzle closer on those models. Move gradually while watching the result. Don't copy another owner's numerical offset: sheet thickness and the individual machine affect the needed setting.
Prusa MK4-family, XL, and CORE One sense nozzle contact to set up the first layer automatically. The older i3 Live Adjust Z isn't the routine first step. Check their nozzle and loadcell instructions if automatic setup gives poor results.
Other brands call the controls Z offset, baby stepping, or first-layer calibration. Check which direction brings your printer's nozzle closer. Stop immediately if the nozzle scrapes the plate; continuing the print can damage the surface.
If extrusion works with the nozzle raised away from the plate but stops at the surface, check the nozzle height. If material won't feed even away from the plate, go to the extrusion section instead.
3. Restore the actual printer and filament profiles
Open the model in your slicer, which turns it into printer instructions. Select the actual printer model, nozzle size, and filament type. A profile for another nozzle or material can spoil the first layer.
In PrusaSlicer, check the Printer, Print settings, and Filament selections before slicing again. Use the supplied material profile's nozzle and bed temperatures as the starting point rather than a temperature copied from an unrelated spool.
Check the first layer in the sliced preview. It should rest on the bed, with the intended contact area. A model floating over the plate or touching at only a tiny point needs its placement or supports checked.
The model-to-print workflow explains why exporting the right sliced file matters. Changing a profile on the computer won't change an older file already stored on the printer's card.
Send or save the newly sliced file and run that version. If the first layer improves, keep the working profile with the project. That way, you won't repeat the failure by choosing an old file next week.
4. Slow a layer that won't stay in place
After cleaning and height checks, reduce first-layer speed using the slicer's first-layer speed control. Faster movement can pull a poorly attached strand away before neighboring passes join it.
On Prusa models with a live speed percentage, the first-layer guide suggests trying about 75% for the first three layers, then returning to normal. That recommendation is a percentage of the existing speed, not a universal 75 mm/s target.
Change one setting and repeat the small print. I'd slow that test before changing several temperatures at once; the result is easier to understand when only one thing changed.
If adhesion is still poor, check the spool's temperature range and bed profile. For unfamiliar materials, Prusa's guide suggests a bed increase of 5 to 10 degrees Celsius, within the material and plate instructions.
A layer that sticks initially but curls at its corners needs more contact area or a material-specific warping check. In PrusaSlicer, enable a Brim and inspect it in preview. A brim adds removable material around the base.
Use a separating layer, a coating that helps the print release, when your sheet and filament combination calls for one.
For example, PETG can adhere too strongly to smooth PEI. Glue in that situation protects the surface during removal; maximum adhesion isn't always the goal.
5. Check uneven results and interrupted extrusion
If one side looks right while the opposite side has gaps or ridges, check plate seating and rerun the printer's bed-leveling routine. Lowering the nozzle everywhere won't solve a height difference across the bed.
On automatic sensing models, plastic stuck to the nozzle can affect contact sensing. Follow your model's cleaning and loadcell check rather than changing an unrelated offset. Follow that printer's hot-end handling procedure.
If no plastic comes out, check spool movement, filament loading, and whether the extruder is grinding the filament. The filament feeding checks cover that path before moving to a blockage procedure.
If a PC streams the print over USB and the job stops when it sleeps, adjust its power and sleep controls. That fixes an interrupted job, not poor adhesion.
If the problem keeps happening, send support a first-layer photo, printer and nozzle model, sheet type, filament, and selected profile. Ask for the model's calibration or loadcell check if one side stays wrong after leveling.
The Short Version
Clean the right surface, read the strand pattern, and use your model's height procedure. Restore matching slicer profiles, then try a slower first layer or a brim. Treat uneven height and missing extrusion as separate problems.
Checked November 9, 2026.

Isaac Smith is the founder and editor of PC Glance, a website that covers computers, laptops, and technology. He is a tech enthusiast and a computer geek who loves to share his insights and help his readers make smart choices when buying tech gadgets or laptops. He is always curious and updated about the latest tech trends.