
Rooting a Samsung S25 Ultra depends on whether its bootloader can still be unlocked. Check that before downloading anything: One UI 8 removed the normal unlock route, and US or Canadian models have additional market restrictions.
A phone on eligible older firmware can use Magisk's Samsung method. An unlocked SIM doesn't help when the bootloader remains locked. Check whether your handset qualifies before preparing a modified firmware file.
Check the software and the kind of unlock
Write down the model number from Settings > About phone. Open Software information and note the One UI version and build number. Keep those details together; steps for a different regional model or firmware won't necessarily work on yours.
The bootloader decides which system software the phone may start. Unlocking it allows modified software, which is what the usual Magisk method needs. Root then gives approved apps access to parts of Android that ordinary apps can't change.
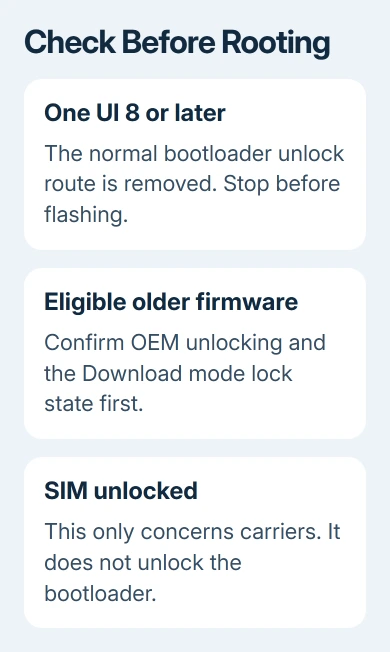
A network unlock only lets the phone accept another carrier's SIM. The Samsung carrier unlock procedure explains that separate process. Paying off a phone or buying it unlocked doesn't mean you can unlock its bootloader.
The UN1CA maintainer's bootloader instructions warn that official One UI 8 removes unlocking. Don't follow an older S25 tutorial that skips this check or promises a universal downgrade.
Stop before flashing, which writes firmware to the phone, if your installed software has no unlock route. This procedure can't bypass that restriction. Continue only when your handset's firmware and bootloader still permit unlocking.
Prepare backups before changing the bootloader
Unlocking erases the phone, and the first Magisk installation requires another full wipe. Save photos, files, messages and any app-specific exports before continuing. Check that the saved copies open somewhere other than this handset.
Review your Android backup coverage rather than assuming every app is included. Google's backup settings show the account and the data categories being saved.
Make sure you can get to your passwords and two-factor recovery methods after the phone is erased. Don't leave the only sign-in approval method on this phone. Have the cable and computer ready for transferring firmware later.
Installing Magisk trips Samsung's Knox Warranty Bit permanently. Returning to stock software doesn't reset that bit. I'd leave the phone unmodified if a Knox-dependent feature is something you rely on every day.
Open the official Magisk releases page, expand Assets if needed, and download the Magisk APK. Don't choose either source-code archive.
Follow the Samsung installation section for the current tools and patching controls. Older tutorials may use different ones.

Read the lock state before attempting a flash
Open Settings > About phone > Software information and tap Build number seven times to enable Developer options. Confirm your screen lock if prompted, then look for OEM unlocking in Developer options.
On eligible firmware, enable that setting. If it isn't available, don't treat the missing switch as permission to flash anyway. Region restrictions, firmware and device management can prevent the unlock that this method requires.
Before checking the lock state, enable Settings > Device care > Maintenance mode as the Magisk procedure directs.
Read OEM Lock and KnoxGuard in Download mode. ON (L) means locked, ON (U) means locked with OEM unlocking enabled, and OFF (U) means fully unlocked.
An absent OEM Lock entry can indicate a market restriction. KnoxGuard states Active or Locked also block this installation. A Prenormal state still needs attention; it doesn't mean unlocking has finished.
Power off the S25 Ultra. Keep both volume buttons pressed while attaching a USB cable between phone and computer. This opens the Download mode warning. Read the offered choices before continuing; unlocking erases your data.
Use the long Volume Up unlock option only when the phone offers it. Confirm the warning, allow the reset, then complete initial setup with an internet connection. Re-enable Developer options and check the OEM unlocking state again.
Patch the matching Samsung firmware package
Match the firmware package to your exact model and an allowed build. Another region's files or a lower bootloader revision won't unlock a phone that doesn't support it. Check that your phone qualifies before installing Magisk.
Extract the package on the computer. Samsung firmware includes files labeled AP, BL, CP and CSC, with HOME_CSC as another CSC choice. Keep the files from the same package together.
Copy the large AP archive to the phone. Install and open the official Magisk app, then use Install in its Magisk card. The current instructions call the method Patch firmware / image, followed by Select from storage.
Select that AP archive and let patching finish. The output is a patched tar archive, not an APK and not the untouched AP file. Check the output filename shown by the app before moving it back to the computer.
Install official Android SDK Platform-Tools on the computer. Enable USB debugging in the phone's Developer options, connect its cable and approve this computer's prompt.
Use ADB, the debugging command tool, to copy the patched archive. Ordinary MTP transfer can corrupt large files. Run adb pull /sdcard/Download/NAME.tar, replacing NAME.tar with the output's actual filename.
On Windows, open PowerShell in the extracted platform-tools folder and use .\adb.exe in place of adb in that command. The copied tar should appear in that folder; keep it with the matching firmware package.
Complete the initial installation and verify it
Return the phone to Download mode. Use samloader, following the current Samsung flashing instructions, and assign the patched archive to AP and the original package's BL, CP and CSC files to their matching slots.
For the first installation, the instructions use CSC, not HOME_CSC, because a wipe is required. The later upgrade procedure uses a different choice. Keep those procedures separate so you know which step will erase your phone.
Allow the phone to restart and accept a factory reset if requested. Once Android setup finishes, install and open Magisk again. Let its additional setup complete, including the automatic reboot it requests.
Open Magisk after that reboot and check that it reports an installed version. Installing the app alone isn't root; both the modified firmware installation and the app's final setup need to finish.
Future updates need the project's rooted Samsung upgrade procedure. Don't flash individual stock boot-related partitions to clear a warning or repair startup.
For a failed flash, save the error and ask in the project's support channel. Include the handset's model, build and files used so the person helping knows exactly what you installed.
The Short Version
Check firmware and bootloader eligibility first. One UI 8 removes the normal unlock route. Eligible older phones need backups, an unlocked bootloader, a matching AP archive patched in Magisk, a full initial flash and Magisk's final setup.
Checked November 9, 2026.

Isaac Smith is the founder and editor of PC Glance, a website that covers computers, laptops, and technology. He is a tech enthusiast and a computer geek who loves to share his insights and help his readers make smart choices when buying tech gadgets or laptops. He is always curious and updated about the latest tech trends.