A USB cable that won't fit a ViviCam 8300s needs a different connector, not a driver. Don't push it into the camera. Match the exact 8300s model, or remove its SD card and copy the pictures with a computer card reader.
Using a card reader avoids the camera socket entirely. It works for pictures stored on the card; photos held in the camera's internal memory need a separate transfer. First, check which end of the cable is causing trouble.
In this guide
1. Match the cable to the camera, not just the brand
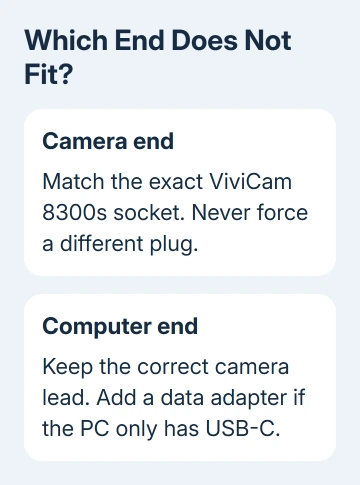
Read the model marking on the camera itself. ViviCam 8300s is the model you're matching. A listing that only says Vivitar camera cable doesn't tell you whether its small connector will fit this camera.
Compare the opening with the connector's metal end under good light. Check its shape, width and orientation without pushing. A connector that stops at the opening isn't a software problem, even if the other end fits your computer perfectly.
The manual shows a USB connection but doesn't name a standard replacement plug in its transfer steps. Look for a seller who confirms the exact camera model rather than relying on a blurry product photo.
Ask the seller to confirm ViviCam 8300s, including the final letter, and send a clear photo of the camera socket. Compare the replacement against the original lead, if it's available. I'd do that before ordering another generic camera lead.
If the original plug no longer enters, check for a bent end or damage around the opening. If the socket is loose or damaged, stop trying cables. A new cable won't put the socket back in place; ask a camera repair shop to inspect it.
2. Fix a mismatch at the computer end separately
Sometimes the camera end fits, but the computer only has USB-C sockets and the cable ends in the larger rectangular USB-A plug. Keep the correct camera cable and use a USB-C adapter that supports data at the computer end.
An adapter on the computer doesn't change the connector going into the camera. It solves a missing computer port, but it can't make the wrong camera plug fit.
Leave the dock or monitor hub disconnected during this check. If the camera appears when connected directly, reconnect the dock afterward. If it only fails through the dock, check that connection.
Microsoft says to use a cable capable of file transfer in its photo-import instructions. A cable that supplies power might still be unable to carry your pictures.
If the connectors fit but Windows still sees nothing, continue with the camera's USB mode. For a broader computer-port problem, the USB connection checks also explain why a direct computer socket and a working transfer lead matter.
3. Copy the SD card without using the camera cable
Switch off the camera, then open its battery and SD-card compartment. Press the edge of the SD card lightly to release it, then remove it. Put that card into a compatible computer card slot or an external USB card reader.
The reader handles the connection while the camera stays disconnected. Pick a reader whose computer plug fits your PC or Mac and whose slot accepts the card you removed. You don't need a new memory card to copy those files.
On either Windows 11 or 10, open File Explorer > This PC and open the card's drive. Look inside DCIM and its folders. Copy the photos into a new folder on the computer, keeping the originals on the card for now.
On a Mac, open Finder and select the card in the sidebar under Locations. Open DCIM, then drag copies of the files into your chosen Mac folder. If the card isn't in the sidebar, check Finder's settings for displaying external disks.
Don't accept a request to format a card containing the pictures you want. Formatting is a different operation from importing. The SD card formatting guide explains that difference before you prepare a card for reuse.
Open several copied photos from the new folder on your computer. Check those files, rather than the thumbnails on the card. Use the operating system's Eject command before disconnecting the reader or putting its card back into the camera.
4. Set USB to PC when a fitting cable stays invisible
Once the correct cable fits, turn the camera on and select its Setup mode. In the Basic menu, choose USB, press SET, choose PC, then press SET again. Connect the camera to the computer.
Vivitar's 8300s transfer procedure uses that PC setting before looking for the camera as a removable disk. The printer connection mode is for printing, not copying files to your computer.
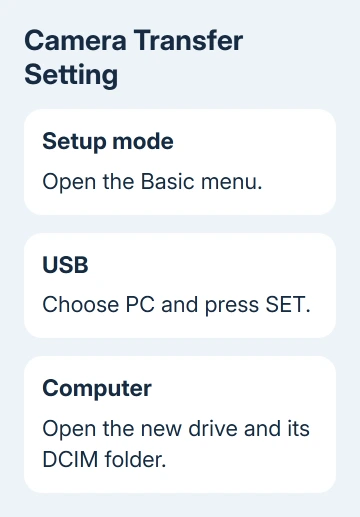
Check This PC in Windows for the new drive, then open DCIM. The old manual calls the computer window My Computer; modern Windows uses This PC. The drive letter can differ, so identify the drive that appeared when you connected the camera.
Keep the camera powered while files copy. If it disappears mid-transfer, check its battery and cable before trying again. The original CD's Windows 98 driver can't fix a plug that doesn't fit a modern computer.
5. Separate internal-memory photos from card photos
The 8300s also has internal memory. A card reader can only read the card you've inserted into it. An empty card, or a card missing the oldest photos, doesn't tell you that the camera's internal pictures have been erased.
If pictures appear on the camera but not on its card, check where they're stored. Keep the camera and card together while you check. Use the correct cable in PC mode to access the camera; another card reader can't read its internal memory.
Ask a camera repair shop for separate prices to recover internal-memory photos and repair the socket. For an unreadable card holding irreplaceable photos, stop writing to it and ask a data-recovery service about recovery.
The Short Version
Use an 8300s-compatible cable without forcing its plug. An SD reader retrieves card photos without the camera socket. A fitting cable still needs USB set to PC; internal-memory pictures can't be read by removing the card.
Checked November 13, 2026.