
An ASUS monitor's HDMI No Signal message means the selected port isn't receiving usable video. Wake your computer, match the input to its HDMI socket, then reseat the cable before opening Windows display controls.
The visible warning gives you a starting point: check the video feed from your computer. If the screen is dark with no menu or power light, check power first. Note whether the picture never appears or disappears when Windows loads.
1. Wake the computer and match the HDMI input
Wake the computer by tapping a key or moving your mouse. Use the monitor's own buttons or joystick to open input selection. Choose HDMI 1 when using the socket with that label, or HDMI 2 for the other socket.
Some models have an input-select button; on others, you need to open Menu first. Check the labels and your monitor's manual to find the right button. ASUS models don't all use the same controls.
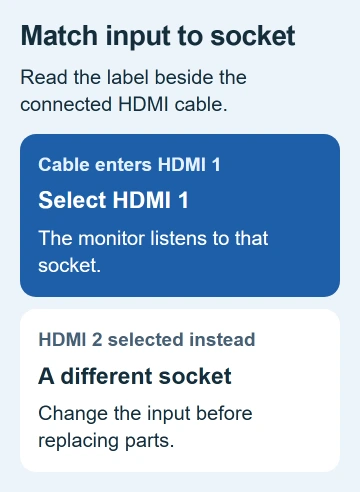
ASUS recommends checking the selected port in its no-display troubleshooting. Even with the cable firmly connected, the monitor may be waiting for a picture from a different port.
Check whether the monitor's menu stays visible and the connected device is awake. If the correct input still shows No Signal, test the cable next. Selecting the same input again won't tell you whether the connection works.
2. Reconnect the cable and remove the dock for a test
Shut down the connected equipment and disconnect its HDMI cable. Check the cable and sockets for damage, then push both plugs fully into place.
If you're using a dock, splitter or converter, try HDMI directly from your computer to the monitor if the computer supports it. That takes the extra devices out of this test.
The Windows external-display checks include removing accessories and trying another cable. Borrow a compatible cable that works elsewhere before buying a replacement.
Change one item at a time. If bypassing your dock restores video, note that result. If another cable brings the picture back through the same two sockets, check the original cable or connection.
For a portable display, check its power supply as well as the video cable. USB-C adapters and portable monitors work in different ways. A plug that fits doesn't tell you which device supplies power or video.
3. Check which socket on the computer supplies video
Follow the HDMI cable back to your computer. A desktop graphics card has its own video ports, separate from the motherboard, the PC's main circuit board. Use the output your PC's setup instructions specify.
The graphics card's ports usually sit in the part of the case with slots for add-in cards. Motherboard ports sit with USB and network connections. Check your PC manual, since the position varies between cases.
Whether a motherboard HDMI socket works depends on your processor and PC setup. If it isn't active, selecting that connection on the monitor won't give you a picture. Use a working video output for the next test.
For a laptop, use its HDMI output or a USB-C video adapter that the laptop supports. The Windows HDMI guide explains the display controls once the computer has a working screen.
I'd check the socket before reinstalling any driver. A driver change won't make an unsupported video connection work.
4. Compare another source and a second display
Connect the ASUS monitor to another compatible computer or video source, using a cable that already works. Select the HDMI input used for this test.
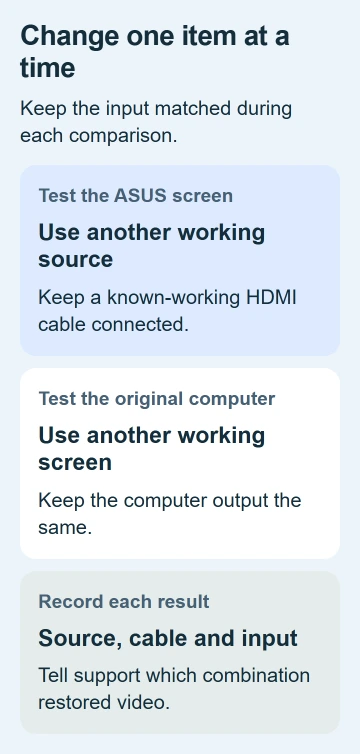
If the other source gives you a picture, check your original computer, dock or output settings next. If you still see No Signal with that working source and cable, look more closely at the monitor's input or settings.
If you have a spare display, try the test the other way around. Connect it to the same output on the original computer. If the second screen works there, that output is less likely to have failed completely.
Write down which source, cable and input you tried, plus what happened. Give support those details so they can see which parts worked together and which combinations failed.
5. Use Windows projection and resolution controls
With the laptop's own screen or another monitor available, press Windows+P and choose Extend for an additional desktop. Check whether the ASUS appears in Settings > System > Display.
If the ASUS remains absent from Display settings, use the second-monitor detection checks. Work from the visible screen so you can see which display is selected before making changes.
If you see the startup logo, then lose the picture as Windows loads, check the picture size (resolution) and how often it updates (refresh rate). Use settings supported by your exact monitor and connection.
Open Settings > System > Display > Advanced display to inspect the refresh rate for the selected screen. Use the resolution and layout controls for its recommended resolution.
If a new display setting caused the problem, use another screen to restore the setting that worked. Don't force a higher advertised refresh rate before checking that your connection supports it.
6. Reset the monitor only after the connection checks
If you can open the monitor's menu, look for Reset, All Reset or a factory-reset option. The support steps use Menu > System Setup > Restore factory mode (Reset) > Yes as an example; your model's wording may differ.
Before confirming, note any picture settings you'll want to put back. After the reset, select the HDMI input you're using and test again with the working source and cable.
Check what your model's power light means too. Amber can indicate standby or a missing signal on many displays, while OLED and portable models use different signals. A flashing orange light on an OLED model can mean pixel cleaning.
Those colors don't mean the same thing on every model. Tell support your exact model and what the light does. An amber light alone doesn't mean the panel has failed.
When the HDMI input still won't accept a picture
If the correct input fails with another working source and cable, contact ASUS about the monitor. If the screen works elsewhere, contact the computer or dock maker with the comparison results.
If your PC shows no startup picture on any display, it may need a startup or graphics repair. Fans and lights don't tell you whether it finished starting. Give the PC maker any diagnostic light or beep pattern.
The Short Version
Match the selected input to the connected HDMI socket, then try a direct working cable. Compare another source or screen. Check Windows settings from a working screen, then reset or service the monitor if the results point there.
Checked November 5, 2026.

Isaac Smith is the founder and editor of PC Glance, a website that covers computers, laptops, and technology. He is a tech enthusiast and a computer geek who loves to share his insights and help his readers make smart choices when buying tech gadgets or laptops. He is always curious and updated about the latest tech trends.