

ASUS laptop display issues visible in BIOS, the setup screen before Windows, need a hardware check before another Windows reinstall. For blur, flicker or colored blocks, restart and compare BIOS with Windows.
A laptop that shows nothing at startup needs the startup checks instead. These steps are for a distorted built-in display, including when an external monitor works but the laptop's own screen doesn't look right.
1. Restart and describe what the screen is doing
Save your documents, then choose Restart from the Windows power menu. Look for the same problem on the ASUS logo, sign-in screen and desktop. Note whether it affects the whole screen or just one app.
If Windows still responds but the picture suddenly breaks up, press Windows + Ctrl + Shift + B once. Windows may beep or briefly blank the screen as it restarts the graphics driver, the software that controls the display.
If that brings the picture back, open the same app and see whether the problem returns. Tell support if the shortcut helps only temporarily or if the problem comes back during normal use.
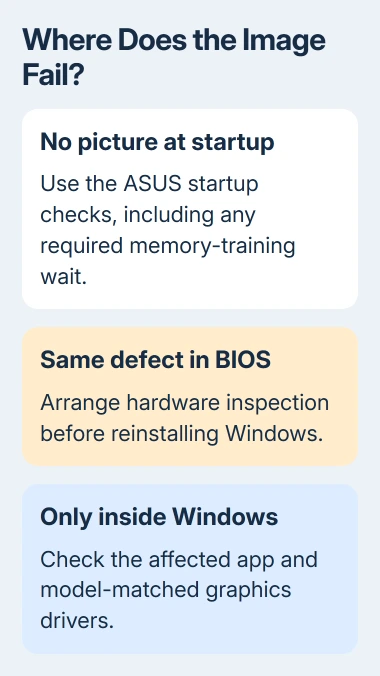
If no ASUS logo or picture appears at startup, use the ASUS black-screen startup procedure. After memory or firmware changes, startup may need extra time. That wait doesn't apply to a laptop already running with a distorted picture.
2. Look at BIOS without changing its settings
Shut down your laptop, then hold F2 as you press Power. When BIOS setup appears, let go of F2. This screen runs before Windows and its normal graphics driver load.
ASUS's internal display troubleshooting guide recommends this comparison. If the same distortion is present there, arrange an authorized hardware inspection instead of repeatedly reinstalling Windows drivers.
Look for the same flickering, colored blocks or damaged-looking part of the picture. BIOS normally has a simpler layout and may use a different resolution. Those differences aren't the problem you're checking for.
Leave setup without saving changes. You're only comparing the picture; loading defaults or changing boot options isn't needed for this check.
If BIOS looks normal, check Windows software next. If the problem comes and goes, note whether you saw it during this check. A normal picture for a few moments doesn't rule out a hardware problem.
3. Separate one application's problem from the whole display
Open a simple Windows window and compare it with the affected app. If the desktop looks normal but a game shows broken graphics, check that game's updates and hardware requirements before treating the panel as damaged.
For general flickering, press Ctrl + Shift + Esc and watch Task Manager. If it flickers along with the desktop, check the graphics driver. When Task Manager is stable despite flickering elsewhere, check for an incompatible app.
Use the Windows flickering guide for the next steps that match what you saw. That lets you check the affected app or driver without removing several programs and drivers at once.
If the problem starts only when a particular program runs, update that program and retest. Close it afterward and compare the ordinary desktop again. Note the program version and whether a recent update changed the behavior.
If your laptop's screen fails but a connected monitor works, use that monitor to save files and reach the next settings. It gives you a usable screen, though the comparison alone won't tell you which internal part failed.
4. Check both graphics devices on a dual-GPU laptop
Right-click Start, open Device Manager and expand Display adapters. Some ASUS laptops list one graphics device; others list integrated graphics plus a dedicated NVIDIA or AMD device.
Integrated graphics are part of the main processor setup. Dedicated graphics use an extra graphics processor, also called a GPU. A laptop with both may need drivers for both, including the one without the gaming brand name.
Open each adapter's Properties > Driver and note its Driver Version, Driver Date and any warning symbol or error. Keep each device name with its version so support can tell which driver you're describing.
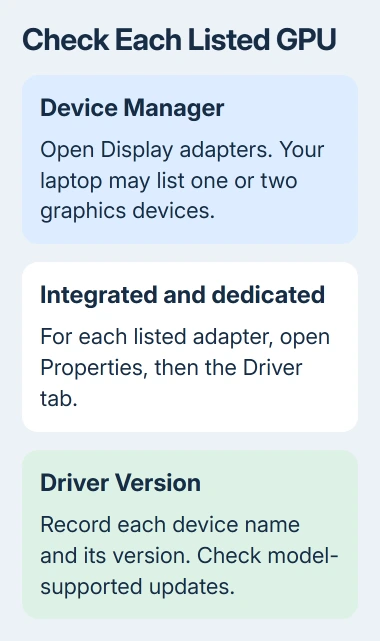
The model-specific display guidance calls for checking both graphics devices if your laptop has them. Keep the integrated adapter enabled; disabling it changes how the laptop handles its display.
For a fault that started after a graphics update, check Roll Back Driver on that adapter's Driver tab. It restores the earlier driver when available. A grayed-out button means that version isn't available there.
5. Install the supported updates through MyASUS
Open MyASUS from Start and select System Update if your laptop has that page. Let it check for updates, then review the graphics updates offered for your laptop. A package for a similarly named model may be different.
Select the items you need and choose Update Selected Items. Restart if asked, then check the same app or screen that showed the problem. In MyASUS, Update history shows whether those items installed successfully.
The MyASUS update instructions explain that page in the app. If System Update is missing, ask support for drivers matching your laptop's model code and Windows version.
An empty list means no newer updates are offered. A recently installed driver could still be involved. Give support its version and the date the problem started when asking about an earlier driver for your model.
I'd try the drivers for your exact model before another generic graphics download. If support asks you to remove a driver first, have the replacement ready and a usable screen before you start.
6. Report recent hardware changes and use service when needed
Tell support if the screen problem started when you added or replaced RAM (memory). The internal-display guide lists incompatible memory as a possible cause and recommends putting the previous memory back when appropriate.
Ask the installer to compare the memory if you're unfamiliar with opening laptops. The right setup depends on your model, so have them check it rather than pulling parts from a sealed laptop at random.
Arrange a display inspection if the problem appears in BIOS, the panel is physically damaged or the picture changes as you move the lid normally. Keep the lid steady instead of repeatedly moving it to bring the problem back.
Send the repair team your model, what BIOS looked like, the GPU names and whether another monitor worked. Back up files you can access before service. Ask them to check the screen and its connections before quoting a replacement panel.
The Short Version
Restart, then compare BIOS with Windows. If the problem appears in BIOS, arrange a hardware inspection. If it appears only in Windows, check apps and graphics drivers. Check both GPUs if fitted and use updates for your exact model.
Checked November 5, 2026.

Isaac Smith is the founder and editor of PC Glance, a website that covers computers, laptops, and technology. He is a tech enthusiast and a computer geek who loves to share his insights and help his readers make smart choices when buying tech gadgets or laptops. He is always curious and updated about the latest tech trends.