
You want to connect a projector to your laptop, but the cable, the input menu and Windows all seem to need something different. It can feel awkward with people waiting for your slides.
I'll help you get a wired picture working on Windows 11. Start with the connection, choose the matching projector input, then tell Windows what you want to show.
Match the cable to your laptop
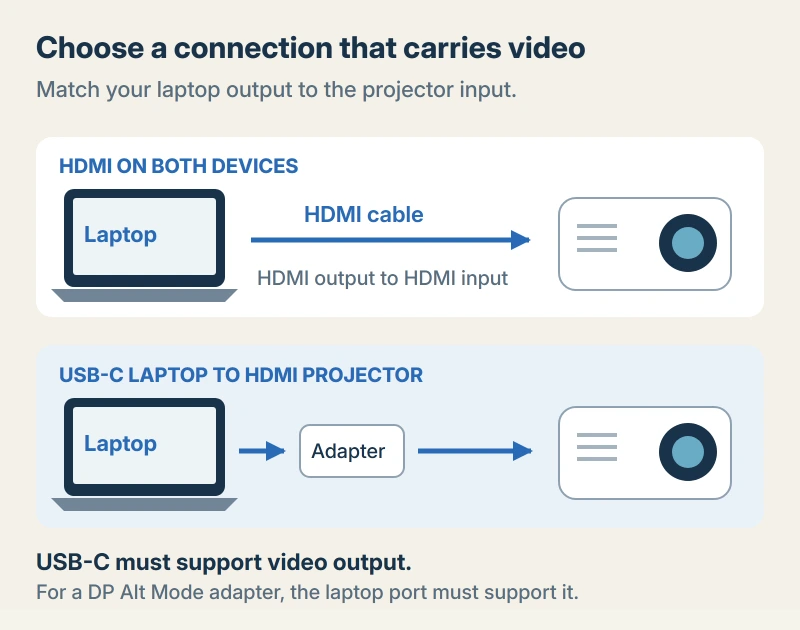
If your laptop and projector both have HDMI, connect them with an HDMI cable. Epson documents this in its setup guide.
Plug one end into the laptop's HDMI output and the other into the projector's HDMI input. HDMI also carries audio.
Status: wired Windows 11 setup, using Microsoft display guidance and Epson connection instructions checked 17 October 2026. Projector controls vary by model.
No HDMI on your laptop? You may be able to use a USB-C to HDMI adapter, but check your laptop's specifications before buying one.
Microsoft says the port, adapter and cable must support the required video features in its USB-C guidance. The connector shape isn't enough.
For an adapter using DisplayPort Alt Mode, use a laptop port supporting that mode and connect the adapter directly there, then run HDMI from the adapter to your projector.
I would use direct HDMI when both devices already offer it, because you have fewer parts to check if the picture does not appear.
Choose the input your cable actually uses
Switch on the projector and keep your laptop awake. Read the label beside the projector socket you used, such as HDMI1 or HDMI2.
Now select that same input using the projector's remote or control panel, because connecting to HDMI2 while viewing HDMI1 leaves you watching the wrong source.
Epson's source-selection instructions explain that you can find the picture with Source Search, choose a source button on the remote, or open the input list with Home.
Other projectors name those buttons differently, so check the manual for yours. Either way, you are picking the socket your laptop's cable goes into.
Press Windows+P and choose your picture
Press Windows+P together, then choose Duplicate. Microsoft documents the projection choices in its multiple-display guide.
Duplicate puts the same desktop on both screens. I would start there when you want the audience to follow your laptop screen.
Extend gives you extra desktop space. You can move a window onto the projected screen while keeping another on your laptop.
Second screen only sends the desktop to the projector and switches off the laptop display. PC screen only uses your laptop display.
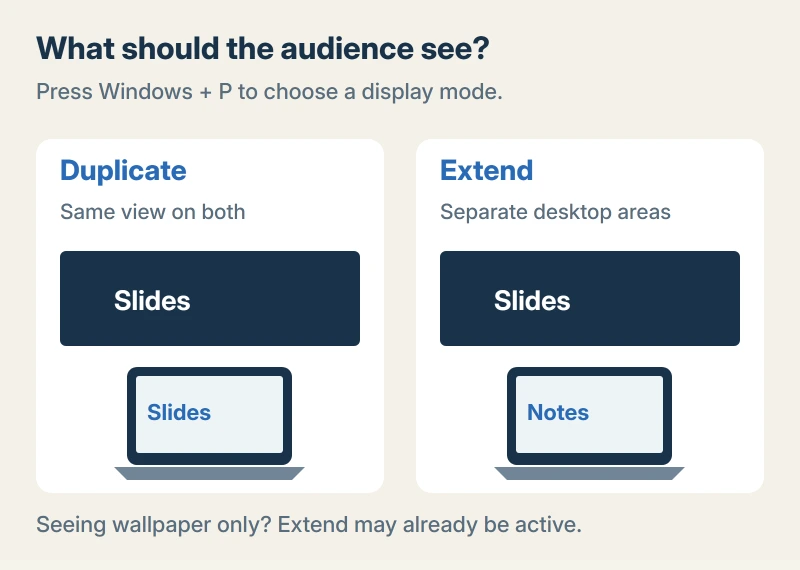
A projector showing just your wallpaper may already be working in Extend mode, so choose Duplicate if you expected the open laptop window to appear there too.
Before presenting, look at the projected image yourself. Make sure the audience can see the window you meant to share.
A picture appears, but sound stays on the laptop
Check whether your projector has speakers or an attached audio system, because the receiving equipment still needs a way to play the sound arriving through HDMI.
Epson's HDMI audio instructions tell you to select the projector as the computer's playback device. On those models, its name is EPSON PJ.
In Windows 11, open Settings, System, Sound and choose the projector under Output, or keep your laptop speakers selected if you prefer to use those.
Preview your video before the presentation. That gives you a chance to check the volume while the room is still quiet.
Still looking at No Signal?
Don't assume the laptop port is broken yet. Microsoft recommends checking the cable connection, trying another cable and testing the external display with another computer in its display troubleshooting guide.
If you are using a dock, try a direct connection where your laptop supports it. That removes the dock from this particular check.
For the next checks, use our HDMI port troubleshooting page. It helps separate a missing display from a connection that Windows already recognizes.
Want to leave the cable behind? Our wireless display setup guide covers the different hardware requirements for that connection.
The Short Version
- Connect laptop HDMI to projector HDMI, or use a supported USB-C video adapter.
- Match the projector's selected input to the socket you plugged into.
- Use Windows+P, then Duplicate for matching screens or Extend for extra space.
- Choose your sound output and preview the actual presentation before you begin.
Where to Next
Which ports are on your laptop and projector? Leave their model names in a comment if the cable choice is confusing, and tell me whether Windows shows a second display at all.

Isaac Smith is the founder and editor of PC Glance, a website that covers computers, laptops, and technology. He is a tech enthusiast and a computer geek who loves to share his insights and help his readers make smart choices when buying tech gadgets or laptops. He is always curious and updated about the latest tech trends.