
You want to print screen on your Mac, but there is no Print Screen key to press. That's an easy thing to miss when you move from Windows.
I'll show you the shortcuts for a whole screen, a selected area, and one window. Then we'll sort out the part that catches people: saving a picture and copying it are different actions.
Start with the picture you need
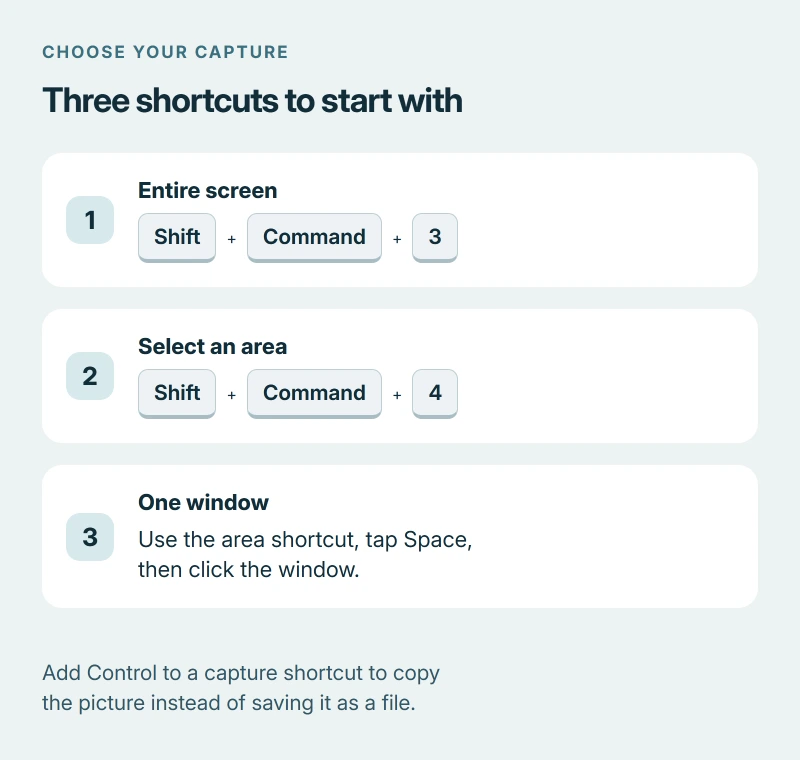
For a full-screen picture, press Shift-Command-3 together, then release them. Apple says the picture saves to your desktop after its little preview disappears.
Just need an error message? I would capture a smaller area so your other windows stay out of the picture. The next shortcuts let you choose exactly what goes into it.
Status: Apple's screenshot instructions checked 17 October 2026; the save-versus-copy question has 24,012 Ask Different views. Instructions are source-based; no hands-on Mac test.
Select a small area with Shift-Command-4
Press Shift-Command-4 and let go; your pointer changes into a crosshair, ready for you to drag across the part you want.
Hold your mouse or trackpad button, draw the rectangle, then release to capture it. Picked the wrong place? Press Escape to cancel and begin again.
You can move the rectangle, too: keep the mouse button held, hold Space, and drag it to a better spot without changing its size.
These controls are documented by Apple on its Mac screenshot page. You don't need an extra capture app.
Capture one window with the Space bar
First open the window you want, then press Shift-Command-4, release those keys, then tap Space to turn the pointer into a little camera.
Click the window to take its picture. Option-click excludes the window's shadow.
That sequence also captures an open menu; have the menu showing before you start, then point the camera at it and click.
Copy a screenshot so you can paste it
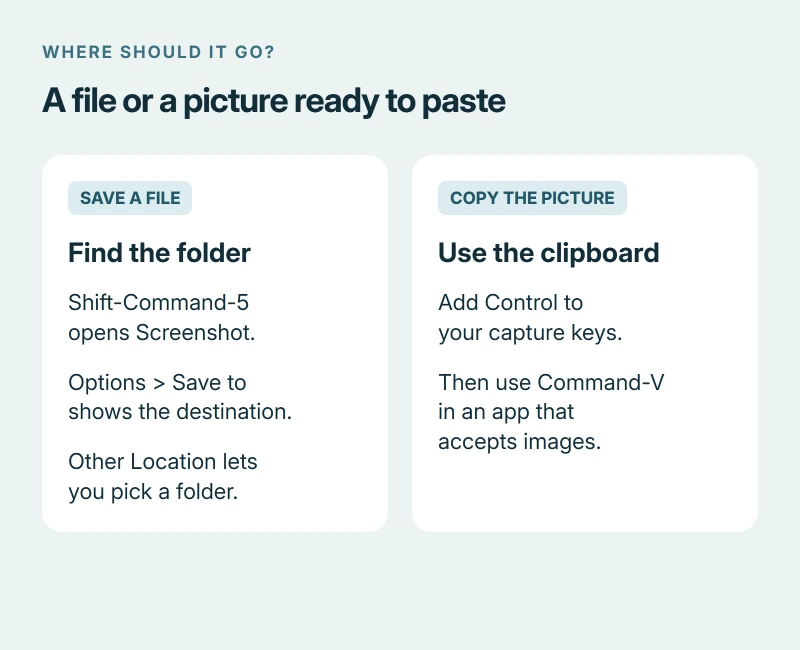
Add Control to your capture shortcut. For example, Control-Shift-Command-4 lets you select an area and put its picture on the clipboard.
Open your message or document. Press Command-V wherever it accepts an image. You can skip finding a file and attaching it by hand.
An owner on Ask Different heard the shutter after Shift-Command-4, but pasting still produced their old clipboard contents. The accepted answer supplied the missing Control key.
The answerer also explained that this wasn't a new change, pointing a surprised reader to their earlier explanation from 2015.
Already took your picture? Apple documents another route: Control-click the floating preview, then choose Save to Clipboard from its menu.
If you switch between computers, Windows has its own screenshot shortcuts. Keep those separate from the Mac combinations.
Choose a folder or add a timer
Press Shift-Command-5 to open Screenshot, a panel available on macOS Mojave 10.14 and later, with buttons for different capture areas.
Open Options and look at Save to. Choose a listed destination, or use Other Location to pick the folder where you want your pictures.
I would check that setting before searching for a missing screenshot. The desktop is only the starting destination, and your chosen folder can be somewhere else.
Options also has a Timer choice. Set a delay when you need time to open a menu before the capture happens.
Why won't the screenshot paste or upload?
A file saved on the desktop doesn't replace what you last copied. Use the clipboard method in this guide if your next action is pasting.
For an upload, check the file format because supported Macs using Tahoe 26 or later offer HDR as well as SDR (Most Compatible) in Screenshot's Capture Format setting.
Apple says SDR uses PNG and HDR uses HEIF. Choose SDR when the site needs a PNG file, then take the picture again.
Want the words inside an iPhone screenshot instead? Live Text copies that text, which is a separate job from copying the whole picture.
When the shortcut does nothing
Apple's Mac User Guide lets you change capture shortcuts in System Settings, Keyboard, Keyboard Shortcuts, then Screenshots. Check the assigned keys there if the usual combination doesn't respond.
Apple's examples of windows that can block capture include the Apple TV app, so an uncooperative video window doesn't mean your whole screenshot tool is broken.
The Short Version
- Choose your capture area first: screen, rectangle, or individual window.
- Decide whether you need a saved file or a picture ready to paste.
- Screenshot's Options menu controls the destination, delay, and supported capture formats.
Where to Next
Did your screenshot end up in a different folder, or were you trying to paste it? Tell me which part caught you out, and which Mac shortcut you were using.

Isaac Smith is the founder and editor of PC Glance, a website that covers computers, laptops, and technology. He is a tech enthusiast and a computer geek who loves to share his insights and help his readers make smart choices when buying tech gadgets or laptops. He is always curious and updated about the latest tech trends.