Mac screen recording starts with Shift + Command + 5. Choose the recording area, open Options to set the sound, then click Record.
Check the audio options before a long recording. macOS 27 can include computer sound as well as a microphone; older versions have different built-in limits.
In this guide
1. Open Screenshot and choose the recording area
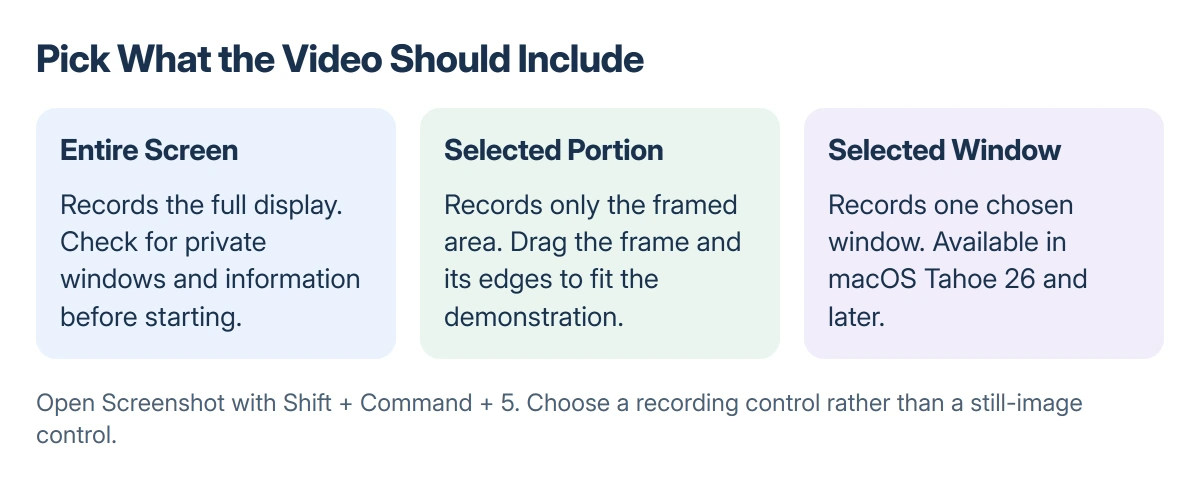
Press Shift + Command + 5 to open Screenshot. Its toolbar includes photo and video controls, so choose a recording mode before setting the area.
Apple documents Record Entire Screen and Record Selected Portion in its Mac recording instructions. For a portion, drag the frame into place and adjust its edges around the content.
Status: Apple's Screenshot and QuickTime instructions checked 22 October 2026, including macOS 27 system audio and Tahoe 26 window recording. No recording was made here.
Record Selected Window is available in macOS Tahoe 26 and later. Choose that control and click the window to record it. On earlier versions, select a portion instead when a full display is unnecessary.
For gameplay capture, Medal compatibility on Mac needs checking before choosing its older recorder.
Close private windows or documents within the recording area before you start. A whole-display recording can capture notifications and other content outside the app being demonstrated.
For a photo of the screen, use the Mac screenshot shortcuts. There is no need to record a video just to take a still frame.
2. Choose the sound before pressing Record
Open Options on the Screenshot toolbar. Under Microphone, select the input you want for speech. Choose None when the microphone should stay out of the recording.
Apple says Include System Audio records the Mac's own sound on macOS 27 Golden Gate or later. Set it separately from the microphone, depending on whether you need app audio, narration or both.
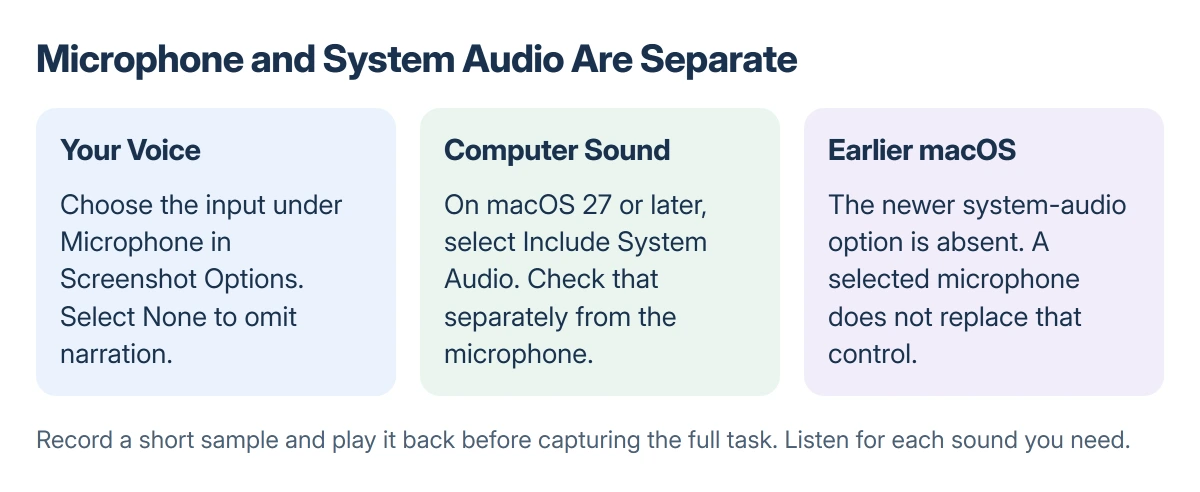
The system-audio control starts with macOS 27. Selecting a microphone on macOS 26 or an earlier version does not add that computer-audio option.
Record a short sample, then play it back before the full session. Listen for the voice and app sound you intended to capture, as a working picture does not confirm the audio settings.
3. Pick a destination and finish the recording
In Options, choose the location under Save to. The default is the desktop. Set a timer there too if you need time to arrange the app before capture begins.
Click Record to begin. To finish, use the menu-bar stop button or press Command + Control + Esc.
A small thumbnail appears briefly afterward. Click it to edit, or let it disappear while the Mac saves the file to the destination you selected.
Apple states that saved recordings are .mov files named with the date and time. Open the file in QuickTime Player to check its start, finish and sound.
Use QuickTime when that is your starting point
Open QuickTime Player from Applications and choose File > New Screen Recording. If that opens the Screenshot toolbar, use the same capture and audio controls already described.
To capture the camera instead, use QuickTime's movie recording controls, where camera and microphone are selected separately.
On older systems, QuickTime may show its own recording window. Use the small menu beside Record for microphone and click-indicator options, then click Record and choose the display or drag out an area.
The same menu-bar stop control ends the recording. QuickTime opens the result afterward so it can be reviewed, edited or shared.
Missing sound, a black window or a busy Mac
If narration is absent, reopen Options and check the selected input. If computer sound is absent, check both the macOS version and the system-audio choice instead of changing the microphone repeatedly.
Some apps block recording of their content. Apple names the Apple TV app as one example. A black window containing protected video can therefore reflect an app restriction rather than a fault in Screenshot.
If the Mac stays busy after a recording or screen share has ended, the replayd troubleshooting guide covers owners' results from closing the app still using screen capture.
For a failure in Screenshot itself, give Apple Support the macOS version, the selected capture mode and whether the saved video has an image, sound or neither.
The Short Version
Use Shift + Command + 5, choose the recording area and set Options first. Microphone input and system audio are separate. System audio needs macOS 27 or later; window recording starts with Tahoe 26.
Stop from the menu bar and review the saved video.
Where to Next
Keep the settings that worked in the sample for the full session. Check the saved recording before deleting source material or relying on it for a lesson or demonstration.
Once capture has ended and the file is reviewed, lock the Mac before leaving it. Screen locking and stopping a recording are separate actions.