
Spyro: A Hero's Tail can run on a Windows PC through PCSX2 using the PlayStation 2 version of the game. You'll need your own PS2 BIOS dump and game disc image as well as the emulator; installing PCSX2 alone doesn't supply either one.
These steps use the PS2 edition. A GameCube or Xbox disc needs a different emulator, so check which edition you own before spending time setting up the wrong program.
1. Gather the PS2 files before installing
The BIOS is the PS2's built-in system software. PCSX2 requires a copy read from your own console. Its BIOS dumping instructions explain the supported tools and which console setup they need.
Follow that guide on your console before starting setup on the PC. The BIOS files it creates are separate from the game image. Keep them in a clearly named folder so you can select it during setup.
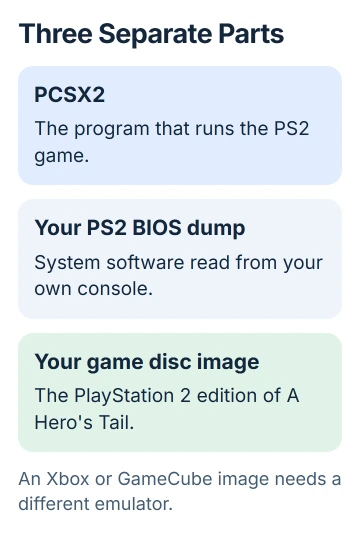
For the game, create an image of your PS2 disc with a compatible optical drive. A disc image is a file containing the disc's data. The project's disc dumping guide covers the Windows tools and verification process.
With Media Preservation Frontend, insert the disc and choose Scan for Discs. Check the detected system, media type and drive. Choose an output folder, then use Start Dumping when the status is ready.
Wait for the completion message before removing the disc. Save the finished game image somewhere you can find again. PCSX2 supports formats including ISO, BIN and CHD. A picture of the disc cover won't work as a game file.
The game's US SLUS-20884 and European SLES-52569 editions are in the project's game database. Check your disc's edition when reporting a problem or following advice for a particular release.
2. Download the current Windows PCSX2 build
Open the official downloads page, choose Latest Stable, then the Windows Installer. Start with stable. Use a nightly build when you need a newer fix or the support team asks you to try one.
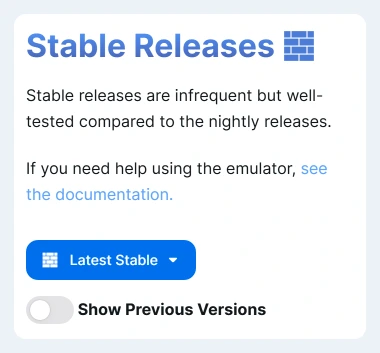
The running instructions cover both the installer and portable package. If you chose the stable installer, run the downloaded EXE and follow its prompts. Use the file from that official project link.
For the portable package, extract the 7z archive into its own folder before opening pcsx2-qt. Windows 11 version 23H2 or later can extract 7z files through Extract All; otherwise the guide gives the 7-Zip route.
The Windows version also needs the current x64 Visual C++ runtime, the supporting software linked in the running guide. Install it if needed. If you see a missing-runtime message, fix that before trying to load your game.
Older PCSX2 instructions can list different requirements. Check the system requirements against your PC, especially with an older Windows version. Getting a game to open doesn't mean it'll run smoothly.
3. Choose the BIOS and game folder in the wizard
Open PCSX2 and follow the first-time setup wizard. At BIOS Image, use Browse beside BIOS Directory to select the folder with your console's BIOS files. Choose the BIOS that appears in the list.
If the list is empty, check the folder and the files the dumping tool created. Choosing the game image's folder won't help. PCSX2 needs the BIOS and game files separately.
At Game Directories, choose Add and select the folder with the PS2 game image. Enable Scan Recursively if your games are inside subfolders that should also be searched. Finish the wizard after reviewing the remaining choices.
The game should appear in the library. You can also use System > Start File and select a supported image directly. If it still isn't recognized, check that extraction or disc dumping actually finished.
Don't rename an unrelated file to .iso. That ending tells the program what kind of file to expect. Changing it won't turn an archive, installer or another console's game into a PS2 image.
4. Map a controller to the first PS2 port
Connect your controller to Windows before opening the emulator's controller settings. I'd try USB first. For Bluetooth, Microsoft explains the connection in its Windows pairing steps.
If Windows doesn't react to the controller, use the Windows game controller input test before changing game settings. Check that Windows sees it before assigning its buttons in PCSX2.
Open Settings > Controllers. The controller guide recommends SDL as the input source for most controllers. Select Controller Port 1, then use Automatic Mapping and choose your connected device.
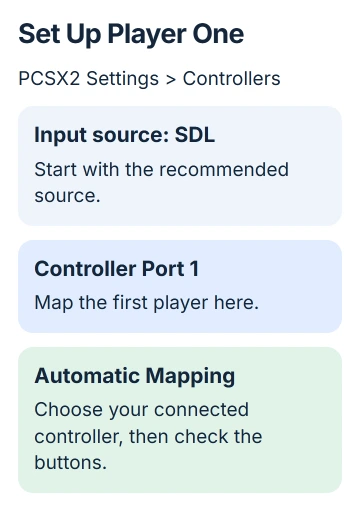
Check both sticks, the face buttons and Start in the mapping view. If automatic mapping doesn't suit your controller, assign each control yourself. Mapping only Port 2 can leave the game waiting for a player-one controller.
If your controller keeps disappearing from Windows, follow the PC controller disconnection checks. Reassigning buttons can't fix a connection that keeps dropping.
5. Start with defaults and save inside the game
Start A Hero's Tail from the game list and check that the title screen responds. Leave the graphics API, the way PCSX2 draws the game, on Automatic at first. The general settings guide recommends it when you're unsure.
Keep the first attempt simple. I'd confirm movement, camera controls and an ordinary in-game save before raising the rendering resolution or adding patches. You'll then have something clear to compare after a change.
Use the game's normal save system and PCSX2's virtual memory card for lasting progress. A save state captures the running emulator at one moment; it can be convenient, but it isn't a replacement for a memory-card save.
If the game freezes or looks wrong, note your PCSX2 version, disc serial and where it happens in the game. Share those details when contacting the project's support team. Follow current advice instead of changing old plugin settings.
The Short Version
Use PCSX2 with the PS2 edition, your console's BIOS dump and your disc image. Select both folders, map Controller Port 1, then start with default graphics. Save through the game's memory-card system before experimenting.
Checked November 5, 2026.

Isaac Smith is the founder and editor of PC Glance, a website that covers computers, laptops, and technology. He is a tech enthusiast and a computer geek who loves to share his insights and help his readers make smart choices when buying tech gadgets or laptops. He is always curious and updated about the latest tech trends.