

To use one photo as your Mac screen saver, put it in a folder by itself and choose that folder as the source. On current macOS, open System Settings > Wallpaper > Screen Saver, select Custom, then Photos under Other.
Choose your photo source in Options, then preview it. The screen saver and desktop wallpaper have separate controls, so changing one won't necessarily change the other.
A Samsung Chromebook has its own idle photo slideshow, with a charging requirement and a choice of screen-saver animations.
Prepare a folder with only the picture you want
Open the image you want to use and check that it's the full picture saved on your Mac. A small preview file can look fine as a thumbnail, even when it isn't the version you meant to display.
In Finder, open the location where you want to keep the screen-saver folder. Choose File > New Folder, or press Shift + Command + N. Give it a name you'll recognize, such as Screen Saver Photo.
Copy your chosen picture into that folder and leave it as the only image there. If the folder contains several pictures, the screen saver can choose from all of them, even if you only wanted the first.
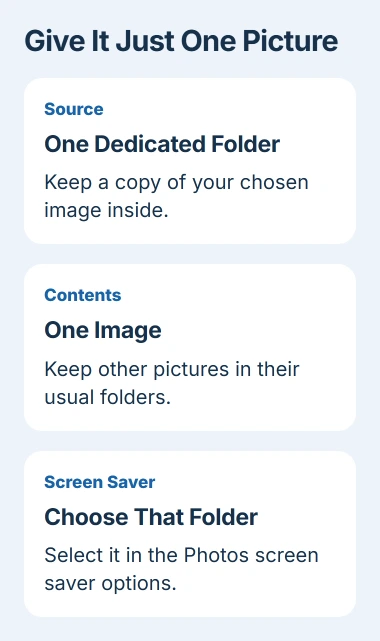
The Finder folder guide explains how to create and organize folders. Copying your picture lets you set up the screen saver while keeping your original photo collection in place.
Keep this folder somewhere you plan to leave it. I'd avoid a download folder you regularly empty; you could remove the picture later without connecting that change to a screen saver that no longer looks right.
Select Photos in the current Screen Saver settings
Open the Apple menu > System Settings, then select Wallpaper. Click Screen Saver, choose Custom, scroll to Other and select Photos. Then click Options.
Apple's photo screen-saver instructions describe this route in macOS 27. You can choose Photos in Settings without opening the Photos app.
In Options, open the source pop-up menu and choose Choose Folder. Select the folder you prepared, then click Choose. If a transition choice is available under Style, select the appearance you prefer and click OK.
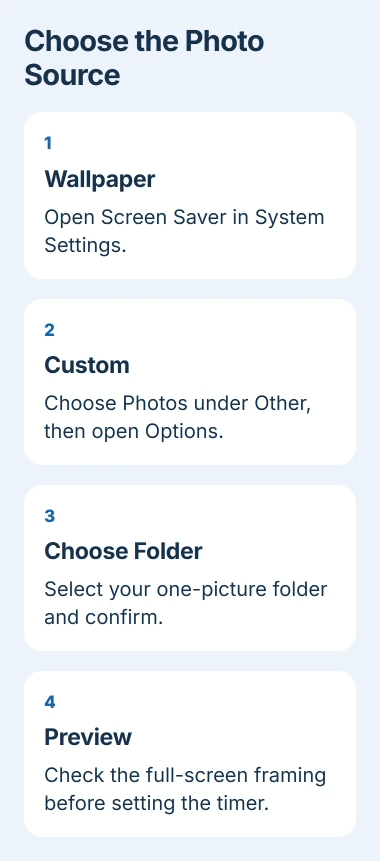
Check which source is selected before closing Options. The folder name helps you spot a mistake: choosing your whole Pictures folder would let the screen saver use many more images than the one you wanted.
The Photos screen saver can still animate or frame your single picture. If you want a still image behind your apps while you work, choose it as your wallpaper instead; a screen saver won't stay active while you're using the Mac.
Use a one-photo album on an older macOS version
Older releases can put Screen Saver directly in the System Settings sidebar. For example, the macOS Sonoma photo instructions start there rather than inside Wallpaper.
In that layout, choose Photos under Other, open Options, then select Photo Library. Choose a photo set or album containing only the picture you want, and confirm with Choose, then OK.
If your album contains several pictures, make a separate album with just the one you want. That limits the screen saver's selection while letting you keep all the other pictures in your photo library.
Use whichever source controls your macOS version offers. Choose Folder lets you select the folder you prepared. If you're using Photo Library, pick the one-photo album rather than your larger collection.
If your album won't load because Photos itself is stuck, check the Mac Photos library problem. An album needs its Photos library to be available, while a folder source uses the saved picture.
Preview the picture and check its framing
Return to the top of Screen Saver settings. Move the pointer over the current screen-saver thumbnail and click Preview. The screen-saver controls describe this full-screen check.
Move the pointer to end the preview. If the wrong image appears, revisit the source selection. If the correct image appears but looks awkwardly cropped, try another available style or use an image better suited to the screen's shape.
A narrow portrait photo won't fit a wide laptop screen the same way. A style may crop or move it instead of stretching it. Judge it in full-screen preview, since the small Settings thumbnail can hide the difference.
Keep your original photo when trying a crop. Put an edited copy in the selected folder and preview that version. The original framing will still be available if the crop looks wrong.
Set when the screen saver starts
Use Start Screen Saver to choose how long the Mac should sit idle before it begins. Test with a short wait if needed, then choose a delay that suits normal use.
The general screen-saver guide also explains how to start it with a Hot Corner. Preview lets you check the picture right away; waiting for the idle timer checks its automatic start.
If it interrupts a video, use the Mac screen-saver timing checks. That behavior calls for a timing or Hot Corner adjustment rather than choosing the photo again.
Your display has a separate timer for turning off when you aren't using the Mac. In System Settings > Lock Screen, check the display-off and password settings too. Keep the password protection you need on that computer.
Finish by checking the source and the automatic start
Let the screen saver start once with your chosen folder or album, then wake the Mac normally. Make sure it's using your chosen photo, showing it the way you want and starting when you expect.
If the picture opens on your Mac but the screen saver can't use it, ask Apple Support for help. Include your macOS version, whether you chose a folder or album, and whether you're stuck selecting it, previewing it or getting it to start.
The Short Version
Put one picture in a dedicated folder, select Photos in Screen Saver settings and choose that folder in Options. Older layouts can use a one-photo album. Preview the framing, then check the idle timer and display-off settings.
Checked November 5, 2026.

Isaac Smith is the founder and editor of PC Glance, a website that covers computers, laptops, and technology. He is a tech enthusiast and a computer geek who loves to share his insights and help his readers make smart choices when buying tech gadgets or laptops. He is always curious and updated about the latest tech trends.