

Smudged lenses, poor light and digital zoom can make an iPad 7th generation's photos look blurry. Clean both lenses, then take a rear-camera photo in good light.
Its 8-megapixel rear camera captures more detail than the 1.2-megapixel front camera. Soft selfies don't automatically mean the tablet needs repair.
1. Clean the lens and remove anything covering it
Use a microfiber cloth to wipe each camera lens. Remove a case, protective film or camera accessory that overlaps either lens. A fingerprint can turn a bright window or lamp into a hazy patch across the picture.
Apple says to check accessories and clean the lenses in its camera troubleshooting steps. Afterward, open Camera, choose Photo and photograph a still object in good light.
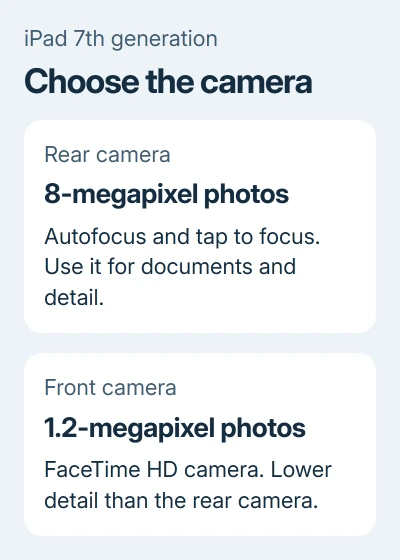
Tap the camera-switch button and repeat with the other camera. Compare the saved pictures in Photos. The rear camera can capture more detail. If the same smear remains in its saved photo, continue with the lighting and focus checks.
Check the tablet's generation through Model Name in About if it was bought used. Camera options differ between iPads, and instructions for a recent iPad Pro can send you looking for controls this one doesn't have.
2. Give the camera more light and keep it steady
Move the subject near a window or into a brighter room. Keep the light on the subject rather than putting a bright window directly behind them. Hold the iPad steady while taking the picture.
A moving hand or subject can produce blur, especially in a dim room. For a document, place it flat and hold the iPad parallel to it. Check that the whole page is lit before taking the picture.
For a stationary subject, rest the iPad securely and use Camera's timer. Tap the Timer control, select 3s or 10s, then press the shutter. This gives the tablet time to settle after you touch the screen.
Compare that shot with your handheld one. If the writing is sharper in the timer shot, the iPad moved during your handheld shot. Better light and a steady position help with that blur; changing video resolution won't.
I'd make this comparison before paying for a camera repair. A photo that's still blurry with good light and no movement gives you a better reason to have the camera checked.
3. Set focus and brightness on the subject
With the rear camera facing your subject, tap the part that needs to look sharp. A yellow focus area appears. The rear camera can focus automatically or where you tap. Don't assume the lower-resolution front camera focuses the same way.
Next to the focus area, slide the control to adjust exposure. Exposure changes how bright the picture looks. Reduce it when a white page has lost its printed detail, or increase it when a face is too dark.
For several pictures at the same distance, touch and hold the focus area until AE/AF Lock appears. That holds the exposure and focus settings. Tap the screen again when you want the camera to adjust them automatically.
These manual camera controls help when the camera keeps choosing the background. They can't sharpen a subject that's moving during the exposure.
4. Compare an unzoomed rear photo with a selfie
Pinch to zoom back out before taking the comparison picture. If the subject is small, move closer when practical. Enlarging part of the view makes softness easier to see without adding detail to the subject.
The 7th generation's specifications list an 8-megapixel rear camera, 1080p rear video at 30 fps, and a 1.2-megapixel FaceTime HD camera with 720p video. The front camera can't capture as much detail as the rear one.
Changing rear video resolution won't improve selfie resolution. Use the rear camera for detailed documents, then check the saved original before judging a copy sent through another app.
A sharp rear-camera photo doesn't mean a selfie-camera call will look equally detailed. On a different iPad that supports automatic framing, use the Center Stage controls to change how the camera follows you.
5. Restart, update and arrange service for persistent blur
Restart this Home-button iPad by holding the top button until the power slider appears. Drag it and wait 30 seconds. Hold that button again and release it when you see the Apple logo.
Open Settings > General > Software Update and install an update offered for this iPad. Install the version offered for your model.
Repeat the rear and front camera comparison. If one camera still gives blurred or black pictures in good light, ask Apple Support to assess that camera. Bring examples showing the problem after cleaning, restarting and updating.
The Short Version
Clean the lenses, improve lighting and steady the iPad. Tap to focus with the rear camera and compare unzoomed originals. Persistent blur needs a service assessment; the front camera has a lower resolution.
Checked November 7, 2026.

Isaac Smith is the founder and editor of PC Glance, a website that covers computers, laptops, and technology. He is a tech enthusiast and a computer geek who loves to share his insights and help his readers make smart choices when buying tech gadgets or laptops. He is always curious and updated about the latest tech trends.