An iPad can scan paper with its built-in apps. Open a note, tap the paperclip Attachment button, then choose Scan Documents. Hold the camera over the page, check that its edges are correct, then finish to save the scan in the note.
For a PDF, Preview on iPadOS 26 and later offers Scan Documents from its opening screen. Use document scanning when the recipient needs a copy of the paper; Scan Text copies words into a note instead of saving the page's appearance.
In this guide
Scan the first page in Notes
Lay the sheet flat in a well-lit spot. A background that contrasts with the paper helps you see whether the scanner has selected the right edges. Keep your fingers clear of the page.
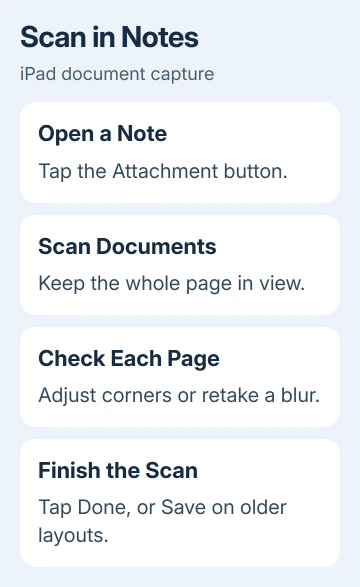
In Notes, tap inside an existing note or start a new one for this document. Tap the paperclip Attachment button, then choose Scan Documents. The camera opens in document-scanning mode.
Older iPadOS versions can show a camera button for attachments instead of a paperclip. Open that button's menu and choose Scan Documents. This scans the page as a document, unlike taking a regular photo in Camera.
Place the full sheet inside the camera view. In Auto, the iPad captures a page when it detects it. You should see the captured page added to the scan's thumbnails, rather than just a live camera preview.
Apple explains manual document capture: use either the camera shutter or one of the volume buttons.
Drag the corners to match the page, then tap Keep Scan when that control appears.
Hold the iPad steady and roughly parallel to the paper. If it keeps capturing before you've positioned the sheet, switch from Auto to Manual, frame the whole page, and take the scan yourself.
Add the remaining pages before finishing
After capturing the first sheet, put the next one in view and capture it in the same scan session. Repeat for the rest of the document. This keeps the pages together rather than making a separate note for each sheet.
Open the page thumbnails to check the results. Review the corners, text near the edge, and the page orientation. A scan can look neat as a thumbnail while cutting off a signature or a line along the bottom.
Use the available crop, rotation, and color controls to correct the page. For a receipt, check faint totals and dates after applying a filter. A strong black-and-white result isn't helpful if it removes pale printing.
Retake a page if it is blurred. Cropping removes unwanted surroundings, but it won't sharpen letters that were captured out of focus. Uncover the lens and adjust the lighting before scanning that page again.
When every page is present, tap Done, or Save on an older layout. The finished scan should appear as a document attachment in the note. Finish the scan before leaving the camera view so your document is saved.
I'd inspect the first page before scanning a long stack. Fixing the light and framing once is easier than discovering the same dark corner on every page after you've put the papers away.
Save or send the scan itself
Tap the scanned document inside the note to open it. Use the document's Share button, then choose Save to Files when you want a separate file. Choose a folder, check the filename, and tap Save.
In Files, find your saved document and check its pages before attaching it to a form or email. This catches missing pages while the original paper is still beside you.
Share the scanned attachment rather than a collaboration link to the whole note. A recipient who needs a PDF doesn't need access to your notebook or the other text you've written around the scan.
If a website requires a specific file type or size, check those requirements before uploading. A document scan and a photo aren't interchangeable for every form. Keep a readable copy if you make a smaller version for the upload.
For moving the completed scan to a computer, follow the iPad file-transfer steps. Open the transferred PDF to confirm its pages arrived together.
Scan straight into Files when you want a folder
Open Files, choose Browse, and open the folder where the PDF belongs. From More, select Scan Documents. Capture and review the pages, then tap Done or Save, choose the location, and tap Save.
This avoids putting the scan in a note first. Use it when an upload form needs a PDF from Files, or when you keep receipts in a particular folder. Check the saved PDF's filename, then open it to inspect every page.
Create a PDF with Preview
Open Preview and tap Scan Documents. Position the paper in the camera view. Auto captures a detected page; tap Auto to change to Manual if you want to use the shutter yourself.
Scan any remaining pages before finishing. Tap the thumbnails to crop, rotate, or adjust their coloring, then tap Done.
This is the Preview scanning procedure, which creates a PDF.
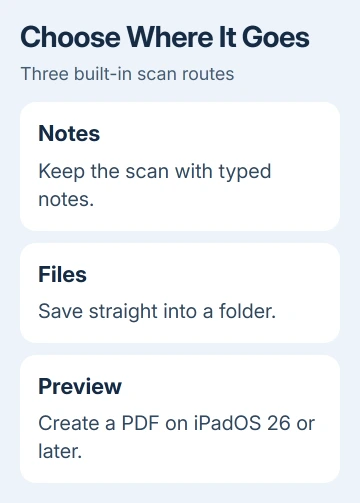
Choose Preview to keep the document on its own. Use Notes when the scan belongs with your typed notes about a meeting, receipt, or project. Both start with the iPad camera; neither needs a separate scanner subscription.
If your iPad's software doesn't have Preview, use the Notes route. Check Settings > General > About for the installed iPadOS version rather than following an app layout your device doesn't have.
Some supported iPads also offer Scan Document when the Camera app detects paper in Photo mode. If that control doesn't appear, start from Notes or Preview instead of waiting for a camera suggestion.
Copy text or add a signature when that is the task
Scan Text copies the words the camera recognizes into your note. Choose it when you want editable text. Choose Scan Documents when the reader needs the original page layout, signature, or printed form.
For a signature on a scanned page, open the document in Notes, tap Markup, then the add button and Signature. Create or choose a signature and place it where the form needs it. Finish with Done.
Check the signature's size and position before sending. Markup adds a visible signature; if the recipient requires its own signing service, you'll still need to sign through that service.
For a paper copy after scanning, use the iPad printing steps. Choose the scanned document itself when opening the print preview, then check that all its pages are included.
For a scan that won't save, give Apple Support your iPadOS version, the app used, and the point where saving stops. Keep the paper until you can reopen the finished document where you saved it.
The Short Version
In Notes, choose Attachment > Scan Documents, capture each page, review it, and finish the scan. Share the scanned attachment to Files for a separate copy. On iPadOS 26 and later, Preview can create a PDF directly.
Checked November 11, 2026.