An NSIS error launching installer pop-up that appears on its own can come from an app's background updater. Leave the message open and trace its file in Task Manager, then repair or remove the app responsible.
One owner stopped an hourly pop-up by uninstalling RAV Endpoint Protection. That doesn't mean every NSIS message comes from RAV. Check which program is behind yours before changing anything.
In this guide
1. Find the program behind the pop-up
Different programs use NSIS to install their software. The message names that system rather than the app trying to install or update, which explains why the window can appear even though you haven't opened a setup file.
Press Ctrl+Shift+Esc while the error is still visible. In Task Manager, check Processes for the installer or the app associated with the error window. Expand a grouped entry if necessary.
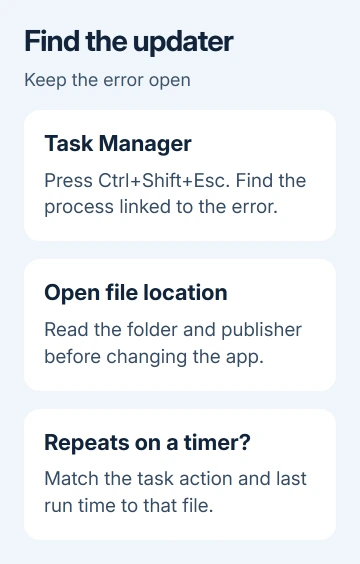
Right-click the matching process and choose Open file location. Read the folder path and the file name. If the folder belongs to an installed app, you have a program to check. The NSIS label doesn't tell you the app's name.
If the process disappears too quickly, keep Task Manager open until the message returns. Don't expect every installer to have NSIS in its process name. A later owner in the thread couldn't find that name in their list.
A file under a temporary folder needs another check. Right-click it, open Properties, and look for a product name or publisher. The Digital Signatures tab, when present, can also help identify who supplied it.
A familiar publisher and matching app folder can help identify the program. Leave unfamiliar files in place until you know which app uses them. If the folder doesn't identify the app, check its scheduled tasks next.
2. Update or uninstall the identified app
For an app you use, open its own update control or get a fresh installer from its maker. Close the app, install the current version, and restart Windows if the installer asks. A complete installer may replace a broken updater.
For an unwanted app, open Settings > Apps > Installed apps in Windows 11. Find that program, select its three-dot menu, and choose Uninstall. Follow the program's prompts rather than removing its folder by hand.
In Windows 10, the app list is under Settings > Apps > Apps & features. Select the app there and choose Uninstall. The Settings layout is different, but you're removing the same app to stop its installer.
RAV Endpoint Protection was responsible for one owner's hourly error. They confirmed that uninstalling it resolved the problem, but the later replies don't confirm the same result on other PCs.
If the identified app is security software, check Windows Security > Virus & threat protection after removal. Make sure a trusted protection provider is active before continuing normal browsing and downloads.
Wait until the time when the message usually appears. For an hourly pop-up, a quick restart and a few quiet minutes aren't enough to judge the result. If the error returns, record the time and continue with Task Scheduler.
3. Match a repeating error to its scheduled task
An error at the same interval can come from an automatic task. Search Start for Task Scheduler, open it, and select Task Scheduler Library. Look for tasks belonging to the app or publisher you identified.
Select a task and read its Triggers and Actions tabs. Triggers tell you when it runs. Actions show the program, script, or installer it launches. Compare that path with the file location from the first check.
The Last Run Time column is useful when the pop-up arrives. A short-lived task may already show Ready by the time you look, so checking only tasks marked Running can miss it.
If the app is already uninstalled and its updater task remains, record the task's name and action. Right-click that specific task and choose Disable, then wait for the next expected appearance of the error.
Disabling is easier to reverse than deleting. Leave Windows tasks and unfamiliar tasks alone. Don't disable a task just because its time matches. Its app or file path needs to match too.
If the message stops, leave that unwanted updater disabled and give the app maker its task name when reporting the fault. If it continues, re-enable the task and use the clean-boot check instead.
4. Identify a hidden updater with a clean boot
I'd use a clean boot after checking the file and task, because it temporarily changes how other apps start. Microsoft's clean-boot procedure includes the steps for restoring normal startup.
Sign in as an administrator. Press Windows+R, enter msconfig, and open Services. Select Hide all Microsoft services. Then choose Disable all and select Apply.
Open the Startup tab and select Open Task Manager. Make a note of the enabled startup entries, then disable them. Close Task Manager, select OK in System Configuration, and restart.
Don't change the Boot tab or advanced boot options. Keep the list of changes so you can put back the services and startup apps that were enabled originally.
Wait long enough for the usual pop-up. If it stops, re-enable half the disabled items, restart, and wait again. Keep narrowing the group until re-enabling a particular item makes the error return.
If a simpler startup check is enough for your case, the Windows startup apps controls explain where those entries live. A clean boot adds the service check that a startup-app toggle misses.
Restore the other items once you've identified the offender. If the error happens during a clean boot too, the items you disabled are less likely to be responsible. Repeating those startup changes won't help you identify it.
When the installer still can't be identified
Send the app maker the error time, file path, publisher, and any matching scheduled task. Ask for their updater cleanup or reinstall procedure. A general Windows reset is a large change for an error whose owner is still unknown.
If you've found the app but it won't uninstall, tackle that problem next. The Windows 10 uninstall guide covers that problem without treating every installer error as the same fault.
The Short Version
Trace the open error to its file. Update its app or uninstall the unwanted program. Check a matching scheduled task if the message repeats on a timer. Use a clean boot when neither check reveals the program.
Checked November 17, 2026.
 If you have any business, I can build it online