Error 1053 means Remote Desktop Services didn't respond in time. Restart the host PC and check the service locally. If it still fails, repair Windows components; one owner needed a reinstall after clean system-file scans.
These steps apply when the host PC reports an error starting Remote Desktop Services, whose service name is TermService. A running service that rejects a password or a connection needs different checks.
In this guide
1. Confirm the failure on the host PC
Use the host computer locally, or arrange access through another approved support tool. Save open work and choose Start > Power > Restart. After signing in, press Windows+R, enter services.msc, and press Enter.
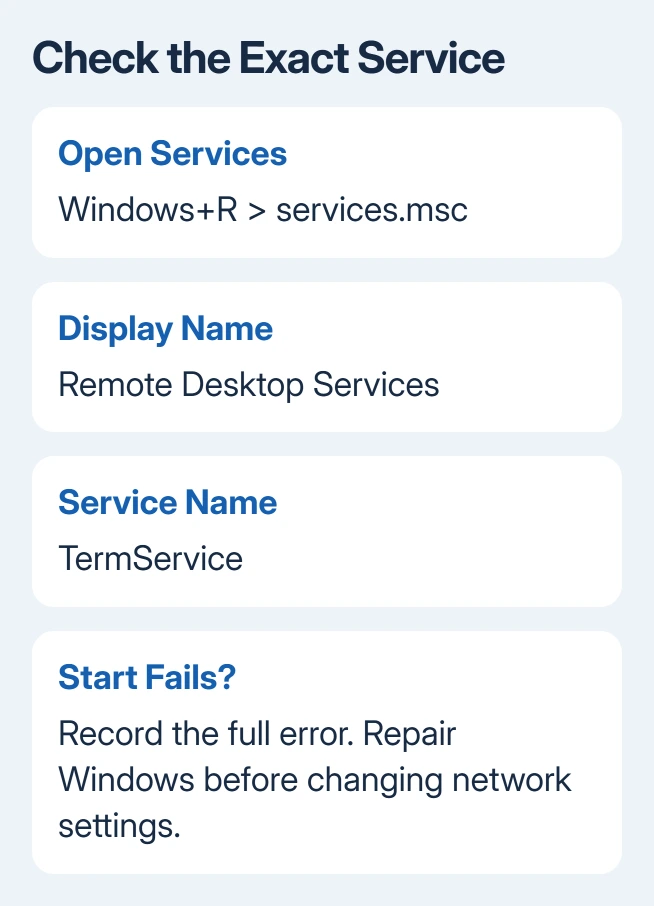
Find Remote Desktop Services and open its properties. Check that Service name is TermService. The similarly named UserMode Port Redirector is a different service, so starting that one doesn't answer this question.
Read Service status. If it's stopped, select Start and record the complete error. If it starts and stays running, try a connection again. An error that changes after restarting is useful information; keep the new code too.
With TermService already running, move to the Remote Desktop connection checks. Router changes and firewall exceptions cannot repair a Windows service that fails before it can accept a connection.
Check Settings > System > About for the Windows edition. Windows Home can connect to another PC, but it can't host the built-in Remote Desktop connection. Changing the service won't make Windows Home support hosting.
On a supported host, check Settings > System > Remote Desktop is enabled. For an organization-managed PC, consult IT before editing its service configuration. Its policies can control both the feature and the available repairs.
2. Keep the error and service details together
Open Start, search Event Viewer, and check Windows Logs > System for the time of that failed startup attempt. Look for a related Service Control Manager event and read its details.
Save the event text, code, and time. A timeout and a missing-file message point to different problems even though both stop Remote Desktop. Give support the complete text, including any filename.
Note anything that changed just before the fault: an update, security software installation, or a manual service edit. That history helps support understand what changed, though the last program you installed might not be the cause.
The original owner suspected security software had changed TermService. They copied the service's registry settings from a working PC, restarted, and still got error 1053. That attempt didn't resolve their problem.
I'd leave registry copying out of the repair. Two machines can differ in Windows build, configuration, and installed software. Keep your error details so you can check whether a repair changes the same service failure afterward.
3. Repair the Windows files used by services
Search for Command Prompt in Start. Right-click it and select Run as administrator. Approve the permission prompt. Run the component repair first:
DISM.exe /Online /Cleanup-Image /RestoreHealthAfter DISM finishes successfully, start SFC:
sfc /scannowDISM repairs the component store, where Windows keeps replacement files. SFC then compares protected files with that repair source. Microsoft's system-file repair instructions give this order.
Read the final message from each command. If the repair succeeds, restart and try starting TermService again. An error from DISM or an SFC result reporting files it couldn't repair should be saved for the next step.
Clean scan results don't rule out this service problem. In the original thread, the owner said both tools found no errors, yet the service still failed. Don't keep running identical scans when the result and symptom haven't changed.
If a command can't finish, include its final error in your support request. Tell support whether the repair failed partway or completed without detecting damaged files. Those results call for different next steps.
4. Reinstall through Windows 11 Recovery
For this Windows 11 repair, open Settings > System > Recovery. In the Fix problems using Windows Update section, choose Reinstall now. This repair keeps your settings, apps, and files while installing the same Windows version again.
Back up important work before starting, and keep internet access and a power connection throughout this repair. This is a Windows reinstall even though it preserves the existing installation's contents.
Review the restart choice, then select OK. Windows takes you to Windows Update, downloads a repair version, and installs it. Restart when the repair finishes if you didn't select an automatic restart.
After signing in, return to services.msc and try Remote Desktop Services again. A service that starts is the first success check. Then test a connection from another computer to confirm that hosting works as well.
The reinstall instructions require Windows 11 22H2 or newer with its optional February 2024 update or a later update installed. Managed update policies can make this button unavailable.
One owner confirmed a Windows reinstall fixed the service, without naming their setup choices. The Recovery route here follows current vendor instructions. The owner didn't say whether they used this same method.
5. Use an in-place repair when that option is missing
If Recovery doesn't offer the update repair, use the Windows repair-install guide or ask IT to perform an in-place repair. Start that process from the running Windows installation to preserve installed apps.
Check the final setup screen carefully. It must offer Keep personal files and apps to preserve both. If that choice isn't available, stop and check the installation media and Windows match before proceeding.
Booting a USB installer and deleting partitions is a different operation. It isn't the next click in a repair intended to preserve your apps. Keep the repair goal clear when speaking to a technician or choosing a recovery method.
If TermService still fails, use Get Help or your Windows administrator. Supply the service name, full error, Windows build, event text, and repair results. Explain that the service won't start, rather than reporting a connection failure.
The Short Version
Confirm that TermService itself fails, record the error, and run DISM followed by SFC. A clean scan can still leave error 1053. Use a Windows repair reinstall when needed, then check service startup and a real connection separately.
Checked November 17, 2026.