A Windows 11 computer needs a backup of its files before a failed drive or accidental deletion takes them away. Connect an external drive and use File History for regular copies, then check that you can recover a file from it.
That protects your documents and photos; it doesn't save a complete copy of Windows and every installed program. Windows Backup can save other settings to your Microsoft account, but neither tool should be mistaken for a full disk image.
In this guide
Decide what needs to come back after a failure
Start with the files you couldn't replace: family pictures, work documents, school projects, and anything stored outside your usual folders. A downloaded installer can be downloaded again. An unfinished project often can't.
Microsoft says its backup and recovery tools separate personal-file backups from system recovery. A restore point repairs system changes; it isn't a spare copy of your documents.
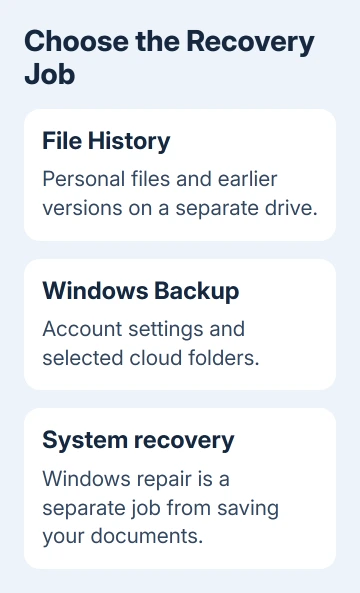
For account settings and cloud folders, check what Windows Backup saves. These steps copy your files to the external drive and help you check that you can get them back.
I'd start with the files before spending time choosing a complete-computer recovery product. If the machine failed tonight, those are usually the things that would hurt to lose.
Keep a list of paid applications and their sign-in or license requirements separately. File History won't turn that list into installed, activated software on a replacement PC.
Connect a drive and turn on File History
Use an external drive with room for the files and their later versions. Leave your existing files on it alone. If Windows asks to format a drive that contains something important, stop and check the drive before agreeing.
- Attach your external drive, then confirm File Explorer lists it.
- Open Start, type Control Panel, and open it.
- Under System and Security, select Save backup copies of your files with File History.
- Select Select drive if the destination isn't the external drive you intended to use.
- Choose that drive and select OK, then select Turn on.
Check the drive name and letter in the File History window. A second partition on the same physical disk isn't protection against that disk failing. The destination should be the separate drive you connected.
The first backup can take longer than later runs because Windows has to copy all those files for the first time. Keep the laptop powered and the drive connected until the window reports a completed run.
If File History doesn't select the drive, return to Select drive and check whether it appears there. A drive missing from File Explorer needs a connection or drive check before File History can use it.
Include the folders that matter
File History works with Windows libraries, including Documents, Pictures, Music, and Videos, and also backs up Desktop files. That doesn't mean every folder anywhere on the computer is automatically included.
Look through the folders where you actually save work. Check projects saved in your own folders on another drive, even when your Documents library already looks correct.
To include another folder on Windows 11, right-click it in File Explorer, choose Show more options > Include in library, and select a suitable library. Use a library that makes sense for that content.
The File History setup instructions support adding folders through libraries. After adding one, let another backup run before trying to recover anything from it.
For cloud storage, check whether an important item is actually downloaded. An online-only listing isn't the same as a local file ready to copy. Open the needed files and confirm they're available before depending on a local backup.
Don't move your working folders onto the backup drive to save space. A backup should give you another copy, rather than become the only place your work exists.
Recover one file before trusting the backup
Choose an ordinary document from a completed backup and keep the original in place. You can check that recovery works without deleting valuable work first.
- In File Explorer, locate the document's containing folder.
- Right-click the folder and choose Restore previous versions. On Windows 11, open Show more options first if needed.
- Select an available version in the Previous Versions tab.
- Expand Open and choose Open in File History to inspect its contents.
- Expand Restore, choose Restore to…, and select a different folder for the recovered copy.
Open the recovered document. Check that the copy opens and that it's in the folder you selected. A backup window saying the feature is on doesn't tell you whether this particular folder was included.
If the version list is empty, check that the folder belongs to a backed-up library and that a run finished after the file was created. Confirm the external drive is attached before trying again.
For a file that disappeared before backups started, use the Windows file recovery options, rather than expecting File History to create an older copy it never saved.
Keep the backup usable and handle a failed run
Reconnect the drive regularly so new changes can be saved. A laptop that has spent weeks away from its backup drive can only recover the versions captured during earlier connections.
If Windows reports that the File History drive is disconnected, attach the same drive and open the File History window again. Check its latest completed backup date after the next run.
For repeated errors, note the exact message, destination drive, and last successful date. Ask Microsoft Support about that File History error, or the drive maker about a disk that also disconnects in File Explorer.
Before replacing or resetting the computer, finish a fresh run and recover a current document. If you need a complete Windows-and-apps image, choose a supported imaging product with recovery steps for your hardware.
The Short Version
Use File History with a separate external drive, include custom folders through libraries, and recover a sample to another location. Connect the drive regularly to capture new work. Plan Windows and app recovery separately.
Checked November 16, 2026.