

ByteBrew not initialized on Android can come from an incomplete Unity setup or from calling events before initialization finishes. Check the first scene, Android game credentials and the code that starts ByteBrew.
Put the ByteBrew GameObject in the first scene, enable Android and enter its game credentials. Call InitializeByteBrew at startup. If only early events or Remote Configs fail, wait for initialization before requesting them.
An SDK warning in the app and an empty dashboard need slightly different checks. Start with the Android build's setup, then check when the failing call runs.
1. Fix the startup scene and Android settings
In Unity, open the scene your Android build starts with. Use Window > ByteBrew > Create ByteBrew GameObject and make sure that object is in the first scene. A later gameplay scene is too late for the launch setup.
Open Window > ByteBrew > Select ByteBrew settings. In the settings Inspector, enable Android for tracking. Working iOS settings won't automatically set up your Android build.
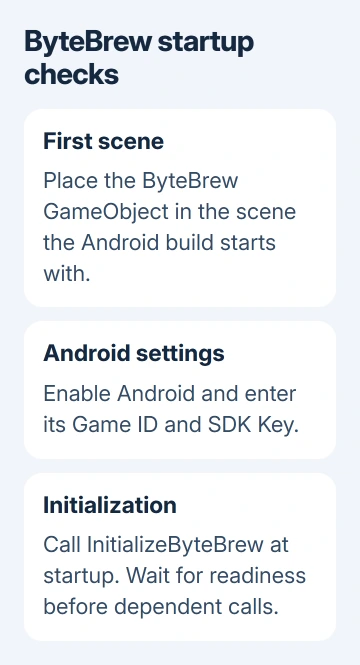
Compare the first scene you run in the Editor with the one included first in the Android build. Your usual test scene might not match the first scene players see when they launch the app.
Save the changed scene and settings, then make a new Android build for the device. Editing the project doesn't change an APK that's already installed, so confirm you're testing the new build before judging the result.
If the startup object is present and Android is enabled but initialization still fails, check the credentials next. If the app initializes and only its earliest events are missing, continue to the timing check in step 4.
2. Recheck the Android game ID and SDK key
Open the intended game's settings in the ByteBrew dashboard and compare its platform-specific credentials with the Unity ByteBrew settings. Use the Android Game ID and SDK Key for the app you're building.
Check the dashboard game as well as the platform. If you entered another test game's key, you could be watching the wrong dashboard. Keep the Android build and its dashboard entry paired throughout the check.
After updating the ByteBrew SDK, re-enter the game credentials. The setup instructions flag this because an SDK update can require you to enter those values again. Don't assume the previous settings survived unchanged.
Rebuild and launch the Android app with a working connection. Watch for the initialization result and then check the matching dashboard entry. Check the Android build itself after making changes.
Keep SDK keys out of public error reports. If you need to show the Inspector to support, hide credential values while leaving the selected platform and relevant field names visible.
3. Resolve Android dependencies and call initialization
After importing the SDK, projects that don't automatically set up the required libraries need you to do that manually. In Unity, choose Assets > External Dependency Manager > Android Resolver > Force Resolve.
Let Force Resolve finish and read any errors before building. A startup script can't supply a missing Android library. Correct resolver or build errors before checking whether analytics events arrive.
The Unity integration instructions also require calling ByteBrew.InitializeByteBrew() at the beginning of the game. Check that your startup code reaches that call in the Android build, after the project has the right settings.
Importing an SDK package and creating its settings aren't the same as running its initialization method. Check the component that runs your startup code and whether its GameObject is active when the first scene opens.
For a project that also uses ByteBrew Ads, keep the documented ordering: initialize ByteBrew before initializing its ads component. Don't add ads initialization just to repair analytics in a game that doesn't use that feature.
I'd check the startup call and resolver output before adding delays. A delay can change timing, but it can't supply a missing Android library or correct a game ID.
4. Wait before sending early events or Remote Configs
Your startup method can finish running before every part of the SDK is ready. Events sent in the same scene can arrive too early. This matters when a launch event fails but later gameplay events work.
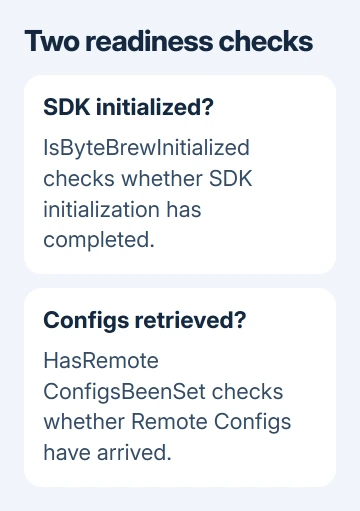
Use ByteBrew.IsByteBrewInitialized() to check whether initialization has completed before running code that needs ByteBrew to be ready. Follow your installed SDK's method signature, so you use the right inputs and read its result correctly.
For Remote Configs, the values the server supplies to your game, wait for initialization before asking to load them. Then wait for the SDK to signal that loading is complete before reading those values.
ByteBrew.HasRemoteConfigsBeenSet() checks whether Remote Configs have been retrieved. That checks something different from whether ByteBrew itself has initialized. A ready SDK can still be waiting for configuration values.
Keep a sensible default for a game setting until the requested value is available. That prevents a missing configuration response from being mistaken for a failed SDK startup or leaving the game's own code without a usable setting.
Rebuild and compare one operation that runs after readiness with the early operation that was failing. If the later one works, run that call once the SDK signals it's ready instead of reimporting the whole SDK again.
5. Check connectivity and the installed SDK release
ByteBrew's documentation says the SDK doesn't cache offline events. If you launch offline, don't expect that event to appear after the phone reconnects. Test the Android build while it has working internet access.
If the game works on one connection but can't send data on another, test a permitted connection and keep the network details with the error. Ask the administrator about service restrictions on a managed network.
If the game exits after locking the phone, check Android's background app behavior separately. Keep the app running while you check whether it finishes starting up.
Review the release notes for the ByteBrew Unity SDK version in the project. Choose an update addressing your build or runtime error, then recheck the credentials in step 2. Save the project before changing the integration package.
To check a released game's version, check Android app updates and its Play Store update controls to identify the installed version. That doesn't replace rebuilding the Unity project when its SDK setup changes.
6. Send a useful failure report
If the setup still fails, contact ByteBrew through the support route linked in its developer hub. Include the Unity version, ByteBrew SDK version, Android version, build type and the exact error from the device's Android log.
State whether initialization never completes, only early events fail, or Remote Configs remain unset. Include the startup sequence with keys removed. Each failure points to a different part of the setup, giving support a place to start.
The Short Version
Check the first scene, Android settings and credentials. Resolve dependencies and run InitializeByteBrew at startup. Wait before dependent calls, test online, and report the exact failure if it continues.
Checked November 9, 2026.

Isaac Smith is the founder and editor of PC Glance, a website that covers computers, laptops, and technology. He is a tech enthusiast and a computer geek who loves to share his insights and help his readers make smart choices when buying tech gadgets or laptops. He is always curious and updated about the latest tech trends.