Equalizer APO can affect speakers but miss your microphone because recording devices need a separate installation. Open Configurator, select the mic under Capture devices, and restart Windows before changing gain again.
A silent microphone needs a different first step from one that records but ignores the equalizer. Try a Windows recording, then follow the steps for that result. Raising gain won't repair an input Windows can't hear.
In this guide
1. Check that Windows can hear the microphone
Open Settings > System > Sound. Under Input, choose the mic you use for speaking. A webcam, headset, built-in mic and virtual audio cable can each have a separate entry.
On Windows 11, open that input's properties and use Start test. Speak during the test, stop it, and listen to the sample if playback is offered. On Windows 10, speak while watching Test your microphone on the Sound page.
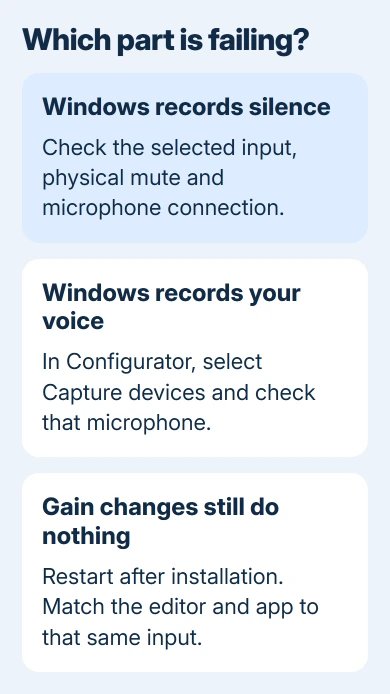
Hearing your voice in the recording confirms Windows receives the mic's sound. Continue with the APO installation. Silence means you should first check its physical mute, connection and input volume, rather than adding another filter.
For a device that stays silent, the Windows microphone checks cover the recording controls and access switches. Return to the equalizer once an ordinary recording works.
A USB microphone and the laptop's built-in microphone aren't interchangeable here. Write down the exact device name that produced the recording. That's the input you need to choose in the next section.
2. Install processing on the capture device
Close your calling and recording apps. Find your Equalizer APO installation folder, normally C:\Program Files\EqualizerAPO, and open Configurator.exe. Use your chosen installation folder if you changed it during setup.
Select the Capture devices tab. Check the microphone that worked in the Windows test, then click OK. Selecting a device under Playback devices affects listening, so a checked speaker doesn't mean the microphone is covered.
Maono's microphone gain instructions describe this capture-device selection and the restart required after installation. Restart the computer rather than only closing the editor.
After signing back in, open your recording app again and make another short sample. Keep the same input selected while you compare recordings. Switching microphones would stop you from hearing whether the change worked.
If the device doesn't appear in Capture devices, check whether Windows still lists it under Input. Reconnect a USB microphone and reopen Configurator. A disconnected input can't be selected just by opening its old equalizer profile.
3. Choose that input in the editor too
Open Editor.exe from the installation folder. In the upper Device control, choose Capture devices, then select your microphone. Now you're looking at the settings for your microphone instead of a speaker.
Check the Preamplification control and whether it's enabled. Gain changes how loud the incoming signal becomes. If the filter is on but barely changes the gain, you might not hear a difference.
I'd test with a reduction in gain first. Record the same sentence at the same distance, save the change, and record it again. A quieter second sample is easier to recognize without pushing a loud signal into distortion.
Use File > Save after changing the configuration. Once the difference is clear, return to a comfortable level. Raising gain also raises background noise, so use enough for a clear recording rather than chasing the largest setting.
If your local recording changes but the meeting app sounds the same, leave the working filter alone. Check which microphone the meeting app has opened next.
4. Match the app's input to the processed device
Open the recording or call app's audio settings. Select the same named microphone used in the Windows test, rather than leaving the choice on Default while several microphones are connected.
A headset connected over Bluetooth and the same headset connected through a USB adapter can appear as different devices. Installing processing for one connection doesn't automatically cover the other connection's input.
Virtual microphone software adds another choice. If the app records from a virtual device, check which physical microphone sends sound to it. Don't assume a profile attached to the laptop microphone also processes a separate virtual input.
Make a local recording before comparing a call. Meeting software can adjust volume or suppress noise, making a gain change harder to hear at the other end. Check the local sample to hear the change without those call controls.
For an app that can't access any working input, Microsoft's microphone permission steps explain the Windows access controls. Permission restores recording access; it doesn't install the equalizer.
5. Check whether Windows has disabled audio processing
Press Windows + R, enter mmsys.cpl, and open Recording. Double-click the microphone to open its properties. Look for Enhancements, or an audio-enhancement option under Advanced, depending on the driver.
Equalizer APO relies on Windows audio processing. If Disable all enhancements is selected, clear it. Where the driver instead offers Enable audio enhancements, enable it so Windows can apply the processing.
This is different from advice to turn enhancements off when diagnosing distorted sound. Disabling the processing can also disable the effect you're trying to use. The setting's name and location depend on the installed audio driver.
Apply the change, reopen the app, and compare recordings again. If neither tab has that control, don't install a random driver to make it appear. Write down your microphone model and driver details to send to support.
6. Ask for help with the failed processing path
If Windows records clearly but gain changes have no effect, ask in the Equalizer APO project's support discussion. Include the Windows version, microphone connection, selected capture device and configuration file.
Mention any recent driver update or switch away from a USB connection. Those details help distinguish a missing device installation from an app selecting a different input.
If Windows itself no longer records, use the microphone maker's support route instead. The microphone test guide helps describe which input responds before you send the report.
The Short Version
Test the mic in Windows, select it in Configurator's Capture devices tab, and restart. Match the editor and recording app to that same input. Compare saved gain changes, then check whether audio enhancements are disabled.
Checked November 13, 2026.