Yes, a Google Pixel can install an official full OTA update without unlocking its bootloader. Use the full OTA package for the exact phone and install it through Android Recovery's Apply update from ADB option.
This restores the official system software after an update problem while keeping the bootloader locked. A factory image is a different download with different consequences. These steps require the full OTA ZIP, not a factory image.
In this guide
Choose the full OTA package for your Pixel
Open Google's Full OTA Images for Nexus and Pixel Devices page. Read and acknowledge the terms, then locate the exact Pixel model. Match the device name and any carrier restriction shown with the build.
Google says these packages restore factory firmware without requiring a data wipe or bootloader unlock. Back up important files before updating anyway.
Keep a separate copy of files you can't replace, especially when the phone already struggles to update.
For a working phone, check the installed build in Settings > About phone > Android version. Also open its system-update screen and finish any pending installation before starting a manual update.
Current Pixels generally put that check under Settings > System > Software updates > System update. The download page also uses an older About phone > System updates path, so search Settings for System update if the labels differ.
Choose a suitable current build for your model rather than treating this as a downgrade method. A locked bootloader doesn't make an older or mismatched package acceptable to Recovery.
For a Pixel with wireless switches that refuse to turn on, keep the model-specific fix in view. Manual installation doesn't promise to repair every wireless hardware fault.
Prepare Platform-Tools and verify the download
Download the current SDK Platform-Tools for Windows, macOS or Linux from the Android developer site. Extract the archive on the computer. The folder contains adb, the tool that communicates with the phone.
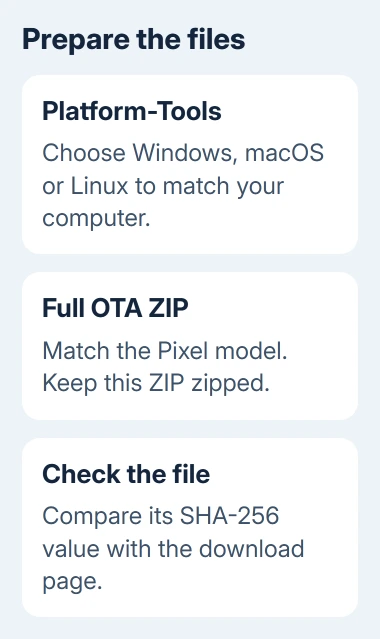
Leave the full OTA ZIP zipped. Put it in the Platform-Tools folder to make the command easier to type, or use its full path later. The phone needs the complete ZIP, so don't extract the individual firmware files.
I'd check the checksum before opening Recovery. Compare the downloaded file's SHA-256 checksum with the full value beside its download link.
A checksum is a long fingerprint of the file; matching values help catch an incomplete or changed download before installation.
In Windows PowerShell, run Get-FileHash followed by the ZIP's path and -Algorithm SHA256. On macOS, use shasum -a 256 followed by the path. On Linux, use sha256sum followed by the path.
If the values differ, download the package again before continuing. Don't troubleshoot a transfer with a file that already fails this comparison.
Open a terminal in the extracted Platform-Tools folder. The commands that follow use adb as the tool name. In PowerShell, use .\adb.exe instead; on macOS and Linux, use ./adb when running the local copy.
Enter Android Recovery without unlocking the bootloader
If Android starts, enable Developer options by tapping Settings > About phone > Build number seven times. Enter the screen-lock credential if requested. Open Settings > System > Developer options and enable USB debugging.
Connect a USB data cable and approve the computer's debugging request on the unlocked phone. In the terminal, run:
adb reboot recoveryIf Android won't start or ADB can't reach it, use the phone's hardware-button route instead. Power the Pixel off, then hold Volume down and Power to reach Fastboot mode on Pixel phones.
Highlight Recovery mode with the volume keys and confirm with Power. The button route gets you to Recovery without needing to enable USB debugging inside a phone that can't start.
An Android robot with a red warning symbol, sometimes accompanied by No command, is the next screen. Hold Power and press Volume up once to reveal the Recovery text menu.
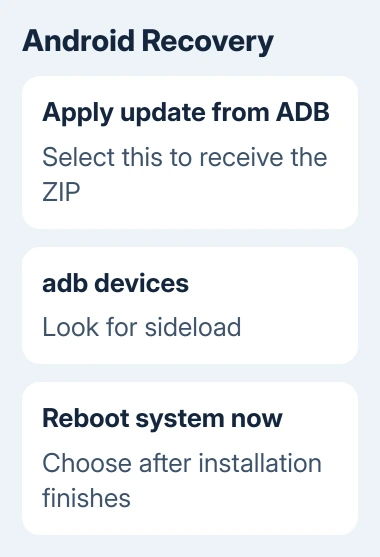
Use the volume buttons to move the selection and Power to confirm it. Choose Apply update from ADB. Leave the bootloader locked; OEM unlocking isn't part of this procedure.
Send the ZIP and let the phone finish
With the phone waiting in sideload mode, run:
adb devicesLook for a device entry with sideload beside it. That tells you the phone is connected in the mode needed to receive the update. If the entry is missing, the computer isn't ready to send it.
Check the data cable, computer port and Recovery selection if the list is empty. On Windows, check the phone's USB driver using the Android developer site's hardware-device instructions.
Changing a cable is simpler than repeatedly sending the same command.
When sideload is listed, run:
adb sideload ota_file.zipReplace ota_file.zip with the actual downloaded filename. A path containing spaces needs quotation marks. If PowerShell can't find adb, use .\adb.exe as described earlier rather than downloading an unrelated installer.
Keep the cable connected while Recovery checks and installs the package. Wait for the phone's completion message before choosing Reboot system now. The computer finishing its transfer doesn't mean the phone has finished installing.
Confirm the build and handle a rejected package
Once Android starts, check its build number again. Confirm that important apps open and your files are present. Turn USB debugging off when the update work is finished.
If Recovery rejects the package, record the exact error. Recheck the model, build and checksum before trying again.
A verification or downgrade rejection is a reason to review the chosen file, rather than unlock the bootloader to force it through.
Use a Pixel screenshot for errors visible inside Android. For Recovery errors, write the wording down or photograph it with another device because Android's screenshot controls aren't running there.
If the correct package still fails, contact Pixel support through Settings > Tips & support when available, or the Pixel support center. Supply the phone model, previous build, OTA filename and Recovery error.
Ask whether repair is needed before choosing an erase.
The Short Version
Download a full OTA ZIP matched to your Pixel model. Verify its checksum, then open Apply update from ADB in Recovery. Confirm sideload appears in adb devices, send the ZIP and reboot after installation finishes.
This official route doesn't require unlocking the bootloader.
Checked November 12, 2026.