When it comes to capturing stunning shots and videos, Canon camera is a popular choice among many Visual content creators. As a photographer or videographer who uses a Mac computer, you understand that capturing stunning photos and videos with your Canon camera is just half the journey.
The next step is transferring those files to your Mac for anything like, editing, sharing or safekeeping, which is equally important. However, connecting your Canon camera to your Mac can be challenging, particularly if you’re new to the process and It’s not uncommon to find yourself struggling. Don’t worry, we understand your frustration and we’re here to help!
Whether you’re a seasoned photographer or a beginner who wants to be guided on the transfer of files from their camera to mac, in this comprehensive guide, we’ll take you through the step-by-step process on how to connect Canon camera to Mac/MacBook and transfer your media files with clear instructions and easy-to-follow visuals.
We’ll cover different ways for connection such as using a USB cable, Wi-Fi connection or SD card, as well as the necessary software and settings you need to transfer files seamlessly. Additionally, we’ll offer tips and troubleshooting advices to help you overcome any potential issues that may arise while connecting.
By the end of this guide, you’ll be equipped with all the knowledge to easily connect your Canon camera( Any model ), to your Mac or MacBook laptops and even Window laptops aswell. So Let’s dive in and get started!
3 Ways to Connect Canon Camera to Mac/MacBook
Connecting your Canon camera to your Mac or MacBook is a straightforward process that can be done in three different ways: using a USB cable, establishing a Wi-Fi connection, or using an SD card reader.
Each method has its advantages, and the best option for you depends on your specific needs and preferences. Let’s take a closer look at each of these methods to help you decide which one works best for you.
1) Connect Canon camera to Mac using a USB cable
Connecting a Canon camera to your Mac via USB cable is one of the easiest and most common way to transfer your media files. So, if you want to know how to connect your Canon camera to your Mac via USB cable, follow the below five easy steps and you’ll be on your way to transfer the files in just a few minutes.
Step: 1 ( Turn off Both Devices )
Turn off your Canon camera and Mac before you begin the process.
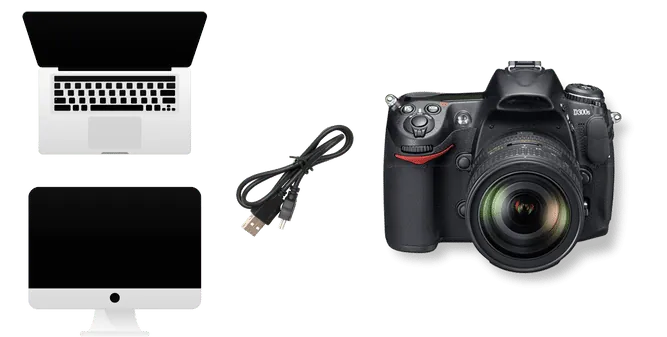
Step: 2 ( Connect Mac and Camera with USB cable )
Using the USB cable that came with your camera or use any other compatible USB cable, connect one end of the cable to the camera’s USB port and the other end to an available USB port on your Mac.
Step: 3 ( Wait for Device Detection )
Turn on your camera and wait for it to appear on your Mac as a connected device.
Step: 4 ( Launch Photos Application on Mac/MacBook )
Once your Canon camera is recognized, , the “Image Capture” or “Photos” application should automatically launch. If it doesn’t launch automatically, you can open the application manually by going to the “Applications” folder on your Mac. Select your Canon camera as the source device and choose the files you want to transfer.
Step: 5 ( Transfer the files )
Click the “Import” button to transfer the selected files from your Canon camera to your Mac or drag and drop your files to the desired location on your Mac.
2) Connect Canon camera to Mac wirelessly ( Wi-Fi Connection )

If your Canon camera supports Wi-Fi connectivity, then you can transfer your media files wirelessly to your Mac without the need for a USB cable. Here’s how you can establish a Wi-Fi connection between your Canon camera and Mac in six easy steps:
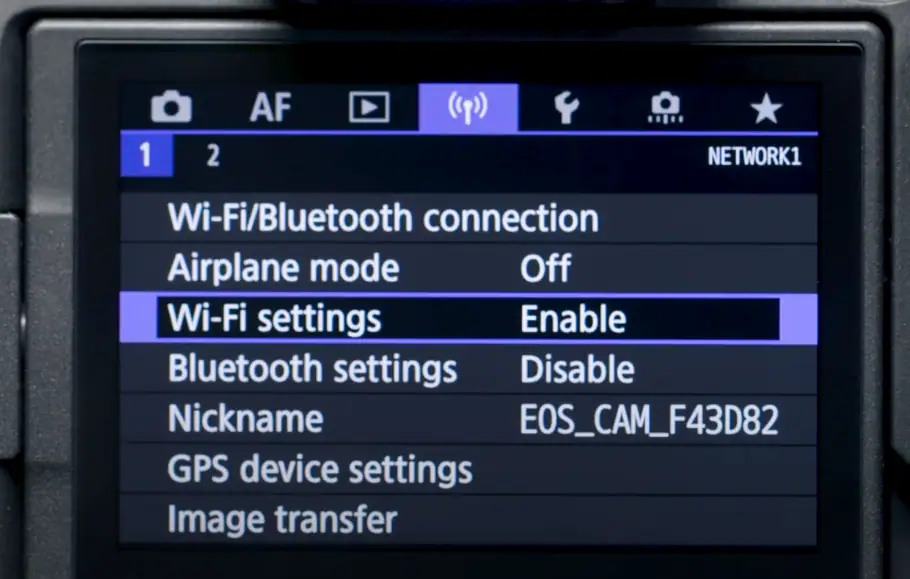
Step: 1 ( Enable Wi-Fi on Canon Camera )
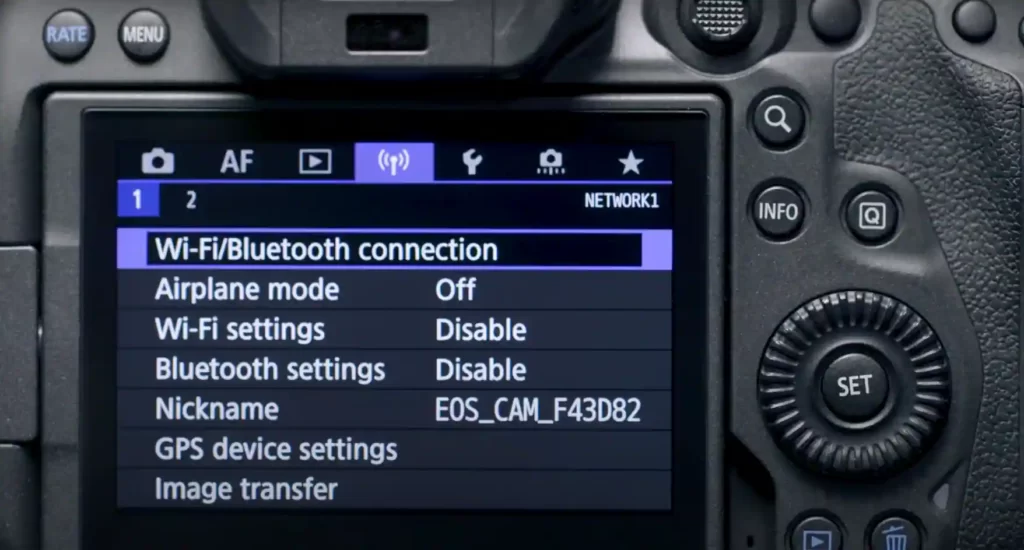
Turn on your Canon camera and put it in Wi-Fi mode. The exact steps for doing this will vary depending on your camera model, so consult your camera’s user manual for instructions. But in general, you’ll need to go to Menu > Wi-Fi settings on your camera and select the option to enable Wi-Fi.
Step: 2 ( Enable Wi-Fi on Mac/ MacBook )
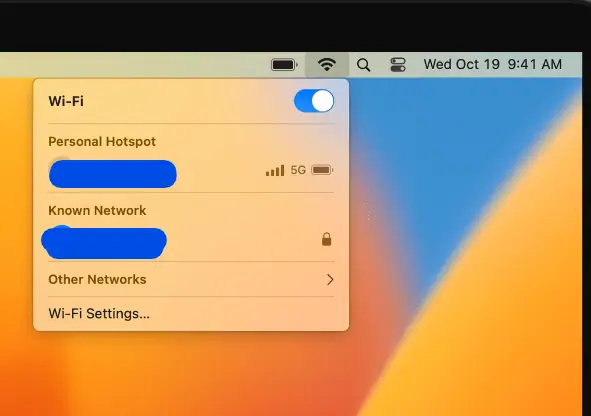
Now, on your Mac, open the “System Preferences” application and select Network, and in the left-hand column, select “Wi-Fi” and make sure Wi-Fi is turned on
Step: 3 ( Connect to Canon Camera Wi-Fi network )
Next, look for the Wi-Fi network name (SSID) of your Canon camera. To do so, go to Wi-Fi settings tab of your camera and click on Wi-Fi/Bluetooth Connectivity, now select remote EOS utility there.

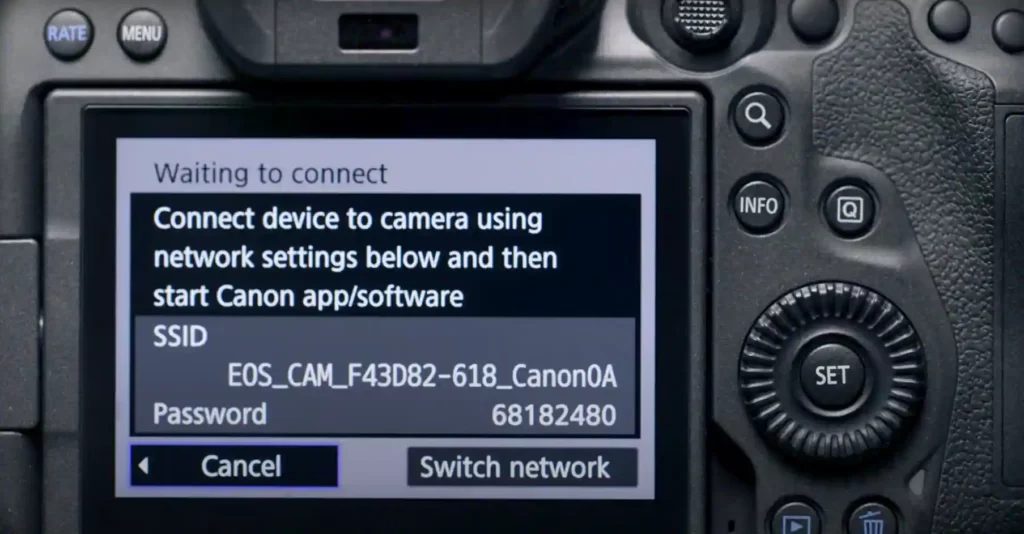
The network name will typically include the camera’s model number or name.
Step: 4 ( Connect Canon SSID with Mac through Wi-Fi )
Next, go to your Mac/MacBook Wi-Fi settings there in Wi-Fi, you will see your Camera SSID name, click on the name of your camera’s Wi-Fi network to connect to it. You may be prompted to enter a password, which is located below the camera’s SSID name.

Step: 5 ( Launch and Connect Canon EOS Utility software )
Once you are connected to your camera’s Wi-Fi network, launch the Canon EOS Utility software on your Mac. If you don’t have this software installed, you can download it from the Canon website.
The EOS Utility software should automatically detect your camera and establish a Wi-Fi connection between your camera and Mac. Once the connection is established, you can use the EOS Utility software to control your camera, transfer photos and videos, and adjust settings.
A video guide is also here if you want to visually see how to connect Canon camera to Mac wirelessly:
Step: 6 ( Transfer Files to Mac/MacBook )
Now, to transfer photos and videos, select the files you want to transfer in the EOS Utility software and click on the “Download” button. Choose the location where you want to save your files on your Mac or MacBook.
That’s it! Now you have successfully connected your Canon camera to your Mac wirelessly using Wi-Fi and can transfer your photos and videos without the need for a USB cable.
3) Connect Canon camera to Mac/MacBook with an SD Card
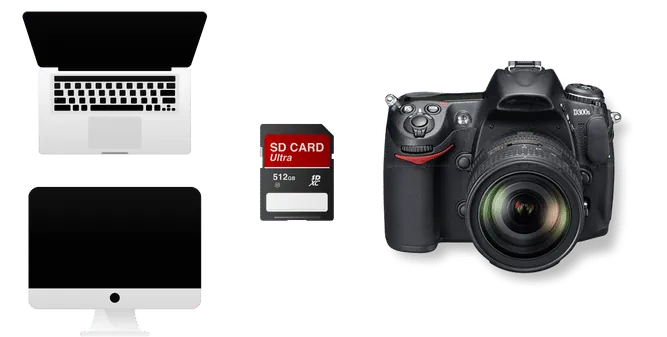
When it comes to connecting your Canon camera to your Mac or MacBook, another convenient way to connect or you can say transfer files is using a memory card. This allows you to transfer media files in a more traditional way. So, follow these steps to connect your Canon camera to your Mac using a memory card:
If you prefer a more traditional method of transferring media files from your Canon camera to your Mac, you can use a memory card. Here’s a step-by-step guide on how to connect your Canon camera to your Mac using a memory card:
Step 1: ( Prepare the Memory Card )
Insert the memory card into your Canon camera. Ensure that the card is compatible with your camera and has sufficient storage capacity to hold the files you want to transfer.
Step 2 : ( Locate the Memory Card Slot on Your Mac/ MacBook )
Most modern Mac computers have an SD card slot built-in. If your Canon camera uses an SD card, locate the appropriate slot on your Mac. If your camera uses a different type of memory card, you may need an external card reader that is compatible with your Mac.
if your mac does not have a dedicated SD card slot, don’t worry, you can use your memory card by using an external card reader and then connect that to your mac.
Step 3 : ( Connect the Memory Card to Your Mac )
Once you have located the memory card slot on your Mac, carefully insert the memory card into the slot. Make sure the card is properly aligned and inserted all the way in.
Step 4 : ( Access the Memory Card on Your Mac )
After inserting the memory card, your Mac should recognize it as an external storage device. The memory card icon will typically appear on your desktop or in the Finder sidebar. Double-click on the memory card icon to open it and access its contents/files.
Step 5 : ( Transfer Files from the Memory Card )
Now that you have access to the memory card on your Mac, you can transfer the media files from the card to your computer. Simply select the files you want to transfer, either drag them to a desired location on your Mac or use the copy-and-paste method.
So, by following these steps, you can easily connect your Canon camera to your Mac using a memory card and can transfer your media files.
Well, that’s it, we have covered how to connect your Canon camera to a Mac or MacBook laptop. So now, as promised, I’ll walk you through the process of connecting your Canon camera to a Windows laptop.
You May Like:
15 Common laptop problems and solutions
How Much does it Cost to Replace a MacBook Screen
How much does a MacBook Pro battery Cost
Connect a Canon camera to Windows laptop

If you’ve already learned how to connect your Canon camera to a Mac or MacBook, connecting it to a Windows laptop won’t be different for you. So, if you have a Windows laptop and you want to connect your Canon camera to it, you’ll find it very straightforward and easy to do because the steps are quite similar
Just like with a Mac, connecting a Canon camera to a Windows laptop can also be done in three different ways. So let me walk you through each with easy to follow steps:
1) USB Cable:
- Make sure your Canon camera is turned off.
- Take the USB cable that came with your camera and connect one end to your camera’s USB port.
- Plug the other end of the cable into an available USB port on your Windows laptop.
- Turn on your Canon camera.
- Your Windows laptop should detect the camera and install any necessary drivers automatically.
- Once the installation is complete, you can access your camera’s files and transfer them to your laptop.
2) Wi-Fi Connection (Using EOS Utility Software):
- First, make sure your Canon camera can connect via Wi-Fi.
- Install the EOS Utility Software on your Windows laptop from Canon official website.
- On your Canon camera, find the Wi-Fi settings and enable the Wi-Fi function.
- Open the EOS Utility Software on your Windows laptop.
- Look for the option within the software that allows you to connect to your camera using Wi-Fi.
- Simply follow the on-screen instructions that pop up to establish the Wi-Fi connection between your camera and laptop.
- Once the connection is successful, you’ll be able to control your camera remotely and wirelessly transfer files using the EOS Utility Software.
Note: Keep in mind that the steps might differ slightly depending on your specific Canon camera model and the version of the EOS Utility Software you’re using. For more accurate and detailed instructions tailored to your camera, refer to the user manual or check Canon’s support resources.
3) SD Card Reader:
You can also use SD card to transfer your files from camera to laptop, to do this:
- First, remove the SD card from your Canon camera with all the desired files.
- Insert the SD card into an SD card reader.
- Connect the SD card reader to an available USB port on your Windows laptop.
- Your laptop should recognize the SD card and automatically open a file explorer window.
- If not, manually open the file explorer and navigate to the SD card’s contents.
- You can then copy the desired files from the SD card to your laptop’s storage.
So, these are the three ways you can connect your Canon camera to a Windows laptop. Choose the method that suits your preferences and follow the simple steps provided above.
If you are also interested in learning how to connect your Canon camera to iOS devices, I have got you covered because sometimes you may want to transfer camera files to your iPhone or other iOS devices.
So, let me guide you through the process of connecting your Canon camera to an iOS device so that you can easily transfer your files whenever you need to.
Connect Canon Camera to IOS Devices
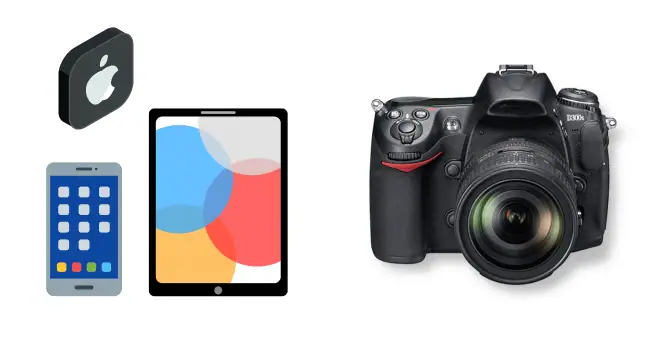
Here are the quick steps to connect your Canon camera to iOS devices:
Steps:
- The first Step is to always ensure that your Canon camera supports Wi-Fi connectivity.
- Now, on your iOS device, go to the App Store and download the Canon Camera Connect app.
- Power on your Canon camera and access its Wi-Fi settings and enable Wi-Fi.
- On your iOS device, open the Settings and navigate to Wi-Fi.
- Look for the Wi-Fi network name (SSID) of your Canon camera and connect to it.
- Launch the Canon Camera Connect app on your iOS device.
- Follow the on screen instructions in the app to establish the Wi-Fi connection between your camera and iOS device.
- Once connected, you can use the Canon Camera Connect app to transfer files, remotely control your camera from phone, or perform other functions.
Note: The process is similar for connecting Canon camera to android devices.
How to Use Canon Camera as Webcam
Many people also asks how to use Canon camera as a webcam on laptop because the quality of built-in cameras on their laptops does not meet their expectations and this can be for any reason.
So, if you also happen to have a Canon camera and want to improve your laptop camera quality for online meetings, streaming’s or anything, using your Canon camera as a webcam is a great solution, and here are the eight steps on how you can use it as webcam.
- Visit the Canon official website and find the Canon EOS Utility software that matches your camera model and computer’s operating system and download it to your Laptop/Mac/MacBook.
- Once the download is complete, follow the on screen instructions to install the software. If the installation prompts you to restart your computer, go ahead and do so.
- Now, grab a USB cable which comes with your camera and connect your Canon camera to your device. Make sure your camera is turned on.
- Check your camera settings and set it to the appropriate mode for webcam usage. This mode is usually labeled as Live View or Movie Mode. If you’re not sure how to do this, refer to your camera’s user manual for guidance.
- Now, open you desired video conferencing application, such as Zoom, Microsoft Teams, or Skype or anything etc. Go to the settings or preferences section within the application.
- There look for the video settings and find the option to choose your camera input source or webcam device. In the list, you should see your Canon camera listed as “Canon EOS Webcam Utility” or with the specific model name.
- If needed, you can tweak the camera settings within the video conferencing application. This includes adjusting the resolution and frame rate to your preference.
- To make sure everything is working smoothly, start a video call or preview your video feed within the application. Check if your Canon camera is providing the desired video input.
Note: Remember, if you encounter any difficulties during the installation or compatibility issues, it’s always a good idea to refer to the Canon EOS Webcam Utility documentation or seek support from Canon Support team.
Also Read: How to Use Webcam on Chromebook
Troubleshooting Common Canon Camera Connection Issues with Mac
Connecting your Canon camera to your Mac or MacBook can be a frustrating experience if you encounter any issues. But don’t worry, we’re here to assist you in troubleshooting the problem. Below are some effective troubleshooting tips that can help you resolve common issues:
Check USB cable for any damage or connectivity issues:
Take a close look at the USB cable to see if there are any visible signs of damage or frayed wires. It’s important to ensure that the cable is in good condition and not compromised. If you suspect the cable might be the culprit, try using a different USB cable as a troubleshooting step. This will help you determine if the issue lies with the cable itself.
Additionally, make sure that the USB cable is securely connected to both your Canon camera and your Mac. A loose or unstable connection can cause connectivity problems. Double-check the connections to ensure they are snug and properly inserted.
Ensure camera is powered on and recognized by the Mac:
To ensure that your camera is powered on and recognized by your Mac, you need to follow a few steps:
- First, make sure your Canon camera is turned on and set to the appropriate mode for computer connectivity, which could be playback or transfer mode.
- Next, connect your camera to your Mac using a compatible USB cable, ensuring that the connection is secure. So, once connected, open the Finder window on your Mac and look for your camera’s icon under the “Devices” section in the sidebar.
- If you don’t see the camera listed, you can troubleshoot the issue by trying a different USB port on your Mac or checking for any firmware updates for your camera.
These steps will help ensure that your camera is powered on and recognized by your Mac, allowing you to proceed with file transfers or other camera related tasks.
Restart the Mac and try reconnecting the camera:
If you’re experiencing connection issues between your Mac and Canon camera, a quick and effective troubleshooting step is to restart your Mac and then reconnect the camera. Restarting can often resolve any temporary glitches or conflicts that might be hindering the connection. After restarting, make sure to reconnect the Canon camera to your Mac using the USB cable.
In case the camera is still not recognized after the restart, you can try connecting it to a different USB port on your Mac. Sometimes, certain USB ports might have compatibility or performance issues, so attempting a connection through an alternative port can help determine if that’s the case or issue.
Update your camera’s firmware:
To ensure a smooth connection between your Canon camera and Mac, it’s important to keep your canon camera firmware up to date. To do so, visit the Canon official website and check if there are any firmware updates available for your camera model. Follow the instructions provided by Canon to update the firmware.
Update your Mac operating system:
Make sure that your Mac is running the latest version of macOS. Software updates often include bug fixes and improvements that can help resolve compatibility issues, and hope the Canon camera connection issue also got resolved with this.
EOS Utility not working:
Contact Canon support:
If you have tried all the troubleshooting steps and are still experiencing difficulties, it may be best to reach out to Canon camera customer support for further assistance. They can provide specific guidance for your camera model and help troubleshoot the issues you are facing while connecting.
FAQ( How to Connect Canon Camera to Mac )
How do I get my Canon camera to show up on my Mac?
To get your Canon camera to show up on your Mac, you will need to establish a connection between both devices. To do so, start by connecting your Canon camera to Mac using a compatible USB cable ( use the one that comes with your camera ). Once connected, your Mac should automatically recognize the camera as a storage device and then you can do the desired tasks.
What do I need to connect my Canon camera to a Mac?
To connect your Canon camera to a Mac, you will need a USB cable that is compatible with both, your canon camera and Mac. It is also important to select a cable that works with your specific camera model and can connect to USB port on Mac.
Can I connect my Canon camera to a Mac using a USB cable?
Yeh, you can connect your Canon camera to a Mac using a USB cable. It allows you to transfer photos and videos directly from your camera to Mac.
How do I connect my Canon camera to my Mac wirelessly?
To connect your Canon camera to your Mac wirelessly, ensure both devices are connected to the same Wi-Fi network. Enable the Wi-Fi on your Canon camera and connect your Mac to the same network.
Then, use Canon’s dedicated software, like EOS Utility, to establish a wireless connection. Follow the camera’s user manual or visit the Canon website for specific instructions on setting up and using the wireless connectivity feature. This will allow you to transfer photos and videos wirelessly and conveniently.
What is the Canon EOS Utility, and how can I use it to connect my camera to a Mac?
Canon EOS Utility is software provided by Canon to connect canon camera to a Mac or any other laptop. It allows you to control your camera remotely, transfer files, and perform various camera settings. So you can download and install the Canon EOS Utility software from the Canon official website and follow the instructions to connect your camera to your Mac easily.
How do I import videos from my Canon camera to a Mac?
The process of importing videos from a Canon camera to a Mac is similar to transferring photos. Connect your camera to your Mac using a USB cable, access the camera’s storage, locate the videos you want to import, and copy them to a folder on your Mac.
Are there any alternative methods to connect a Canon camera to a Mac?
Apart from using a USB cable or Wi-Fi, some Canon cameras support connecting to a Mac using an SD card reader or an HDMI cable. Check your camera’s user manual for information on alternative connection methods.
How do I transfer photos from camera to MacBook?
To transfer photos from your camera to your MacBook, there are a few different methods you can use.
One common way is to connect your camera to your MacBook using a USB cable. Ensure your camera is turned on and set to the appropriate USB mode. Once connected, your MacBook should recognize the camera as a storage device, and you can access the photos directly.
Alternatively, if your camera supports Wi-Fi connectivity, you can transfer photos wirelessly by connecting both devices to the same Wi-Fi network and using Canon’s dedicated software ( Canon EOS Utility ).
Another option is to remove the memory card from your camera and use a card reader to transfer the photos to your MacBook. Choose the method that suits your needs and preferences.
My Mac doesn’t recognize my Canon camera. What should I do?
If your Mac doesn’t recognize your Canon camera, try the following steps:
1) Ensure that the USB cable is securely connected to both the camera and the Mac.
2) Restart your Canon camera and the Mac.
3) Check if there are any firmware updates available for your camera on the Canon website.
4 )Try connecting the camera to a different USB port on your Mac.
5) If possible, test the USB cable with another device to ensure it is functioning properly.
6 )If the issue persists, consult the Canon support website or contact Canon customer support for further assistance.
Well, those were the most common frequently asked questions regarding how to connect a Canon camera to a Mac and transfer photos. So, it’s time to conclude this topic.
My final say on How to Connect Canon Camera to Mac
Connecting your Canon camera to your Mac is a straightforward process that can be done in three different ways: using a USB cable, establishing a wireless connection, or utilizing a card reader. In this guide, we have provided step-by-step tutorials for each method to make the process as easy as possible.
Additionally, we have also guided you on how to connect your Canon camera to other iOS devices and Windows laptops aswell. Furthermore, we have answered many frequently asked questions on this topic to address your concerns and provide helpful information.
We hope that this guide has been helpful in assisting you with connecting your Canon camera to your Mac and transferring photos. Remember, if you encounter any difficulties or have additional questions, Canon’s customer support is always available to assist you. Thank you for reading, have a great day ahead…!

Isaac Smith is the founder and editor of PC Glance, a website that covers computers, laptops, and technology. He is a tech enthusiast and a computer geek who loves to share his insights and help his readers make smart choices when buying tech gadgets or laptops. He is always curious and updated about the latest tech trends.