In today’s age of digital communication, remote work, and online learning – webcams have become an essential tool to facilitate modern communication. Through webcams, people are able to interact with virtually anyone regardless of geographical restrictions. So, in order to take full advantage of your webcam, particularly if you’re using a Chromebook, it’s essential to understand how it operates, its features and settings.
However, using a webcam on a Chromebook is a unique experience when compared to other operating systems. In this comprehensive guide, we will take you through the basics of using a webcam on your Chromebook. We’ll provide you with easy-to-follow instructions and tips for accessing the camera, adjusting settings, and using various apps to enhance your webcam experience.
Aside from the built-in webcam, you may also want to consider using an external webcam for even better video quality or for any reason. So in this guide, we will also show you how to connect and use an external webcam on your Chromebook.
But before we can discuss how to use webcams on Chromebooks, let’s first check the types of webcams that are compatible with them.
Types of Webcams Compatible with Chromebooks
When it comes to webcams, there are three main types that are compatible with Chromebooks: built-in webcams, external USB webcams, Bluetooth webcams.
Built-in webcams:
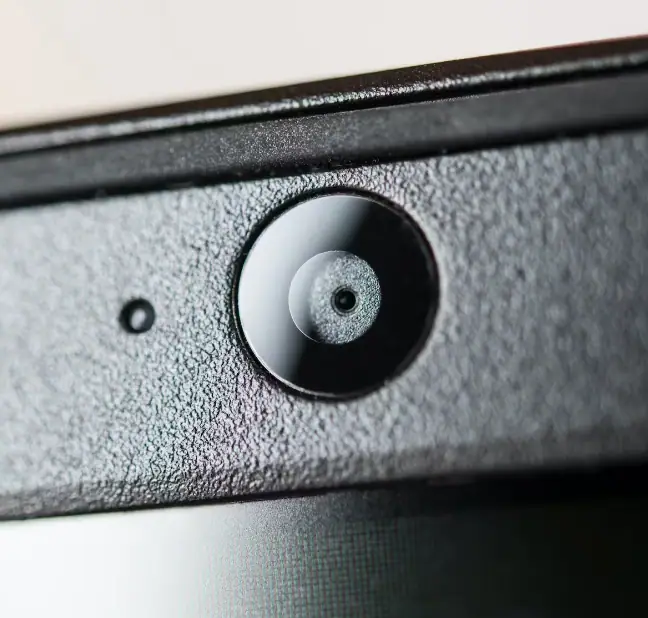
Many Chromebooks come with a built-in webcam located above the screen. These webcams are handy and simple because they don’t need extra setup or installation. They are great for using while traveling because they are part of the device and don’t make it heavier or bigger.
However, built-in webcams might not always be the best choice since they have limited resolution and can produce low-quality images in low light conditions. Also, you can’t change the angle of the webcam, which can be a problem if you need a certain view.
External USB webcams:
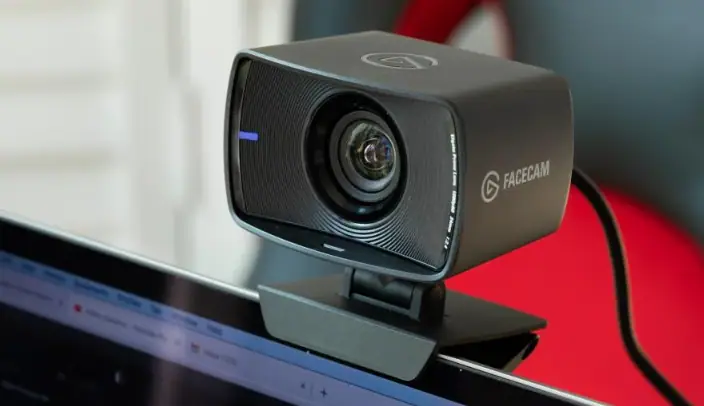
External USB webcams offer substantial advantages compared to built-in webcams, including higher resolution and improved image quality as well as additional features such as adjustable angles, built-in microphones, and focus adjustment.
Natural portability is a prime benefit of external webcams; they can be quickly removed from one device and connected to another with ease. Furthermore, USB webcams come in varying shapes and sizes for added versatility. Any one interested in obtaining a more robust webcam should strongly consider an external USB model for the many benefits it provides.
Bluetooth webcams:
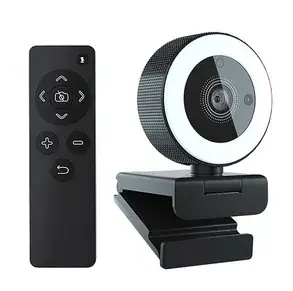
Bluetooth webcams also offer enhanced portability and simplified setup compared to USB models. Users can easily connect to compatible devices without having to continuously attach and remove cables, making Bluetooth cameras a great choice for Chromebooks. Furthermore, users will appreciate the convenience of this type of connection over traditional USB models.
However, due to possible limitations such as lower image quality than USB webcams and limited compatibility with some Chromebooks that don’t have Bluetooth connectivity, users should consider the pros and cons before making a purchase.
Using webcam on Chromebook
Now, let’s explore the process of using webcams on a Chromebook, whether they are built-in, external, or connected via Bluetooth.
How to use a Webcam on a Chromebook ( Built-In Webcam )
Using the built-in webcam on a Chromebook is simple. You can access the webcam through various applications, but the easiest way to get started is by using the built-in Camera app. Here’s a step-by-step guide to use your Chromebook’s webcam:
1) Launch the Camera app:
- Click on the Launcher icon, which looks like a circle in the bottom-left corner of the screen.
- Type “Camera” in the search bar that appears and click on the Camera app icon to open the app.
2) Choose the camera mode:
- Once the Camera app is open, you will see different camera modes at the bottom or top of the screen, such as “Photo” and “Video.” Select the desired mode by clicking on it.
3) Adjust camera settings (optional):
- If you want to modify camera settings, click on the gear icon (settings) in the app. Here you can change the resolution, timer, and grid options, among others. Note that available settings may vary depending on your Chromebook model.
4) Take a photo or record a video:
- For photos: Position yourself or the subject in front of the camera and click the shutter button (a large circle) to take a photo.
- For videos: Click the red record button (a circle with a square inside) to start recording. Click the button again to stop recording.
5) Access your media files:
- Photos and videos taken with the Camera app are automatically saved in the “Downloads” folder on your Chromebook. To access these files, click on the Files app in the Launcher and open the “Downloads” folder.
Note: Keep in mind that you can also use your built-in webcam for video calls with apps like Google Meet, Zoom, or Skype. To do so, just open the respective app, sign in or join a call, and grant permission for the app to access your camera when prompted.
How to use External Webcam on Chromebook
To use an external USB webcam on a Chromebook, follow these steps:
1) Connect the webcam:
Plug the USB webcam into an available USB port on your Chromebook. If your Chromebook doesn’t have a USB port, you might need to use a USB-C to USB adapter.
2) Wait for detection:
After connecting the webcam, wait a few seconds for your Chromebook to detect and configure the device automatically. You should see a notification indicating that your USB device has been connected.
3) Test the webcam:
Now, open the built-in Camera app on your Chromebook to test the webcam. You can find this app by clicking the Launcher icon in the bottom-left corner of the screen, then typing “Camera” in the search bar and selecting the app from the search results.
4) Switch to the external webcam:
Once the Camera app is open, click the “Switch camera” icon in the top-right corner of the app window to toggle between the built-in camera and your external USB webcam.
5) Adjust settings (optional):
If you want to adjust the settings of your external webcam, such as resolution or other features, look for a dedicated app or software from the webcam manufacturer. If they provide a Chrome OS compatible app, you can install it from the Chrome Web Store.
Note: To use your external USB webcam with other apps, such as Google Meet or Zoom, open the app and go to its camera settings. Select your external webcam as the default camera.
That’s it! Your external USB webcam should now be set up and ready to use with your Chromebook.
How to use Bluetooth Webcam on Chromebook
For induvial who are looking to use a Bluetooth webcam on their Chromebook, it’s important to first check the device’s compatibility before connecting. Not all Bluetooth webcams will be compatible, so please check the device’s compatibility before proceeding.
To use a Bluetooth webcam on a Chromebook, you can follow these steps:
1) Turn on your Bluetooth webcam:
To use your Bluetooth webcam, begin by ensuring it is charged and powered. Depending on the model, Bluetooth webcams either come with an On/Off switch or automatically turn on when unplugged from a power source, so make sure it’s discoverable.
2) Enable Bluetooth on your Chromebook:
To enable Bluetooth on your Chromebook, begin by locating the time in the bottom right corner of the screen and select it to open up a settings menu. Next, click on the gear icon found to access the full page of settings. From there, navigate to the “Bluetooth” section and turn Bluetooth on by clicking or tapping on the toggle switch.
3) Pair the webcam:
Put your Bluetooth webcam in pairing mode (refer to the device’s manual for specific instructions). Your Chromebook should now detect the webcam and display its name in the list of available Bluetooth devices. Click on the webcam’s name and follow the on-screen instructions to complete the pairing process.
4) Check Compatibility of Webcam and Camera setting:
To ensure that your Bluetooth webcam is connected, go to your laptop settings and open “Privacy and Security.” Navigate to “Site settings” and then access the “Camera” option. In given dropdown menu, ensure that your Bluetooth webcam is selected as the default for your Chromebook. If you don’t see it listed, it may mean that your laptop is not compatible with your webcam.
5)Test the webcam:
After you have ensured that the webcam is connected and compatible with your Chromebook. You can now launch the camera app on your Chromebook and start using your Bluetooth webcam.
Also read: Upgrading Your Laptop: Can You Add External RAM to a Laptop
You can also open an application or website that requires camera access. Popular apps like Google Meet, Zoom, and Skype are good options. The Bluetooth webcam should now be the default option for any kind of video-related activities on these platforms.
Note: If you’re having trouble connecting your Bluetooth webcam to your Chromebook, make sure it’s charged and turned on, and try moving closer to your Chromebook to establish a stronger Bluetooth connection. You can also try resetting your Bluetooth webcam and Chromebook and trying again.
Now that you know how to use your Chromebook’s webcam, it’s time to explore the various video conferencing and streaming apps available to enhance your online communication.
Popular Video Conferencing and Streaming Apps for Chromebooks

A variety of video conferencing and streaming apps are available for Chromebooks, including:
- Google Meet: Integrated with Google Workspace, Meet is a popular choice for video meetings and collaboration.
- Zoom: This widely-used app offers features like virtual backgrounds, breakout rooms, and screen sharing.
- Skype: A classic choice for video calls, Skype provides chat and file-sharing capabilities alongside video conferencing.
- Microsoft Teams: Designed for business users, Teams integrates with Microsoft Office and supports video meetings and collaboration.
- OBS Studio: A powerful app for live streaming and recording, OBS Studio is available on Chromebooks via the Linux container.
Of course, there are many more apps out there to choose from, but these are some of the most widely-used Apps.
Troubleshooting Common Webcam Issues on Chromebooks
Having trouble with your Chromebook’s webcam? Don’t worry, we’ve got you covered. From software glitches to hardware malfunctions, common webcam issues can be frustrating to deal with. But don’t worry! we’ve compiled a list of simple yet effective troubleshooting steps to help you identify and resolve any problems with your Chromebook’s webcam.
1) Webcam not detected or not working:
- Restart your Chromebook: If you’re having issues with your Chromebook’s camera, first try restarting the device, a simple restart can sometimes resolve the issue.
- Check for updates: Ensure that your Chromebook’s OS is up to date, to do so, go to Settings > About Chrome OS > and their Check for updates.
- Check app permissions: If your webcam is not working on certain apps, make sure the app you’re using has permission to access the webcam. Go to Settings > Privacy and security > Site settings > Camera and make sure the app is allowed.
- Reset camera app: If your webcam is still not working, try resetting the camera App, to do so, Go to Settings > Apps > Google Play Store > Manage Android preferences > Apps & notifications > See all apps > Camera > Storage & cache > Clear storage & Clear cache.
2) Poor video quality or lag:
If you’re having problems with poor video quality or lag, there are a few things you can do.
- Check your internet connection: A slow internet connection can cause video quality issues. Try using a wired connection or moving closer to your Wi-Fi router.
- Close unnecessary apps or tabs: Running too many apps or tabs can strain your Chromebook’s resources, which can impact video quality. Close any apps or tabs you’re not using.
- Check webcam settings: Open your webcam application (e.g., Google Meet, Zoom, Skype) and go to its settings, their adjust the video quality settings if available, lowering the resolution if necessary to reduce lag. Also make sure that the correct webcam is selected if you’re using an external one.
3) Webcam not working with specific apps or websites:
If you’re having trouble with your webcam not working properly when using certain applications or websites on your Chromebook then try these:
- Update the Application: If your webcam is not working on some apps then first make sure you’re using the latest version of the app, as outdated versions may not be compatible with your webcam.
- Disable browser extensions: Some browser extensions may interfere with your webcam. Disable any extensions that might be causing the issue, and then restart your browser.
- Clear browser cache and cookies: if still you are having an issue with webcam on your browser, then go to Settings > Privacy and security > Clear browsing data, then select “Cached images and files” and “Cookies and other site data.” Clear the data and restart your browser.
4) Camera app not working:
- Clear app cache: Go to Settings > Apps > Camera > Storage > Clear cache.
- Uninstall and reinstall the app: Go to Settings > Apps > Camera > Uninstall, and then reinstall the app from the Google Play Store.
If none of above solutions work, there may be a hardware issue with your Chromebook’s webcam or the External webcam. In this case, contact the manufacturer or an authorized service center for further assistance.
Tips on Enhancing Your Webcam Experience on a Chromebook
Now that you’ve resolved any common webcam issues on your Chromebook, it’s time to focus on enhancing your overall webcam experience. Whether you’re using your Chromebook for work or personal video calls, having a clear and high-quality video feed can make all the difference.
So let us provide you with some useful tips to help you get the most out of your Chromebook’s webcam and elevate your video call experience.
Adjusting Webcam Settings:

In Chromebooks you can adjust your webcam settings for better camera results. To do this, open the Camera app and select the gear icon to access the settings. From there you can adjust brightness, contrast, saturation and resolution levels as well as frame rate to ensure that your video produces clear and vibrant images.
Clean your webcam lens:
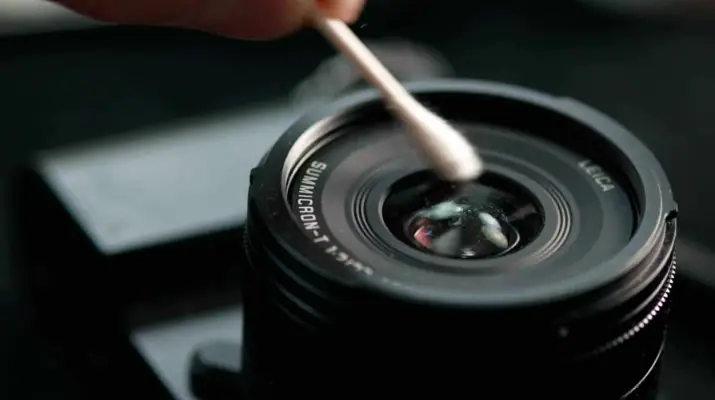
Over time, the lens of your webcam can accumulate dust and dirt, which can negatively impact the image quality. Clean the lens with a soft cloth to remove any dirt or smudges.
Optimizing Lighting and Background for Webcam Use:

For the best webcam appearance, it’s important to optimize your lighting and background. Ensure that the main light source is positioned in front of you – not behind you. Additionally, create a simple, uncluttered background so that viewers won’t be distracted by it.
To avoid a washed-out look, ensure that there isn’t any glaring light shining directly into the webcam from behind you or from a window.
Utilizing Third-Party Camera Apps:

For an enhanced webcam experience, you may consider downloading third-party camera apps. These can provide a range of features, such as filters and effects as well as manual adjustment for focus and exposure. Popular camera apps for Chromebooks include Webcam Toy, YouCam, and Snap Camera.
Investing in a Quality External Webcam:
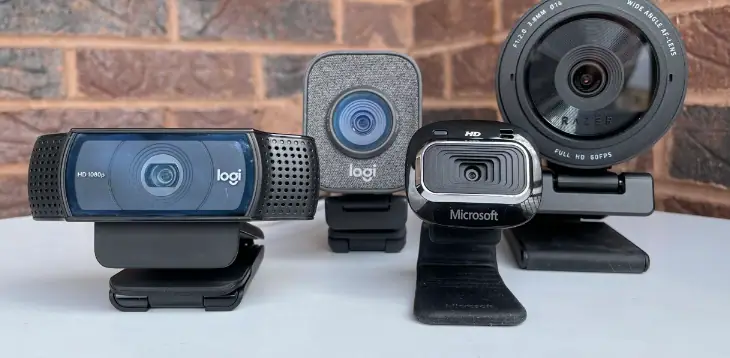
If you’re looking to improve the quality of your video calls, it may be worth investing in a higher-quality external webcam. These webcams typically offer superior image resolution and low-light performance as well as more advanced features.
They also give you more flexibility when it comes to positioning the camera. When choosing a webcam, prioritize one with high resolution and good low-light performance; if needed, choose one that has its own built-in microphone.
We hope that these tips have been useful in helping you make the most of your webcam and present yourself professionally during remote calls or for online classes. By following our suggestions, you should be able to enhance your experience and look your best.
FAQ ( How to Use Webcam on Chromebook )
Do all webcams work with Chromebooks?
While most modern webcams are designed to be compatible with a wide range of devices, including Chromebooks, These laptops use the Chrome OS, which supports the USB Video Class (UVC) standard. Most webcams available on the market are UVC compliant, which means they should work with Chromebooks without the need for additional drivers or software.
it is important to note that not all webcams will work seamlessly with Chromebooks. As these laptops use Chrome OS operating system, which is based on the Linux kernel and prioritizes web-based applications. As a result, Chrome OS has limited support for peripheral devices and drivers compared to more traditional operating systems like Windows or macOS.
Overall, most webcams should work with Chromebooks, but it’s best to check the compatibility before making a purchase.
Why is my webcam not working on my Chromebook?
If your webcam isn’t working on your Chromebook, try the following troubleshooting steps:
1) Check privacy settings and grant the app or website camera access.
2) Restart your Chromebook.
3) Update Chrome OS to the latest version.
4) Inspect the webcam for hardware issues.
5) Test the webcam with another app or website to identify if the issue is specific to a particular platform.
Can I use my phone as a webcam for my Chromebook?
Yes, you can use your phone as a webcam for your Chromebook. Download a suitable app on both your phone and Chromebook, such as DroidCam, Iriun Webcam, or EpocCam. Connect your devices to the same Wi-Fi network and follow the app-specific setup instructions to use your phone as a webcam.
Remember that using your phone as a webcam might not provide the same quality as a dedicated webcam, and the performance might vary depending on your phone and network conditions.
Can I use an external webcam with my Chromebook?
Yes, most USB webcams are compatible with Chromebooks. Plug the webcam into an available USB port, and the Chromebook should automatically recognize and configure it.
How do I adjust webcam settings on my Chromebook?
Chromebooks allow users to adjust settings on their webcam using the camera app. Commonly customizable options include resolution, brightness, and contrast. Additionally, many video conferencing applications may offer more specific adjustments within the app itself.
How do I give a website or app permission to use my Chromebook’s webcam?
When granting permission for a website or app to use your Chromebook’s webcam, you first need to go to Settings > Privacy and Security > Site Settings > Camera. Make sure the app or website is allowed to use the camera, otherwise you can permit access when prompted by the site or app itself.
How do I disable my webcam on a Chromebook?
To disable your webcam, go to Settings > Privacy and Security > Site Settings > Camera, and block the camera access for all websites and apps. Alternatively, unplug any external webcam connected to your Chromebook.
Ending Thoughts on How to Use Webcam on Chromebook
Finally we would say, using a webcam on a Chromebook is a straightforward process that can greatly enhance your online communication and remote work capabilities. Whether you’re using a built-in webcam or an external one, by following the simple steps outlined in this article, you can easily use your Chromebook’s webcam for taking photos, recording videos, and participating in online meetings and video conferencing.
Additionally, by considering factors such as lighting, sound, and surroundings, and using tips and tricks such as filters and posture, you can ensure that you’re presenting yourself in the best possible light and making positive impression on your colleagues or clients.
We hope you found this guide informative and easy to follow. Don’t hesitate to reach out if you have any questions or feedback. Thank you for reading!
You May like to Read:
13 Tips on How to Keep Laptop Cool in Hot Car
How to Know the Pin Size of Laptop Charger

Isaac Smith is the founder and editor of PC Glance, a website that covers computers, laptops, and technology. He is a tech enthusiast and a computer geek who loves to share his insights and help his readers make smart choices when buying tech gadgets or laptops. He is always curious and updated about the latest tech trends.