A motherboard HDMI port needs a processor with supported integrated graphics. Plug the monitor into your graphics card if the CPU doesn't have that capability.
If it does, check the BIOS graphics setting, especially when the graphics card works but the motherboard port doesn't.
Check when the screen loses its picture: throughout startup, or only once Windows has loaded. Watch whether the motherboard HDMI shows the startup logo before choosing the next fix.
In this guide
1. Connect the display to the graphics hardware you have
Check the computer's rear connections. The motherboard video ports sit with the main USB, network, and audio connections. A separate graphics card has its own display connectors on an expansion-slot bracket.
If the PC has a graphics card, connect HDMI directly to that card. Use the monitor's input selector to choose that connection. Once the card gives you a picture, you can use the computer to check whether the motherboard output is supported.
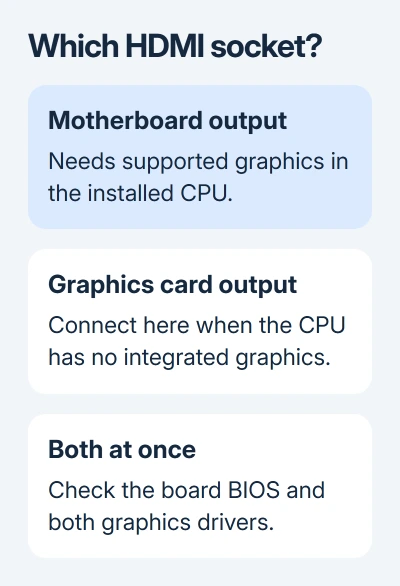
The motherboard socket isn't a pass-through for the graphics card's HDMI signal. A working graphics card doesn't automatically make the motherboard port work. That distinction matters when adding a second monitor to a desktop.
I'd try the graphics card's spare output before buying a different processor just for another HDMI socket. Check the card and monitor's available connections first; another compatible display connection may already meet your needs.
If neither connection gives a picture, select the monitor input manually and try a cable and display that work with another device. Connect the cable directly for this comparison, leaving docks and adapters out of the path.
A picture from the graphics card tells you that output can reach the monitor. Check CPU support next rather than replacing the monitor because the motherboard socket is blank.
2. Verify integrated graphics for the exact CPU
When Windows works through the graphics card, open Settings > System > About and read Processor. If the PC won't display anything, use its order details or build record to find the exact CPU model.
Check that model's official specifications for processor graphics. Match the complete name, including its suffix. Even related processors can differ in graphics support, so check the complete model rather than just its series name.
Also check the motherboard's CPU support list and video-output specifications.
ASUS says to confirm CPU graphics support in its no-display troubleshooting.
If the installed processor lacks integrated graphics, there is no Windows driver or BIOS switch that can add them. Use the graphics card's ports, or choose compatible hardware that provides the outputs you need.
If graphics are supported, note whether motherboard HDMI has ever worked with this CPU. For a new build that's never shown a picture, check compatibility and setup.
If the output worked before, also check its connection and anything you've changed recently.
Don't remove a working CPU just to read its model from the chip. The Windows Processor field, invoice, or build record is a better starting point. Leave work inside the case until the hardware checks point to a reason for it.
3. Enable both graphics devices when the board supports it
Some motherboards need a BIOS option enabled to keep integrated graphics active alongside a graphics card. Enter BIOS using the working graphics-card connection, then follow your board's instructions for its graphics controls.
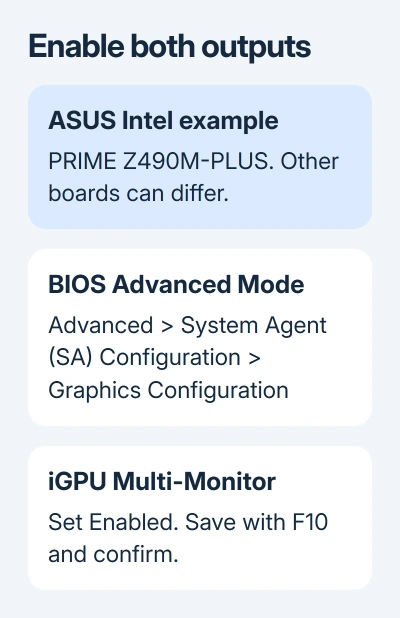
On the ASUS PRIME Z490M-PLUS example, press Delete during startup, then F7 for Advanced Mode if needed. Open Advanced > System Agent (SA) Configuration > Graphics Configuration.
Set iGPU Multi-Monitor to Enabled, then press F10 and confirm the change.
These names come from the ASUS multi-monitor instructions; they aren't a universal path for every motherboard.
For the AMD PRIME X570-PRO example, the route is Advanced > NB Configuration > IGFX Multi-Monitor. Read the board-specific notes before copying it.
On ASUS AM5 and Intel 800-or-later boards, the guide lists dual-display support by default. The toggle can be absent there; the CPU still needs supported graphics.
After saving, let the computer restart and reconnect the second display. If both outputs now work, the BIOS setting was preventing simultaneous use. Continue to Windows only if the extra display still isn't available there.
If your board has no matching option, check its manual or ask the manufacturer whether simultaneous integrated and separate graphics are supported. Don't change unrelated PCIe, memory, or boot settings while searching for a display switch.
4. Check the driver and Windows display mode
Once the CPU and BIOS support motherboard output, open Device Manager through the Start button's right-click menu, then expand Display adapters.
Check whether the integrated graphics device and the separate graphics card are listed.
Install the integrated graphics driver using the PC maker or board manufacturer's instructions. Choose the package for your hardware and Windows version. The graphics card's driver doesn't replace it.
If the installer can't find compatible hardware, return to the CPU and BIOS checks. The current settings may have disabled the device, or you may have the wrong package.
Repeatedly forcing the same installer won't change processor support.
Press Windows + P and choose Extend when you want a larger desktop across both displays. With Duplicate, each monitor displays an identical desktop. This tells Windows how to use the screens once the hardware can send a picture.
In Windows 11, open Settings > System > Display > Multiple displays and use Detect if necessary.
The multiple-monitor instructions cover this control. The HDMI configuration guide explains the resolution and display controls separately.
If motherboard HDMI shows the startup logo but goes blank as Windows loads, tell support that detail. That tells them the output works before Windows starts and helps them choose the driver checks.
5. Treat a PC with no startup picture as a boot problem
A new build with no picture from either supported output may be failing its hardware checks during startup. Fans spinning and lights coming on don't tell you that the processor and memory have successfully started.
Read any motherboard diagnostic LEDs using the manual. Note whether the CPU, memory, or graphics indicator stays lit. The label matters more than the LED's color, which can differ between boards.
Before opening the case, shut down and disconnect power. If you're comfortable working inside a PC, check the motherboard and CPU power connections against the manual, then follow its instructions for starting with one memory module.
A CMOS reset clears saved BIOS settings. Check the usable output, CPU support, and graphics option before removing the CPU or resetting the board.
For a connection that fails across known-working cables and monitors, use the HDMI port checks. For a new build that still won't display, give the builder your CPU, motherboard, BIOS version, and diagnostic LED result.
Ask the manufacturer or repair shop to check integrated graphics support and the board's video socket. If the CPU lacks graphics, ask about a suitable graphics-card connection instead of requesting an HDMI port repair.
The Short Version
First, check whether your exact processor supports integrated graphics. Use the graphics card when the CPU lacks it. For supported hardware, enable simultaneous graphics where needed, install the matching driver, and choose Extend.
If neither output shows a picture, have the PC checked for a startup fault.
Checked November 13, 2026.