
Canon printers use two FINE cartridges, separate color tanks or refillable tanks, so the replacement steps depend on your model. Keep cartridge printers turned on so the holder can move into place, then follow your model's latch steps.
The steps here cover the TS3500 and TS700 series. Refilling a MegaTank is a different job; you don't need to remove its print heads just because the ink is low.
Match the replacement to the printer's ink system
Check your printer's full model name before opening a new cartridge or bottle. Match the ink number to the ones your model supports, including the region. Similar packaging doesn't mean the ink will fit.
Two-cartridge models usually have one black and one combined-color FINE cartridge. Separate-tank models have a slot for each ink color. Refillable models hold liquid ink in tanks that you top up with the correct bottles.
Use the ink-level guide to check for low ink, and read your printer's message. An unrecognized or incompatible cartridge needs different checks than an empty one.
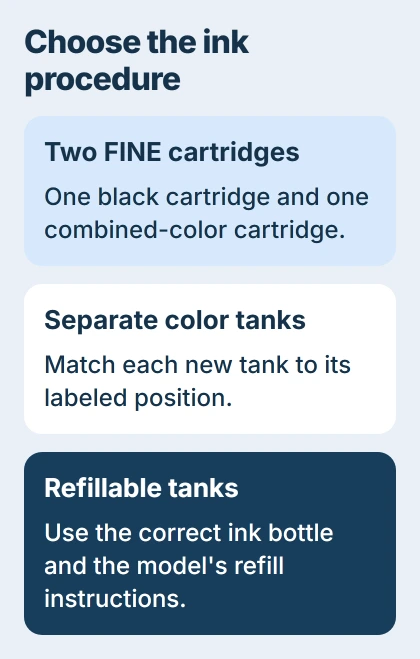
Set out the correct replacement ink before starting the swap. Replace it promptly; leaving a slot empty can let ink dry. Prepare a suitable place to put the removed cartridge.
If the ink isn't low but pages are streaked, start with a nozzle check. The print-head cleaning guide explains how to read the test pattern before you use ink on cleaning or replace supplies at random.
Replace a FINE cartridge in the TS3500 series
Canon says to keep the printer turned on in its TS3500 replacement procedure. Retract the output tray, including its extension, and open the cover.
Wait for the cartridge holder to move into its replacement position and stop. The printer moves it automatically so you can reach the cartridge latches.
Lower the locking lever for the empty cartridge. When it clicks into the released position, take that cartridge out. Replace only the one that needs changing; the black and color slots aren't interchangeable.
Unpack the new cartridge and gently remove its protective tape. Keep your fingers off the electrical contacts and nozzle area. These parts make the cartridge work; don't use them to grip it while fitting it.
Gently insert the new cartridge, keeping it straight until it touches the back of its holder. On the TS3500 series, color goes on the left and black goes on the right. Push the lock lever up until it clicks closed.
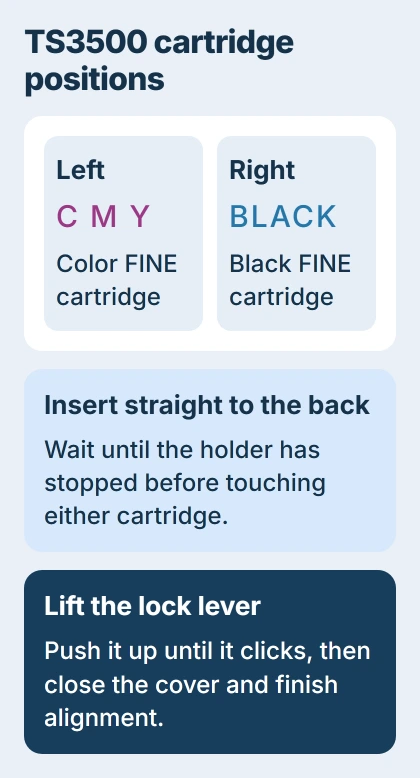
Check that the cartridge is secure, then close the cover. If the small display still shows an error, note the code and follow your model's error instructions. Read the code before repeatedly reopening the printer.
Finish the TS3500's required print-head alignment to line up the printed pattern. Follow your model's alignment steps. Cleaning blocked nozzles is a separate job, so don't start a deep clean when the printer needs alignment.
Replace an individual tank in the TS700 series
The TS700 releases its tanks differently. Turn it on and open the top cover, then wait for the print-head holder to stop at its replacement position. Leave the power connected while the holder moves.
Press the empty tank's release tab and lift it out. Replace tanks one at a time and match each slot's label. Taking them all out together makes it harder to keep track of which color goes where.
Unpack the new tank and remove all of its orange tape and protective film. Hold the tank with the orange protective cap facing up, then gently lift the cap's tab to remove the cap.
Keep the tank's air opening clear and avoid squeezing its sides as you prepare it. The TS700 tank instructions explain how to get this type of tank ready.
Insert the front end at a slant, matching the holder's label. Press the top of the tank until it snaps securely into place. Fit all required tanks in their correct slots before printing.
Close the top cover. The printer may clean the head automatically when you start printing after replacement. Let it finish; a little noise alone doesn't mean the new tank has failed.
If the holder moved away while the cover was open, close and reopen the cover as directed for this model. The printer can then move it back where you can reach it.
Use the refill procedure for a MegaTank
For a refillable model, match the ink bottle to the correct tank opening. Check the level on the tank and follow your exact model's refill steps, including any reset of the counter that tracks remaining ink.
For example, the G3010 refill procedure uses the front tank indicator to show when to refill. The counter-reset steps differ depending on whether you've had an ink warning.
Match the ink color to its tank opening and stop at the upper limit mark. Put the tank cap back on and close the covers when you're done. Filling past that mark can spill ink and damage the printer.
I'd keep your model's instructions open while doing this. Bottle fittings and counter resets can differ, so a video for another refillable Canon may not give you the right steps for yours.
Check the first print and any remaining error
After replacing the ink and finishing alignment, print a small document. Check that the text and colors appear where they should. If an error appears, give support both the code and the cartridge or bottle number.
On Windows 11, a Windows test page checks whether the computer can print to the printer. Open Settings > Bluetooth & devices > Printers & scanners, choose your Canon and open Printer properties.
On the General tab, select Print Test Page. If it prints but one document won't, check the file and the printer selected in that app. If the printer rejects the cartridge, deal with its error before changing Windows settings.
Contact Canon support if you've fitted the correct new ink as directed and the same code remains. Give them your printer model, cartridge or bottle number and error code. They can check compatibility and suggest the next service step.
The Short Version
Match the ink system and supply number. Let the powered printer position its holder, use the correct latch procedure and finish alignment. Refillable models need their own bottle and ink-counter instructions.
Checked November 5, 2026.

Isaac Smith is the founder and editor of PC Glance, a website that covers computers, laptops, and technology. He is a tech enthusiast and a computer geek who loves to share his insights and help his readers make smart choices when buying tech gadgets or laptops. He is always curious and updated about the latest tech trends.