
A dim or slightly blurred Galaxy S26 Ultra screen can come from Privacy display, especially its Maximum privacy protection setting. Switch the feature off before adjusting colors or assuming the panel needs replacing.
A fixed line, a dark patch or a touchscreen that won't respond needs a different check. These steps help you tell a display setting from a fault that stays visible across apps and needs service.
1. Compare the screen with Privacy display off
Open Settings > Display > Privacy display and turn the feature off. Keep the same screen open and look straight at the phone, then compare it from the angle where you noticed the problem.
Samsung's S26 Ultra Privacy display instructions explain that the feature restricts side viewing. Maximum privacy protection narrows that view further and can dim the picture, slightly blur it or alter its colors.
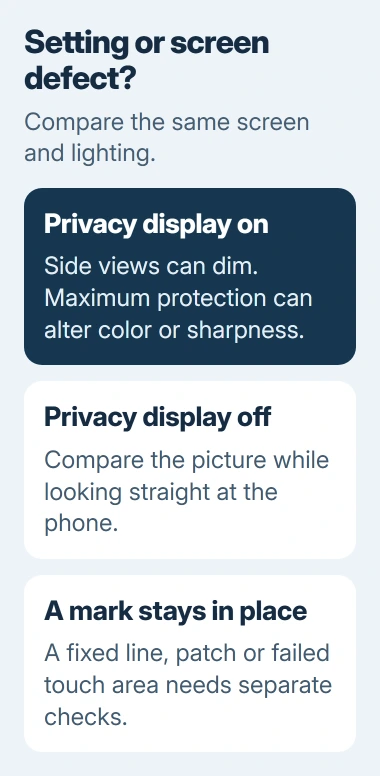
If the picture improves, turn Privacy display back on with Maximum privacy protection disabled. Compare the screen again to see whether the stronger privacy setting caused the change you dislike.
Check Conditions for turning on. Privacy display can turn on for an app, a notification pop-up or when you enter a PIN, pattern or password. If only your banking app looks different, check its condition here.
Look at Apps, PIN, pattern, password and Notification pop-ups in that settings area. Change the condition that matches the problem, keeping your other privacy choices in place.
If the same mark remains with the feature off, continue with the other checks. Privacy display changes viewing angles, but that doesn't explain a patch that stays there when it's off.
2. Check brightness and color controls separately
For a screen that's yellow or warmer than expected, open Settings > Display and temporarily switch Eye comfort shield off. Compare the same white page or Settings screen so a different photo doesn't confuse the result.
For unexpected dimming, check Adaptive brightness in the same Display menu. It changes brightness with surrounding light. Use the Quick panel's brightness slider to compare a comfortable level in the same room.
If you have an added privacy screen protector, check its maker's removal instructions. A second privacy layer can make the screen darker, even when the phone's built-in feature is off.
To adjust the colors to your taste, open Settings > Display > Screen mode. If you're using Vivid, open Advanced settings for White balance and Vividness, if they're available on your layout.
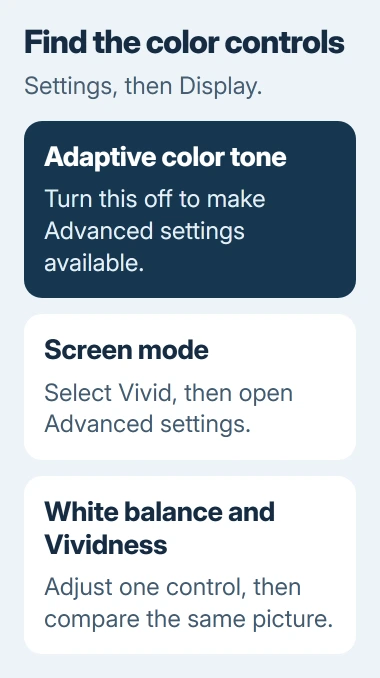
Advanced settings isn't available while Adaptive color tone is enabled. Turn that setting off if you want to adjust white balance manually, then compare the result before changing another control.
I'd make one change at a time here. A warmer color preference, automatic dimming and a permanent display mark are different problems, even when they all make the same photo look wrong.
Color sliders won't fix a line or damaged area. For a mark that stays put as you switch screens, make a note and move to the restart and service checks.
3. Restart and install the available software updates
Hold the Side and Volume Down keys together to open the power menu, then tap Restart. Once your phone restarts, open Settings and check whether the screen still has the same problem.
If the screen is frozen and the menu won't appear, keep both keys held for more than seven seconds until the phone restarts. Release them when it begins restarting, then unlock with your usual screen code.
For a keypad that still won't register taps, use the Samsung PIN input checks. They explain how to enter a known PIN using a USB mouse or keyboard while the display still shows a picture.
Open Settings > Software update and select the available update control: Download and install on many models, Check for updates on some carrier versions. Follow the prompts, then test the same screen after installation finishes.
If only one app looks wrong, open Google Play Store > your profile > Manage apps & device and check its updates. Compare it with Settings before assuming the screen itself is faulty.
An update is a sensible check, but a red tint, a flicker and a damaged pixel can have different causes. They won't all be fixed by the same update.
4. Compare downloaded apps in Safe mode
Try this if the screen problem started after an app change or comes and goes during normal use. Open the power menu, touch and hold Power off, then tap Safe mode when offered.
Downloaded apps don't run during this Safe mode session. Look for the Safe mode label near the bottom of the screen, then compare built-in Settings and the area that was flickering or responding badly.
If the symptom disappears, restart normally. Uninstall an app added or updated around the time the problem began, then compare again before removing another. That keeps a useful app from being blamed for something else.
If the mark or unresponsive area is still there in Safe mode, note that result for support. This check helps you rule out downloaded apps, but it won't tell you which hardware part needs repair.
Restart the phone normally when you're finished. Some wallpaper or theme choices may return to their defaults after this comparison, so review those if the appearance changes afterward.
5. Record the defect and arrange a device check
Open Samsung Members > Support > Phone diagnostics, or Diagnostics from the Discover tab, depending on your app's layout. Run a touchscreen test if offered, or choose Test all and follow its prompts.
The Galaxy diagnostics instructions describe these choices. Save the result and the phone's software version for support, especially if the same area fails every time.
For an intermittent problem, the Galaxy screen-recording controls can help show the action that triggers it. Use another camera for a physical mark that doesn't appear in the recording.
Arrange an inspection if the glass is cracked, the phone has impact damage or a line or patch won't go away. Back up important information while touch still works. More resets and color changes won't repair physical damage.
The Short Version
Compare Privacy display and Maximum privacy protection first. Check brightness and color settings, restart, update and use Safe mode for app-related trouble. A persistent mark or failed touch area needs diagnostics and service.
Checked November 5, 2026.

Isaac Smith is the founder and editor of PC Glance, a website that covers computers, laptops, and technology. He is a tech enthusiast and a computer geek who loves to share his insights and help his readers make smart choices when buying tech gadgets or laptops. He is always curious and updated about the latest tech trends.