
To scan on an Epson printer, open its scanning app, usually Epson Scan 2 or ScanSmart, instead of the Print window. Load your original into the feeder or onto the scanner glass, select that source, then set the output folder.
A printer that prints successfully can still need separate scanner software. On a phone, use the Epson app listed for your model; the steps on your computer won't match those on your phone.
1. Choose the scanner software for your Epson model
Read your printer's label for its exact model. An all-in-one with a scanner lid can scan; a print-only model can't gain that ability through an app.
If your model has a document feeder, it feeds your originals into the scanner. It isn't the tray that holds paper for printing.
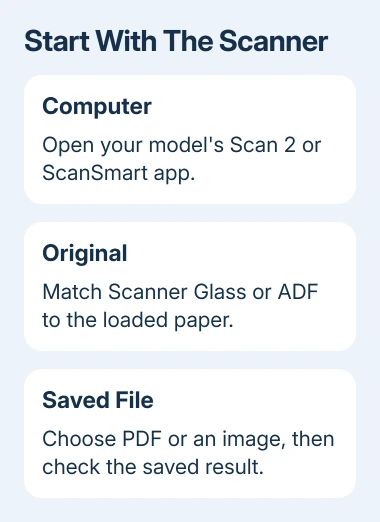
On your computer, open the model's Epson support page and check its operating-system selection. Install the scanner driver and scanning application listed there.
Some models offer Epson Scan 2, some use Epson ScanSmart, and older products can use Epson Scan.
Follow the package offered for your model instead of installing another printer's software to match a screenshot. The Epson computer connection guide covers the model and connection checks if setup isn't finished yet.
For a wireless scan, connect the printer and computer to the same home network. A guest network can prevent them from communicating. USB scanning needs a data connection to the computer as well as power to the printer.
I'd start the first scan from the computer. It lets you choose the file's destination directly, without first setting up the printer's Scan to Computer button.
2. Load the original and select its source
Lift the scanner lid and place a single sheet face down on the glass, aligned with the marked corner. Close the lid gently. Use that glass for a photo, a small receipt or an original that the feeder manual doesn't accept.
Load several loose sheets into the automatic document feeder when your model has one. Follow its printed orientation symbol and adjust the guides to the paper. Remove staples first; don't feed a stapled document into the mechanism.
Open Epson Scan 2 and select your product in the scanner list if necessary. Under Document Source, match the input to your loaded pages: glass or document feeder. Auto Detect is available on some models.
Choosing the feeder while the original sits on the glass can produce an empty-feeder message. For a blank result, check the selected source and which side faces the scanner before changing drivers.
If the feeder supports scanning both sides, select the required Scanning Side option. A feeder doesn't automatically mean two-sided scanning is supported.
When that choice is absent, check the model's manual rather than expecting an update to add it.
3. Preview the page in Epson Scan 2
Select Document Size to match the original, then choose Image Type. Choose color to keep colored marks, or grayscale for a document where those colors don't matter.
Select the resolution for the task rather than choosing the highest number automatically.
Higher resolution creates a larger file and can make scanning slower. For a document going to an upload form, check that form's file-size and format requirements before scanning a whole stack.
Click Preview and inspect the result. The page should show the content you expected, with no edge cut off.
Correct the size, orientation or selected area if the preview is wrong. Rotate changes orientation; Correct Document Skew can help straighten a tilted original.
Epson's Scan 2 procedure includes reinserting the original into the feeder after preview when necessary. Check whether preview has already carried the sheet into the output tray.
A good preview means the app is receiving an image from the scanner you selected. If scanning later fails while saving, check the destination and file settings next instead of reconnecting a scanner that just produced a preview.
4. Save a PDF or picture you can find again
In Epson Scan 2, set Image Format to the format you need. Use PDF for a document you want to read or submit as a document, or an image format offered by the app for a picture. Review Options when the format needs extra settings.
Enter a recognizable File Name, then choose Folder. Use Select if you want another destination. Pick a folder you can open easily, such as a dedicated scans folder inside Documents, before clicking Scan.
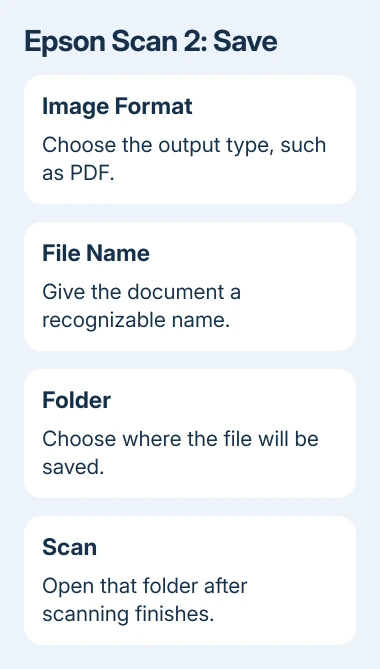
Once scanning ends, browse to that folder and open the saved file. Check every page's orientation and readability. A preview inside the scanning app isn't the file you'll attach to an email.
In ScanSmart, follow the scanning stage with its review and save choices. Confirm page order, remove unwanted blank pages and select the destination. Button names differ from Scan 2, so use ScanSmart's own save screen.
For a multipage PDF, confirm that all pages appear in one saved document. Scanning several pages doesn't by itself guarantee one combined file; use the app's PDF and page-handling options for your model.
Scan to a phone with the supported Epson app
For a compatible model, open Epson Smart Panel on your iPhone or Android phone, select the printer and choose Scan. Place the original in the printer's scanner, adjust the scan settings and start the scan in the app.
Review the result and use the available save or share control. Open the exported document in its destination before sending it. Taking a phone-camera picture of the paper is a different method from using the printer's scanner.
Older models may use Epson iPrint instead. Check the model's supported apps before installing one. On an iPhone, allow local-network access if the app requests it so it can find the printer on your network.
When the scanner won't appear or finish
If the app can't find a wireless printer, check whether the printer actually joined the network. The Epson Wi-Fi report checks explain its password, network and address messages.
Windows also offers Windows Scan for a compatible installed scanner. Microsoft's scanner setup steps explain installation, device selection and the input and output choices.
If neither app detects it, ask Epson support for scanner setup help for your model, operating system and software combination. Give them the connection type, app name and error, and say whether preview works.
With that information, Epson support can tell a scanner connection problem from trouble saving the file.
The Short Version
Install your model's scanning software, match Document Source to the glass or feeder, and inspect Preview. Choose the file format, name and folder before scanning. Open the saved result to check it before uploading or sharing.
Checked November 10, 2026.

Isaac Smith is the founder and editor of PC Glance, a website that covers computers, laptops, and technology. He is a tech enthusiast and a computer geek who loves to share his insights and help his readers make smart choices when buying tech gadgets or laptops. He is always curious and updated about the latest tech trends.