
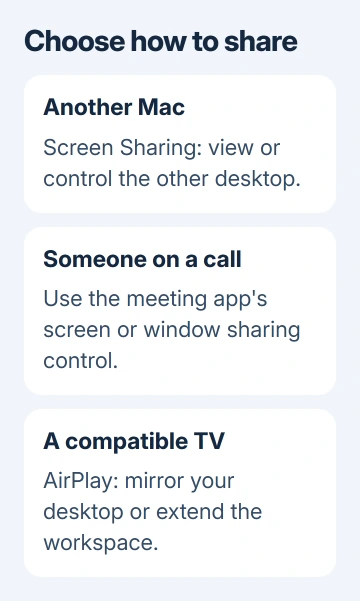
The way to share your Mac desktop depends on what the other person needs to do. Use Screen Sharing to control another Mac on your network. For a call, use a meeting app; for a compatible TV, use AirPlay.
For another Mac on the same network, turn on Screen Sharing on the Mac being viewed, allow the right user, then connect from the other Mac. The viewing Mac doesn't need its own Screen Sharing switch turned on.
Pick viewing, remote control or a second display
A shared desktop can mean showing a presentation, using another computer's pointer and keyboard, or putting your own screen on a bigger display. Each job uses different controls. Choose according to what you want to share.
Use the built-in Screen Sharing app for Mac-to-Mac access. For a call, use that call's screen-share control. For a TV in the room, use Screen Mirroring. Turning on a network service won't automatically start presenting in a meeting.
I'd choose a single app window when presenting private work. Sharing the entire desktop can reveal notifications and any other window you bring forward during the call.
Turn on access on the Mac being viewed
On macOS Ventura 13 and later, open Apple menu > System Settings > General > Sharing on the Mac whose desktop you want to share. Find Screen Sharing, open its information control, and turn it on if needed.
On macOS Monterey 12 and earlier, use Apple menu > System Preferences > Sharing, then select Screen Sharing in the services list. The older preferences look different, but you still change this on the Mac whose screen you want to view.
If Remote Management is enabled, Screen Sharing can't run at the same time. On a personal Mac, decide which service you need. On a work Mac, ask IT before changing a service they may use for support.
Choose Only these users when you want to limit access. Add the account that should be able to connect. Use an allowed account on the destination Mac. Your viewing Mac's login doesn't automatically grant that access.
Apple's Screen Sharing setup instructions explain the available access choices. Start with a named allowed user rather than opening access to every account for convenience.
Leave the Sharing settings open long enough to note the computer's name and any connection address shown. Those details help you select the correct Mac when several computers have similar names.
Connect from the other Mac
Connect both Macs to the same local network. On current macOS, open Screen Sharing through Spotlight. Select Network in its sidebar, point to the destination Mac, and click Connect.
Older macOS versions also offer the Finder route: choose Go > Network, select the destination Mac, then click Share Screen. Use that route if your version lacks the newer Screen Sharing app layout.
When prompted, enter credentials for an allowed account on the destination Mac. If the session asks whether to request permission or sign in, choose the option that matches the access set up on that Mac.
The other desktop opens in a Screen Sharing window. Move the pointer within that window and check whether you can interact with the desktop. Being able to see the screen doesn't always mean you have permission to control it.
For a known local address, Finder's Go > Connect to Server also accepts a vnc:// address. Put the other Mac's actual name or IP address after that prefix. Don't paste an example address and expect it to locate your computer.
These standard local sharing steps apply to Intel Macs and Macs with Apple silicon. Extra sharing modes have their own requirements. Start with an ordinary session rather than assuming every Mac supports the fastest option.
Present the desktop during a call
In FaceTime on current macOS, open the app to present during the call. Use the sharing controls in the menu bar, then choose Share Entire Screen or point to a window and choose Share This Window.
In Teams, Zoom or another meeting app, use the meeting's own share control. Select a screen or window there. The macOS Screen Sharing switch under General isn't the permission those apps use to capture your display.
When an app can't capture the screen, open System Settings > Privacy & Security > Screen & System Audio Recording on current macOS. Some older releases label the permission Screen Recording instead.
Enable the meeting app, or the browser hosting the call. Quit and reopen it if requested, then rejoin and share again. You'll still need to choose the window you want to share in the meeting.
If Chrome already has permission but still presents a blank screen, the Mac Chrome sharing fix covers that narrower fault. Use those steps after checking the meeting's selected source.
Show the desktop on a TV with AirPlay
Put the Mac and an AirPlay-compatible TV or Apple TV on the same network. Open Control Center in the Mac menu bar, choose Screen Mirroring, and select the receiving display. Enter the onscreen AirPlay code if requested.
Follow the display choices to mirror the Mac screen or use the TV as an extended display. Mirroring shows the same desktop; extending creates another workspace, so a window can be on one display without appearing on the other.
If someone in the room can see the wallpaper but not your presentation, check which display holds the presentation window. Move it to the TV's display or change to mirroring if both screens should match.
Use the same Screen Mirroring control to disconnect when finished. If the TV never appears, check that it supports AirPlay and has that feature enabled before changing unrelated Mac sharing services.
Stop sharing and resolve a failed connection
End a meeting presentation with the app's stop-sharing control. Close a Screen Sharing session when remote work is finished, and switch off the destination's Screen Sharing service if you no longer want it available.
For local access that fails, recheck the destination's allowed account and whether both Macs are actually on the same network. Guest Wi-Fi can keep devices apart even while both computers can browse the internet.
If viewing works but opening shared folders doesn't, Mac file-sharing trouble is a separate issue. A visible desktop doesn't mean Finder's file-sharing connection is working too.
Give Apple Support both macOS versions, the connection method and the exact error. Ask IT about local-device or remote-access restrictions if you can't change the switch on a work Mac.
The Short Version
Use Screen Sharing for another Mac, the call's own share button for a meeting, and AirPlay for a compatible TV. Set access on the destination Mac, connect with an allowed account, and end the session when you're done.
Checked November 9, 2026.

Isaac Smith is the founder and editor of PC Glance, a website that covers computers, laptops, and technology. He is a tech enthusiast and a computer geek who loves to share his insights and help his readers make smart choices when buying tech gadgets or laptops. He is always curious and updated about the latest tech trends.